pianotm
Posts
-
rpgmakerweb update on TwiX -
Pianotm's Art ThreadNo AI in any of my art.
Pathfinder/Dungeons & Dragons Characters
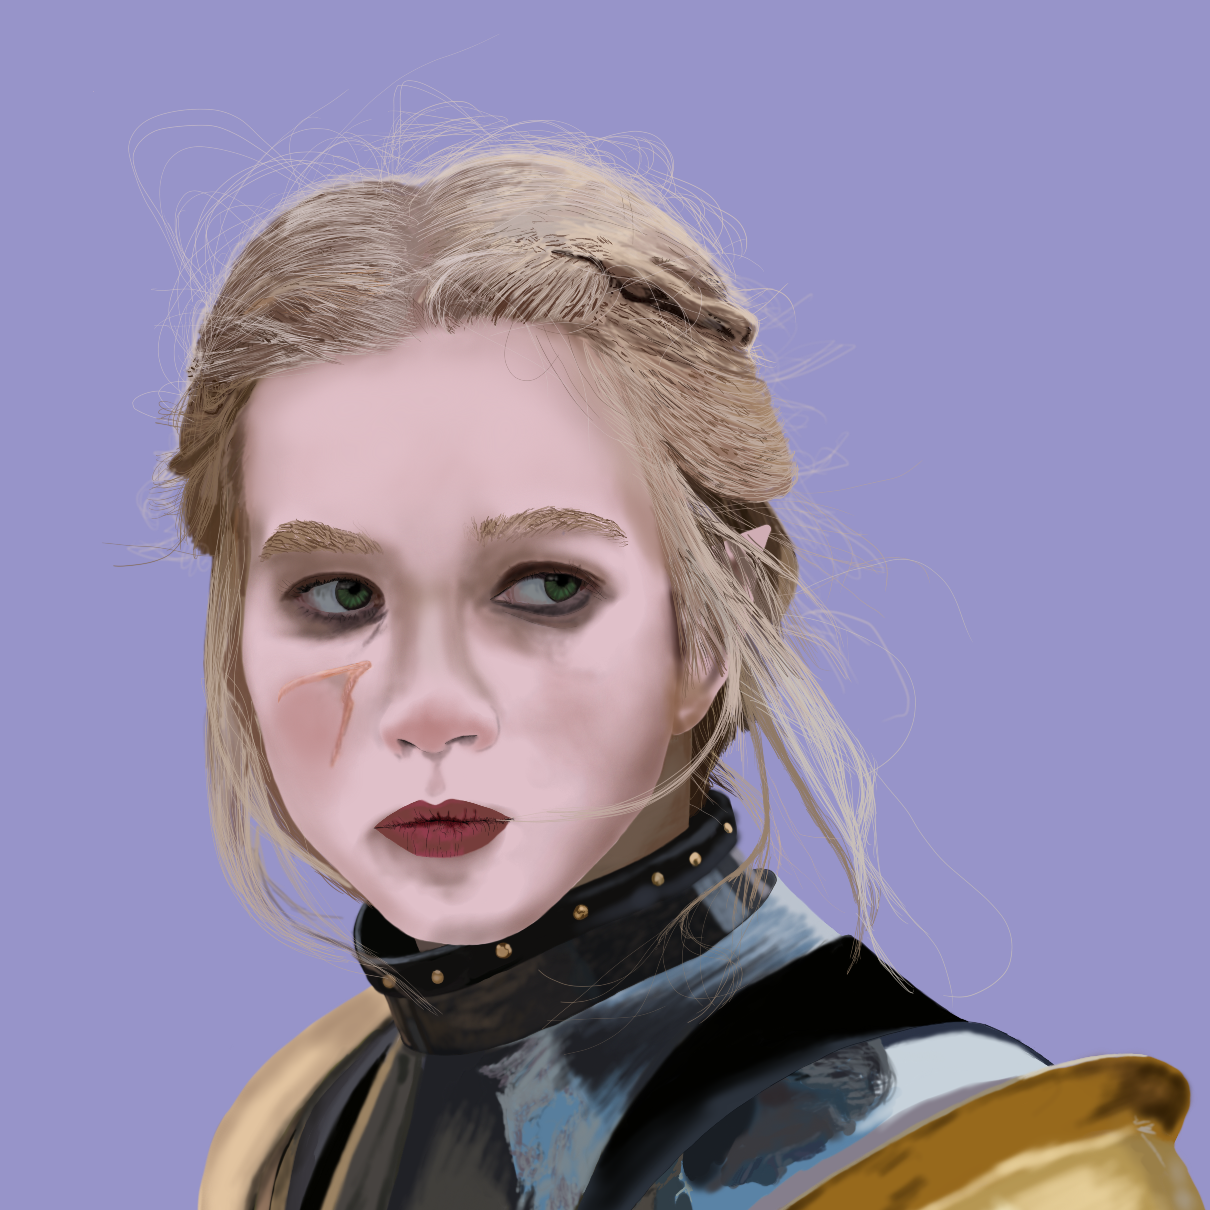
Name: Tasrina "Tez" Patton
Race: Half-Elf
Class: Cavalier
Archetype: Gendarme
Gender: Female
Size: Medium
Alignment: Lawful Good
Current Location: Vorseah
Nation of Birth: Vorseah
World of Origin: Atrusil
Personality: Honest, forthright, somewhat reckless, and a very strong sense of justice.
History: Tez was the squire of my previous character, Ashala, during the Endstaff of Vorseah. This is the only character I've ever played that I didn't technically create. After the campaign, in her backstory, when Ashala trusted her with more involvement in investigations. When going after the cultists that murdered her parents, Tez followed orders well until Ashala gave the order to retreat after their team was divided. Instead, Tez drove into the attackers and got stabbed in the face, prompting a rescue from Ashala. By the time of the campaign I play Tez in, she's a seasoned, level 4 cavalier.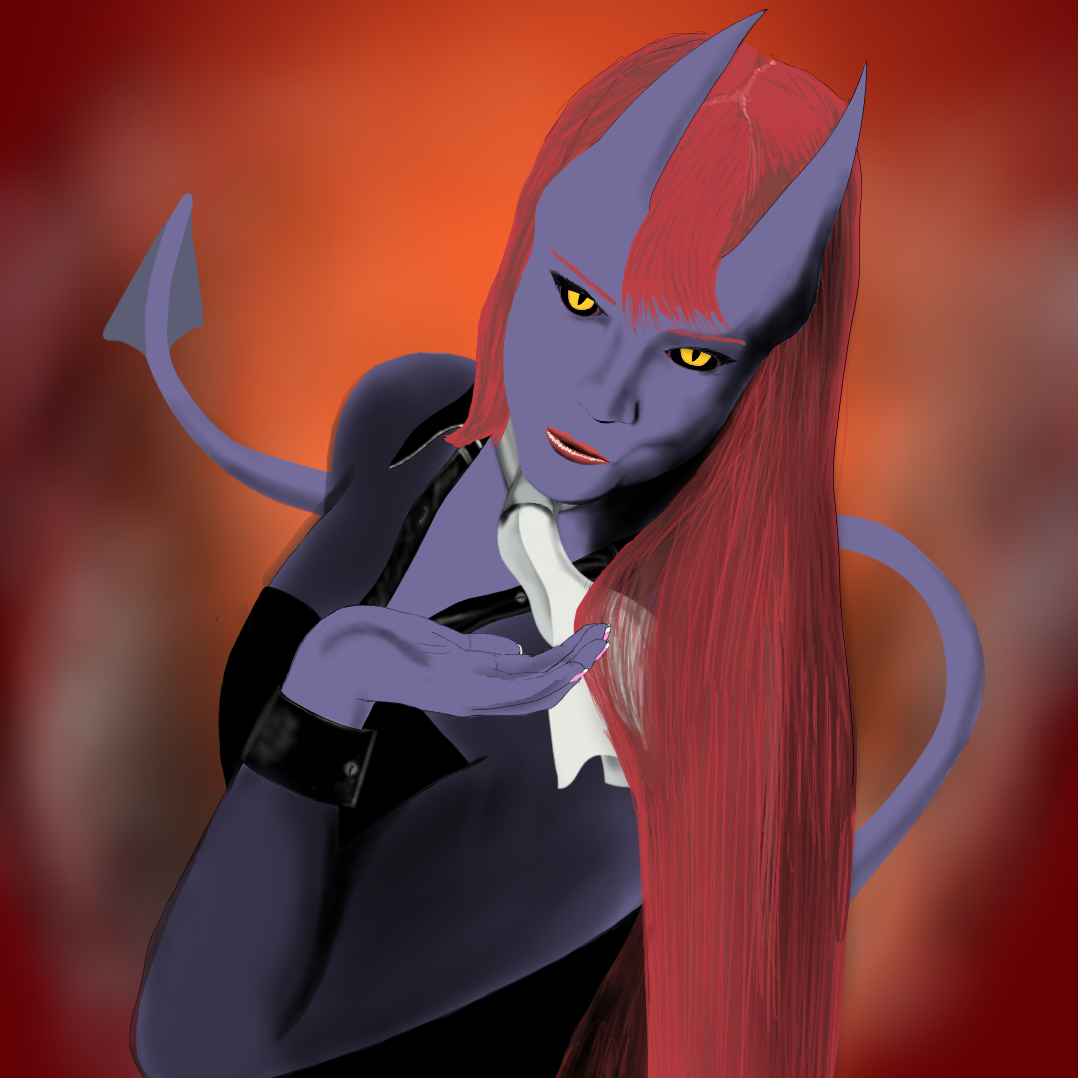
Name: Antoinette Blanchette
Magical Girl Name: The Devil You Don't Know
Race: Human (Transforms into Teifling)
Class: Homebrew (Pretty Soul)
Archetype: Starlight Vanquisher
Gender: Female
Size: Medium
Alignment: Neutral Good
Current Location: Sutekyo, Japan
Nation of Birth: France
World of Origin: Earth
Personality: Empathic, kind, fiesty, eccentric, often waxes poetic.
History: She came to Sutekyo as a foreign exchange student, found her friends attacked by magical enemies, and a mysterious voice asked her if she wanted to save them. She now transforms into a devilish, powerful, and oh-so-stylish teifling that teleports across the battlefield, moving so fast she can literally dodge rain.
Name: Lola Shisuzo
Race: Changling (witchborn)
Class: Alchemist
Archetype: Construct Rider
Gender: Female
Size: Medium
Alignment: Chaotic Neutral
Current Location: Off of the coast of Trestise
Nation of Birth: A segmented portion of the Plane of Axis
World of Origin: Game Master has not yet given a name that I can recall...
Personality: Aloof, quiet/non-talkative (child of a Mute Hag), erratic.
History: Lola's in a currently campaign inspired by Suikoden and One Piece. In this game, the world was abandoned after a disaster where the inhabitants fled to a multitude of extradimensional spaces called Lesser Worlds. Like all changlings, she is unaware of her true nature, and that she is the daughter of a Mute Hag. Although she is not personally mute, she does not like to talk and will often respond to people or try to communicate with people using miming and magic tricks. Her favorite magic tricks are card tricks, although, she also uses dice and pebbles with cups (shell game). She rights a clockwork horse named Vandal.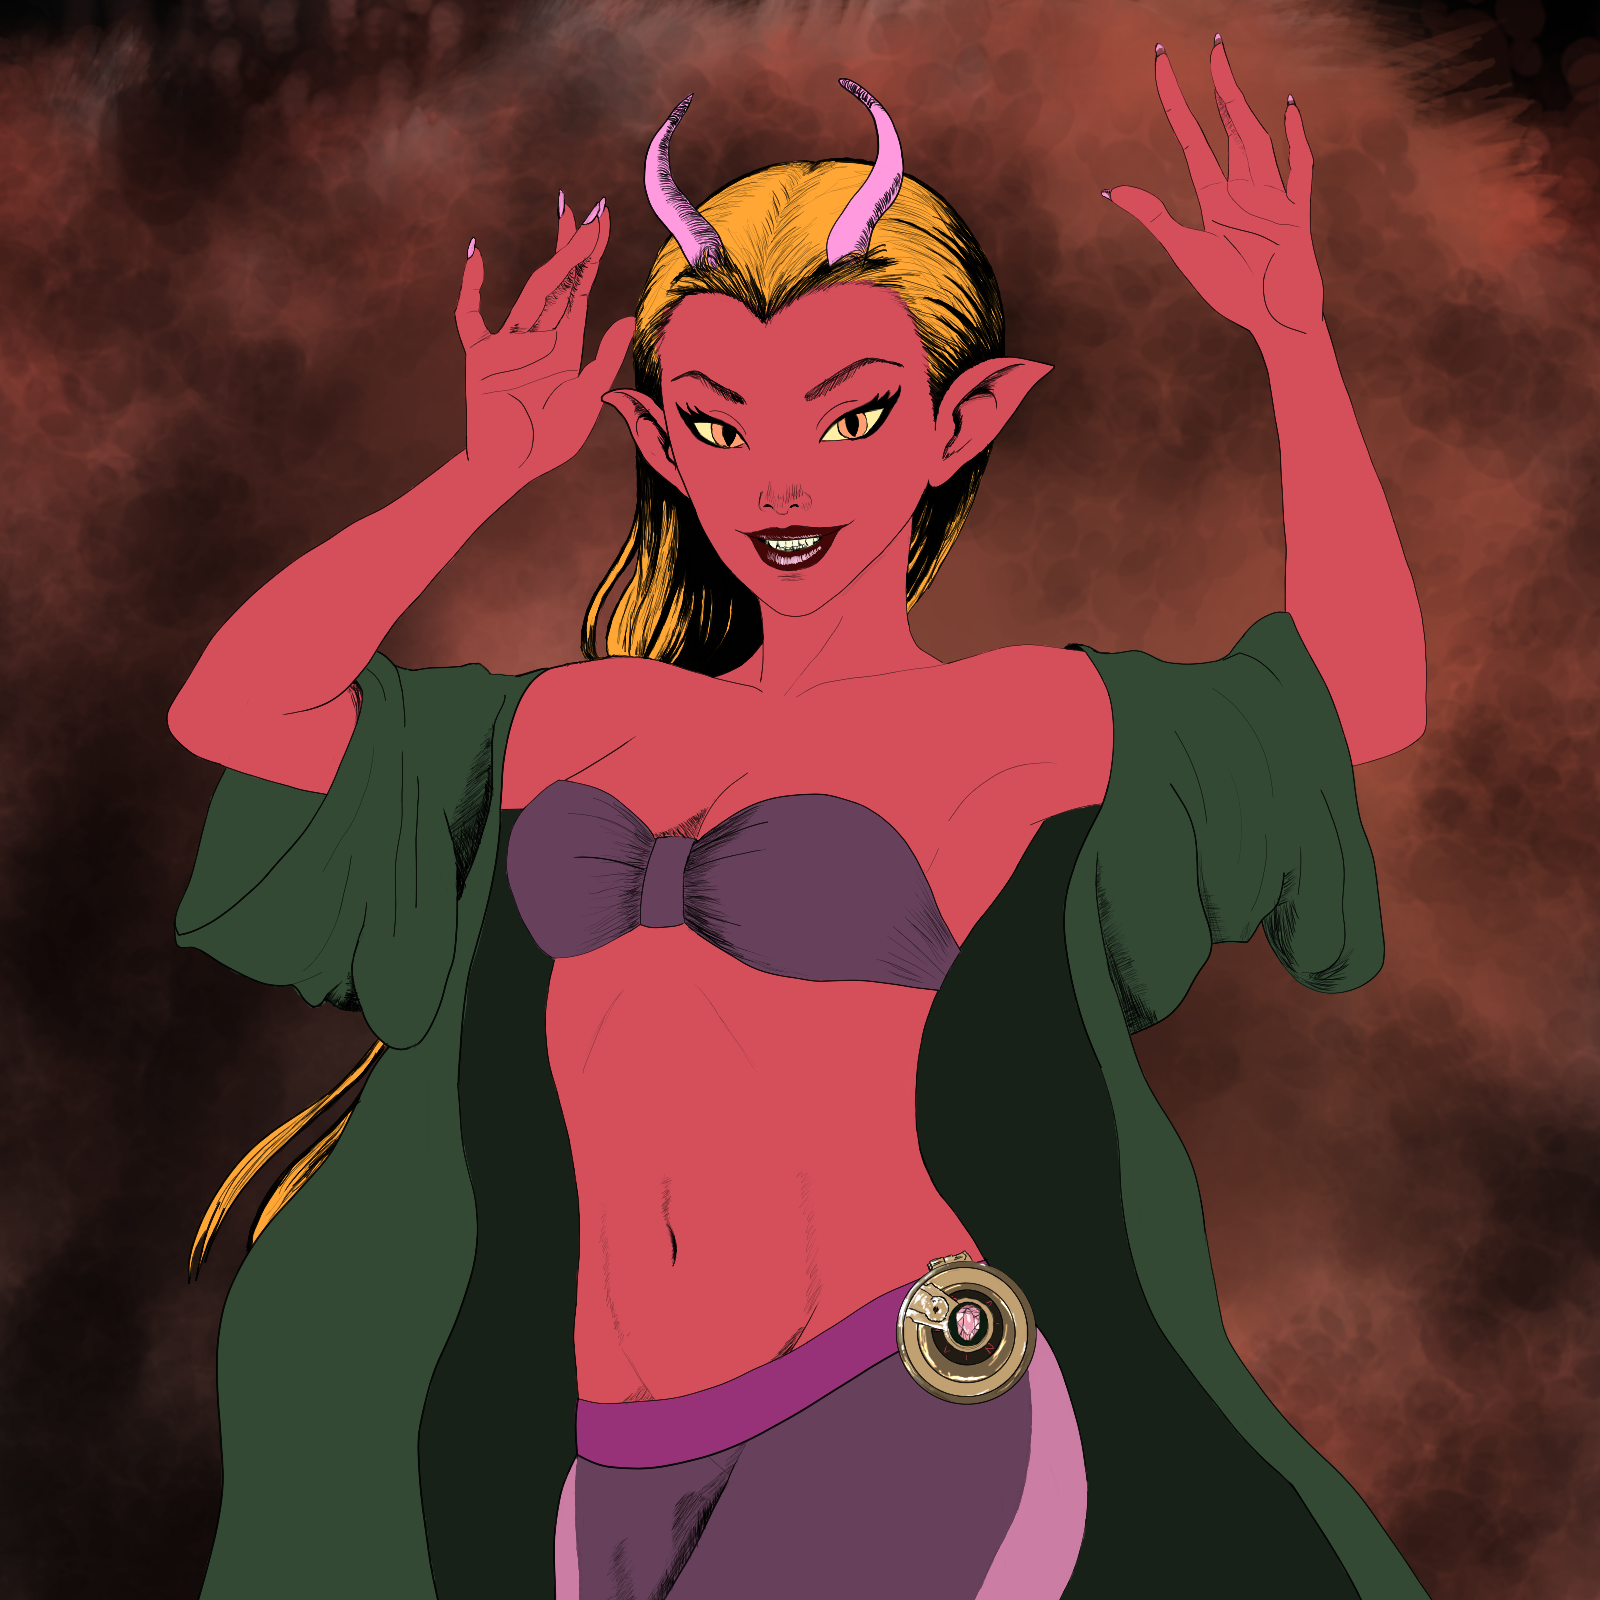
Name: Jiji Flametongue
Race: Ifrit
Class: Sorcerer
Prestige Class: Arcane Savant
Archetype: None
Gender: Female
Size: Medium
Alignment: Chaotic Neutral
Current Location: Unknown
Nation of Birth: Plane of Fire
World of Origin: Plane of Fire
Personality: Egotistical, braggadocios, flirtatious.
History: She's a character in a game inspired by the Tomb of Horrors, where people across the multiverse have joined forces to defeat Acererack once and for all.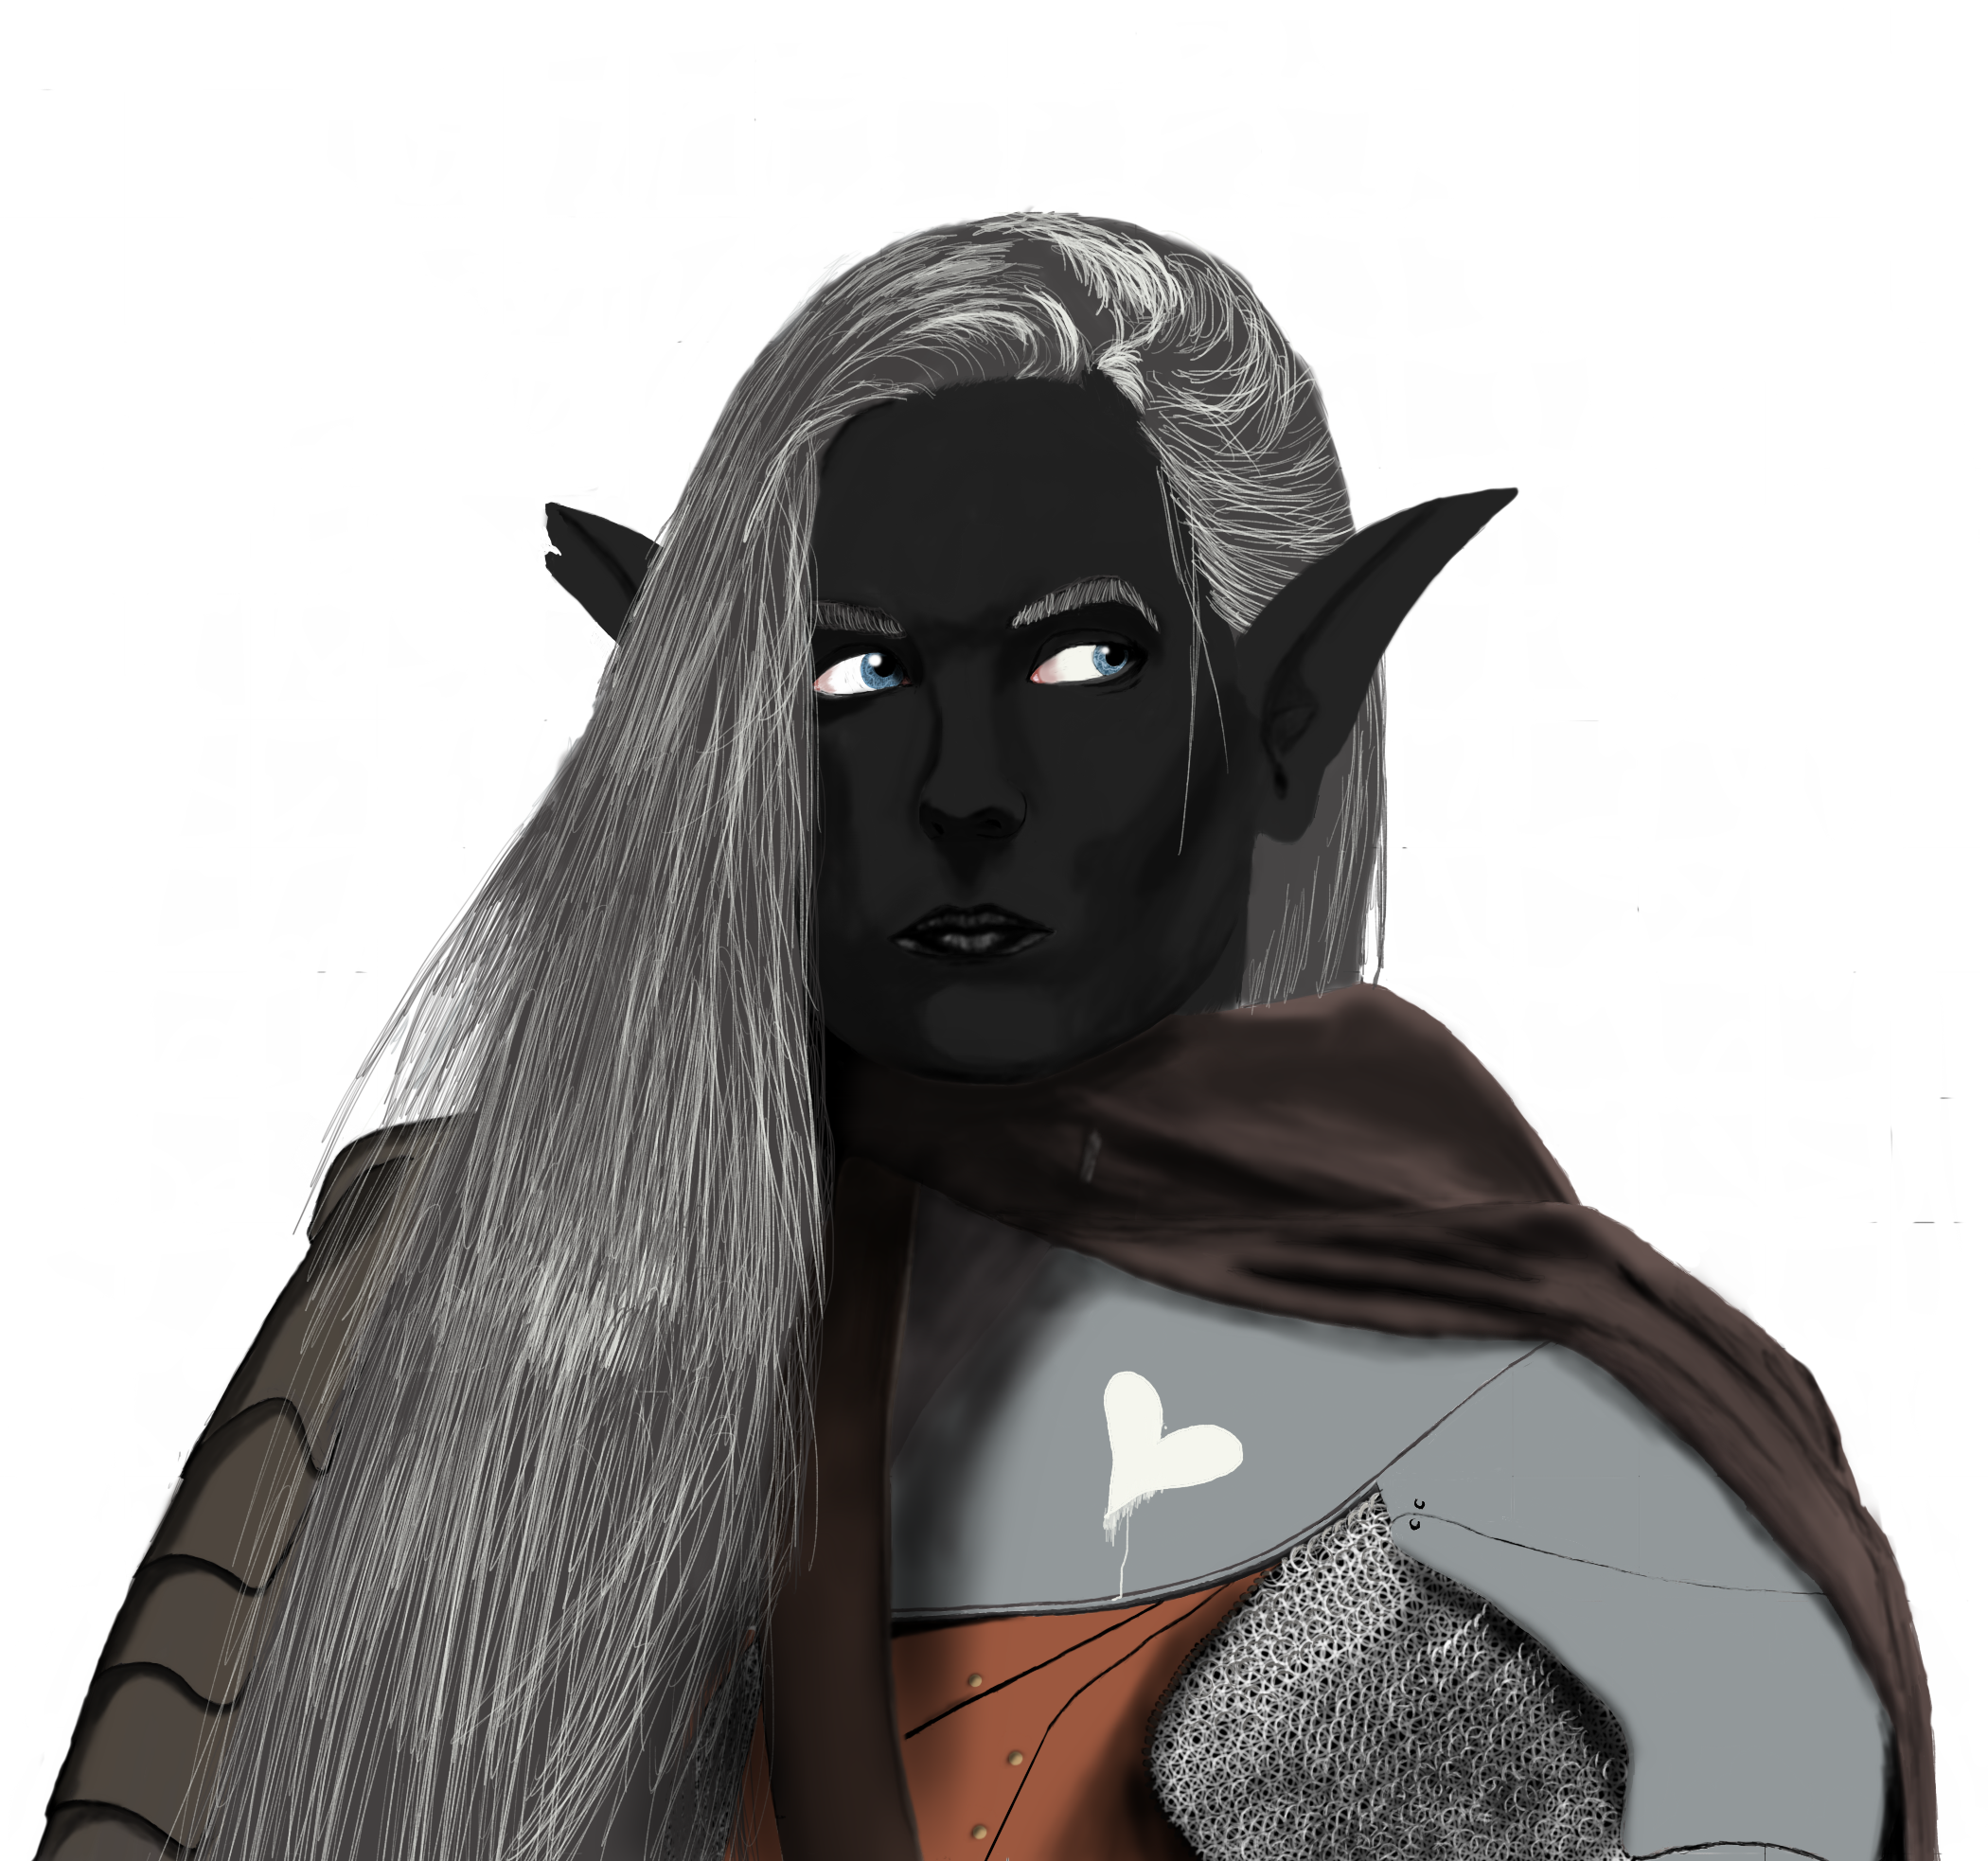
Name: Rilla
Race: Drow
Class: Paladin
Archetype: Oath of Redemption
Gender: Female
Size: Medium
Alignment: Lawful Good
Current Location: Faerun
Nation of Birth: Underdark
World of Origin: Faerun
Personality: Arrogant, overbearing, penitent, loyal, courageous.
History: My first D&D 5E character. I was reluctant to play 5E, considering I was used to Pathfinder, and 2E was the D&D I was most familiar with. Rilla was orphaned as an infant. She wasn't even a year old. Her parents were refugees from the Underdark, and were murdered on sight. Finding the surviving children amongst the bodies and realizing they had killed refugees and not invaders, the paladins took the orphans to be raised by the clergy, the Temple of Rao. Rilla, having no knowledge of the Drow except of how she came to be at the temple, is a Paladin of Rao. Rao is not part of the main D&D pantheon, but I found him in the Players Handbook, so he was allowed, and he best fit Rilla's personality. Rilla avoids killing unless she absolutely has to, believing even the most evil of (living) people can be redeemed. Because of this backstory, I decided to reflect that in her character vital statistics, making her 60 years old, much younger than elves usually start adventuring. This is based on the premise that elves actually reach biological adulthood at 18, but aren't considered mature until 100. Raised by humans, she would not have this same standard.
Name: Honesty-8
Race: Android
Class: Thought Scribe (Psion variant)
Archetype:
Gender: Female
Size: Medium
Alignment: Neutral Good
Current Location: The Plane of Limbo, first officer of a planar ship.
Nation of Birth: Unknown
World of Origin: Golarion
Personality: Androids have the emotionless trait. Honesty-8 is very literal minded. Take Lt. Commander Data's personality and push it to the most absurd conclusion.
History: Her waking history literally starts with the campaigns she's been in, having awakened just weeks prior. She's explored a tomb trying to investigate a cult, and she's been recruited by a Planeship Captain to help fight evil across the multiverse. Somehow, she knows more about the ship than he does. He knows even less about the ship than she thinks he does. Would you believe, she did not start out in a comedy campaign?I was going to stop here with my Pathfinder/D&D characters, but I can't neglect showing off one of my Duskwalkers:
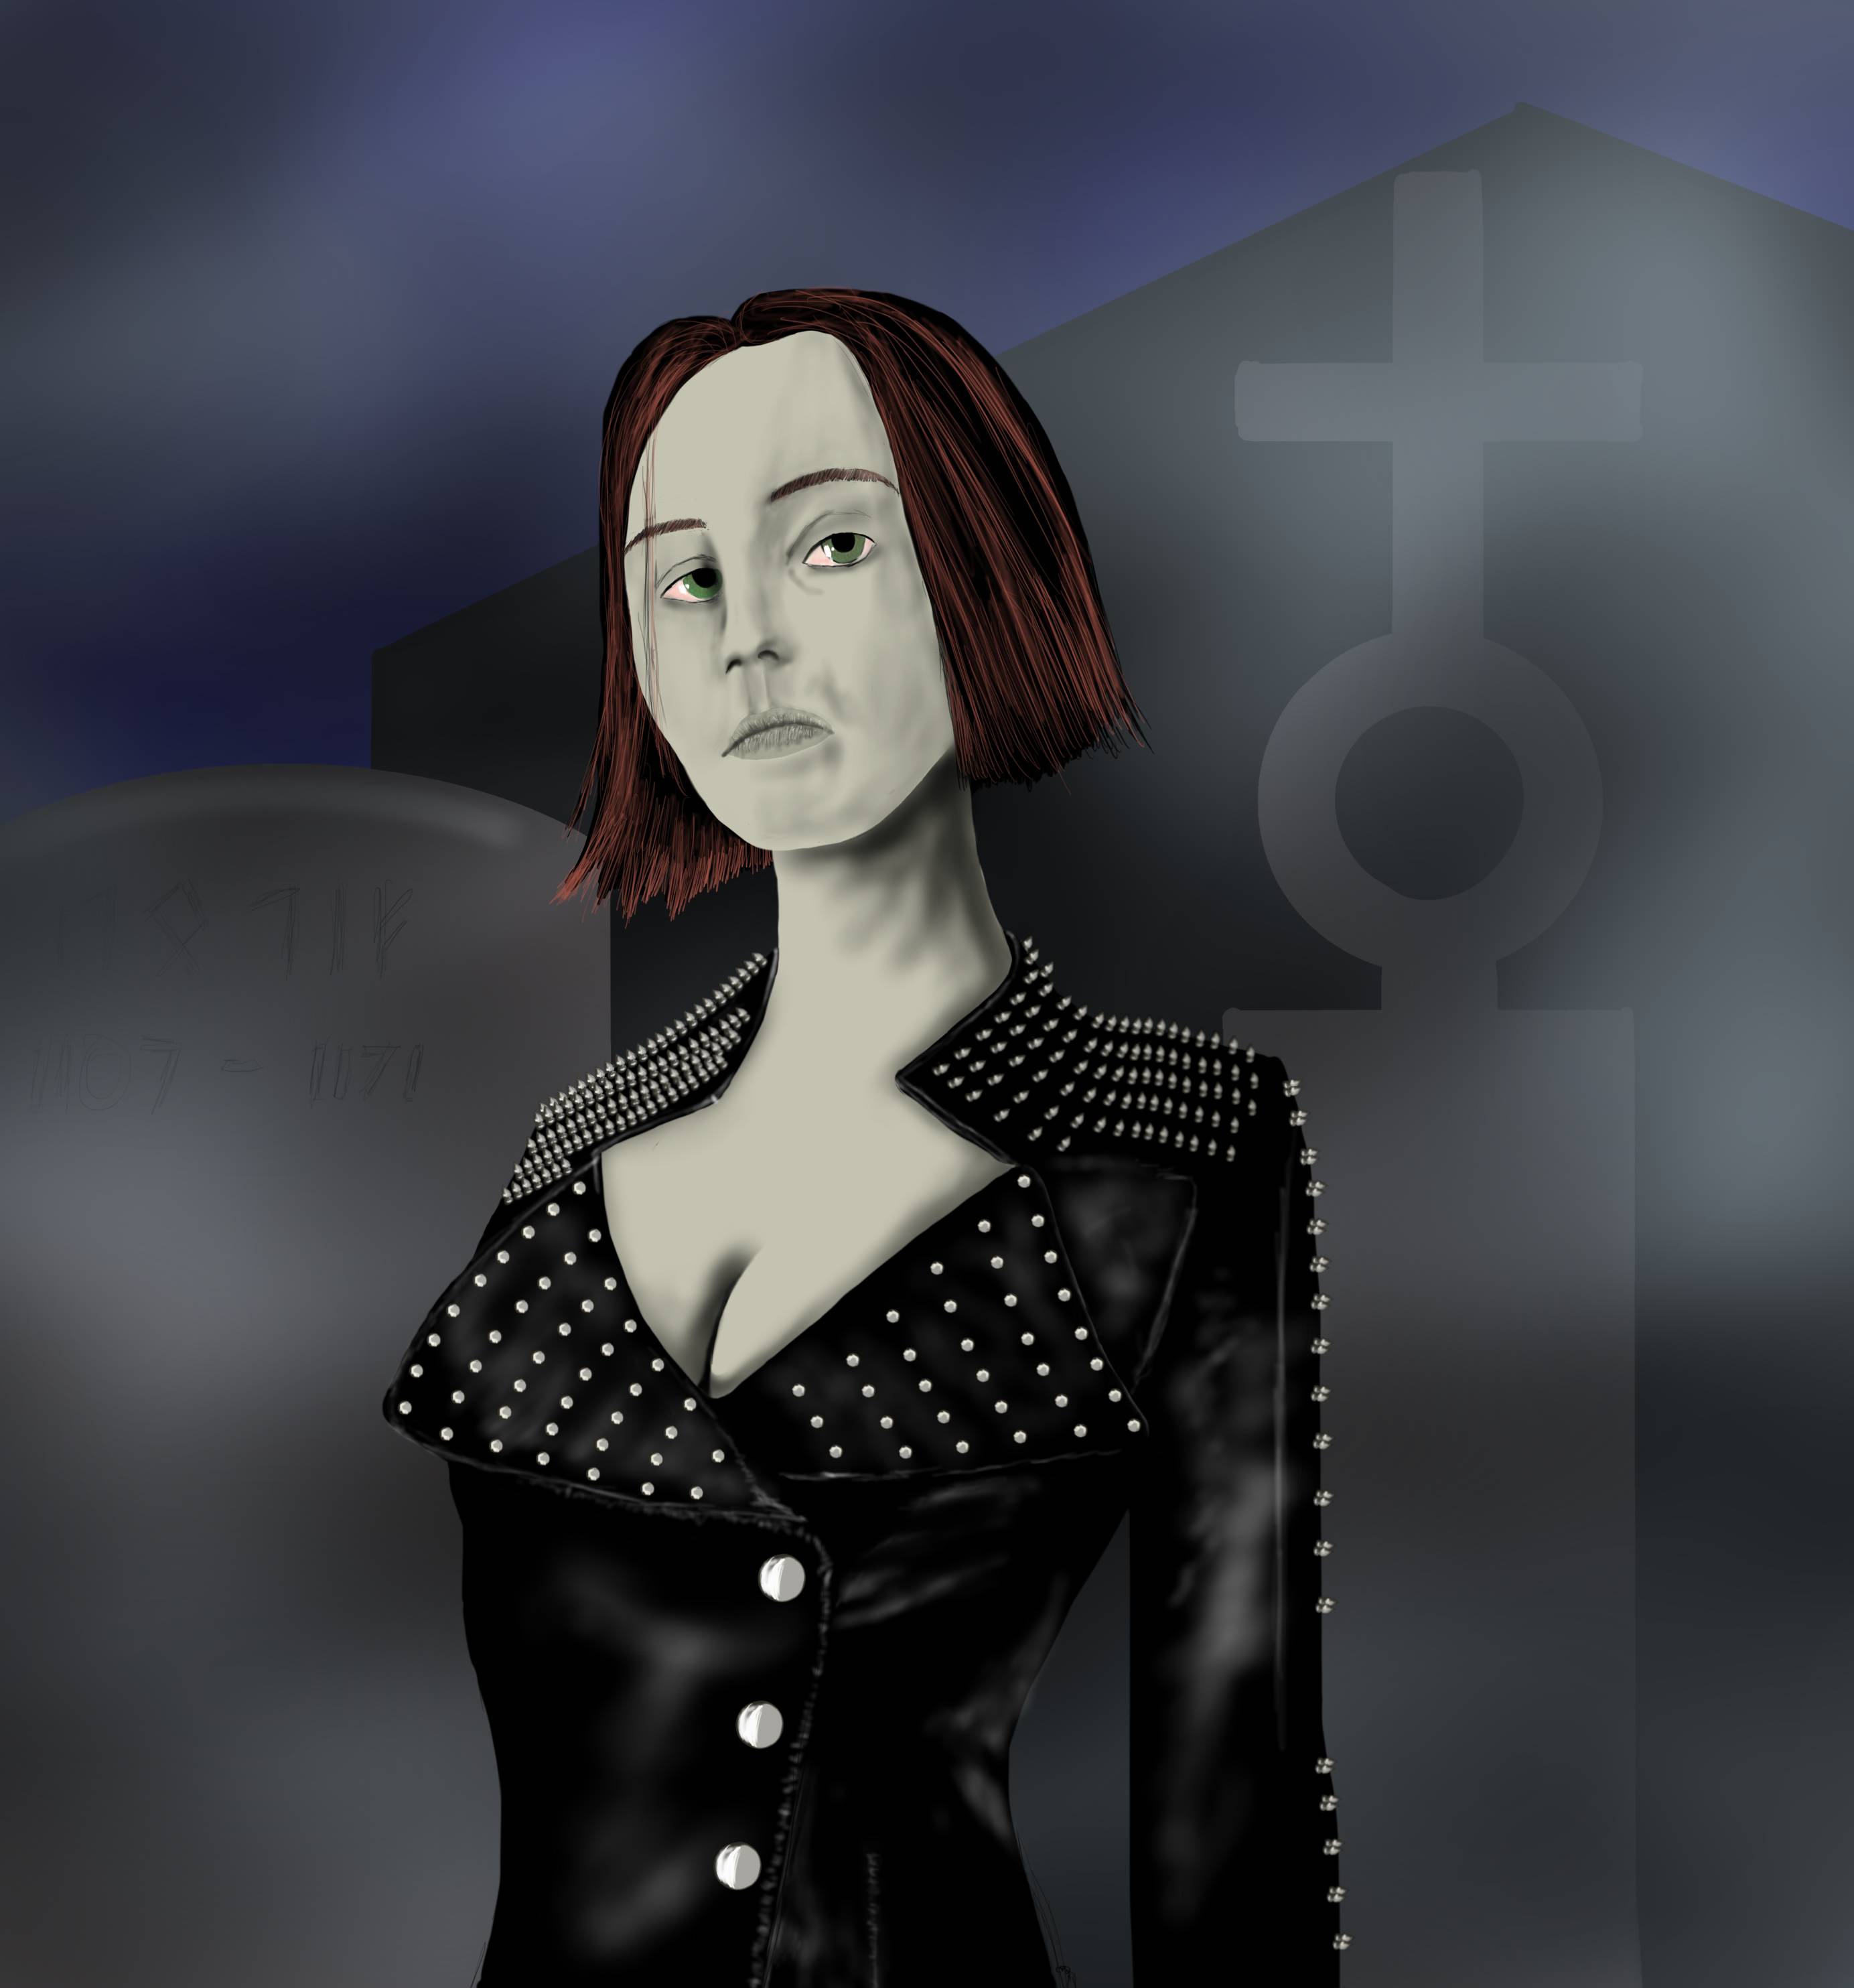
Name: Ephemera
Race: Duskwalker (human)
Class: Rogue
Class: Magus
Prestige Class: Arcane Trickster
Archetype: None
Gender: Female
Size: Medium
Alignment: Neutral Good
Current Location: Golarion
Nation of Birth: Razmiran
World of Origin: Golarion
Personality: Inquisitive, tells morbid and inappropriate jokes, is usually pleasant to speak with. When attacked she continues to make pleasant conversation, but it takes on a more chilling tone.
History: Duskwalkers have died. That is where their history begins. Pharasma, the True Neutral Goddess of Birth and Death, despises the undead, considering them a mockery of death. Her psychopomps resurrect certain individuals that have helped to maintain the balance of life and death. They aren't given a specific task. They are simply allowed to live their lives as they see fit. But Duskwalkers have an unnatural hatred for the undead. They are partially incorporeal and can injure ghosts with mundane attacks. The Duskwalker comes into existence in a holy place of death, usually a cemetery, fully formed at the age of eight. They are usually shunned do to their associations with death, and often grow up stealing to survive. Sometimes, they remember their previous life. Sometimes they don't. Usually they remember bits and pieces. Ephemera, upon reaching adulthood, is a mercenary that routinely seeks employment with adventurers who need a bodyguard. She's particularly keen on jobs that will give her the chance to kill undead.Other Characters
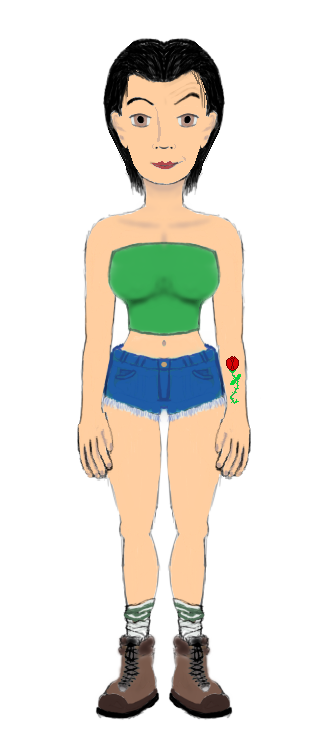
Marla the Martian
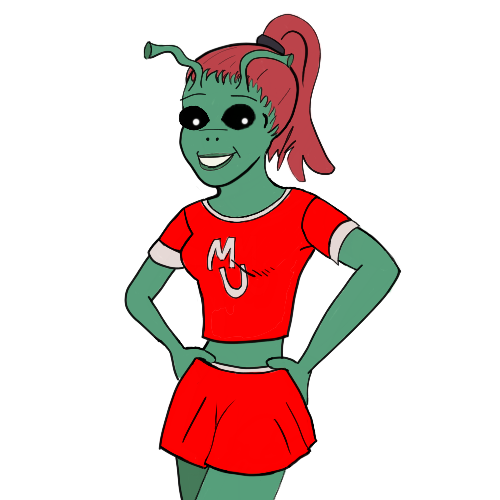
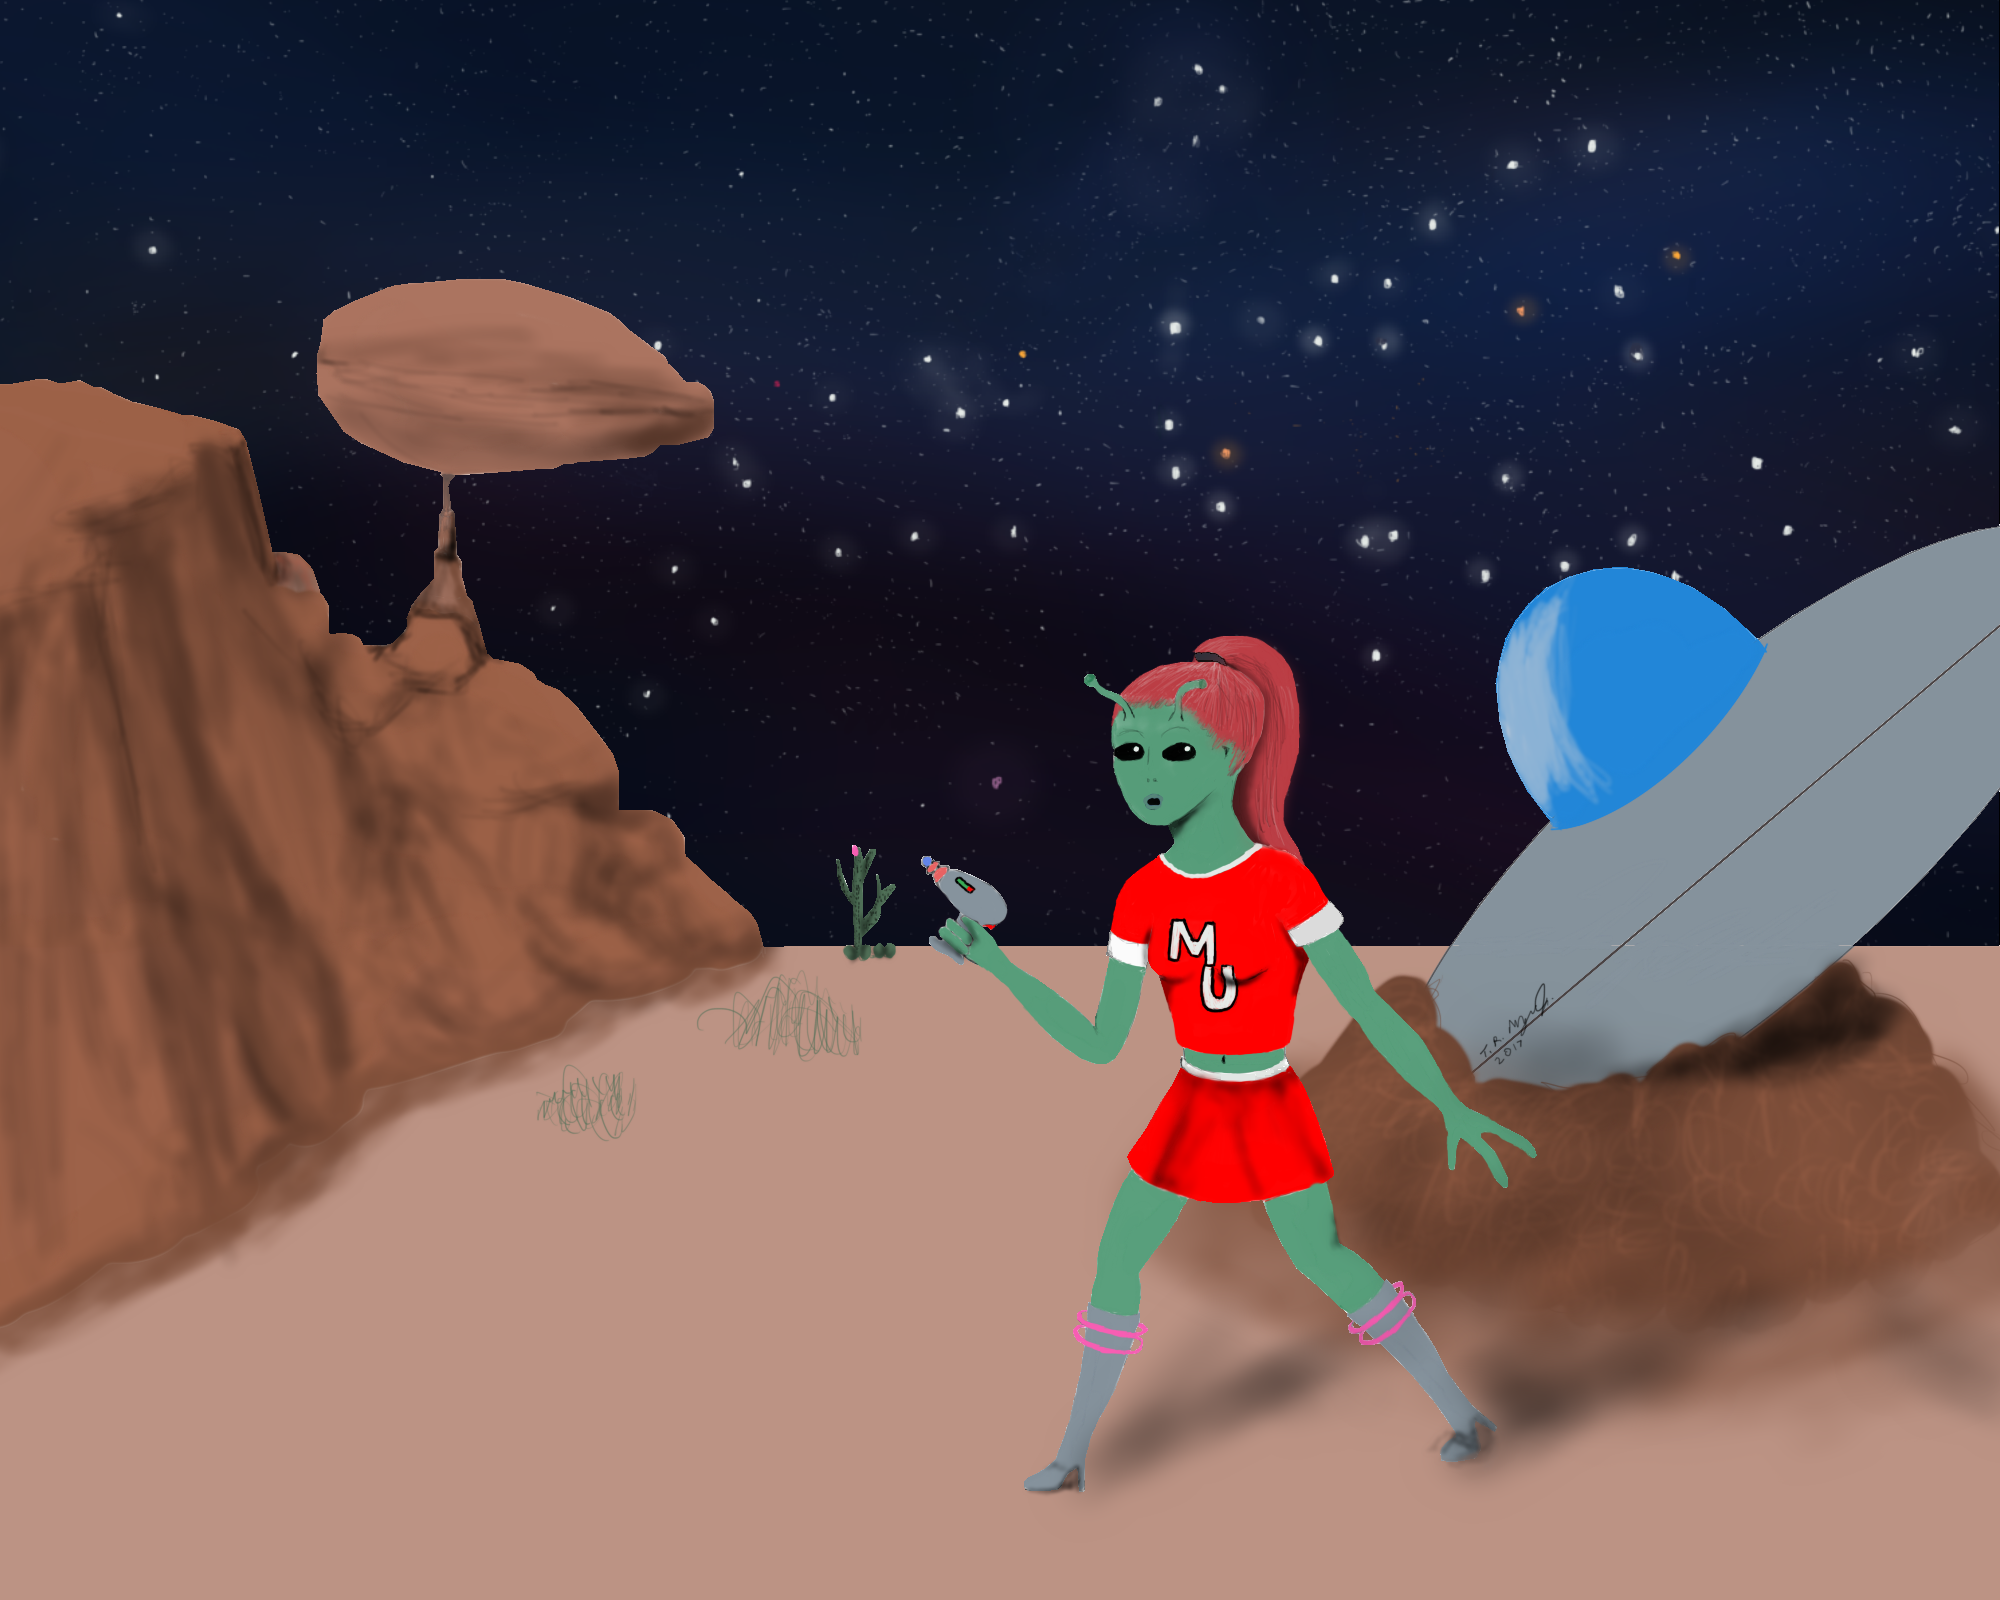
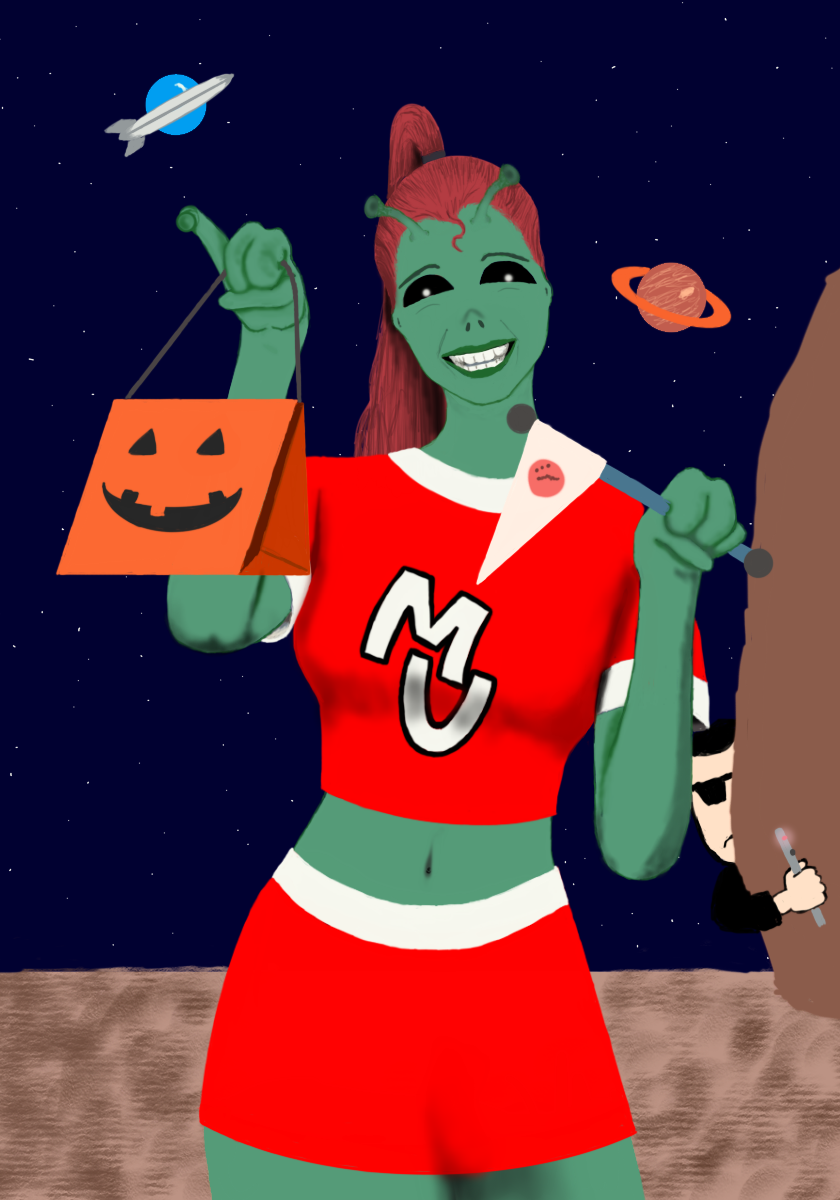
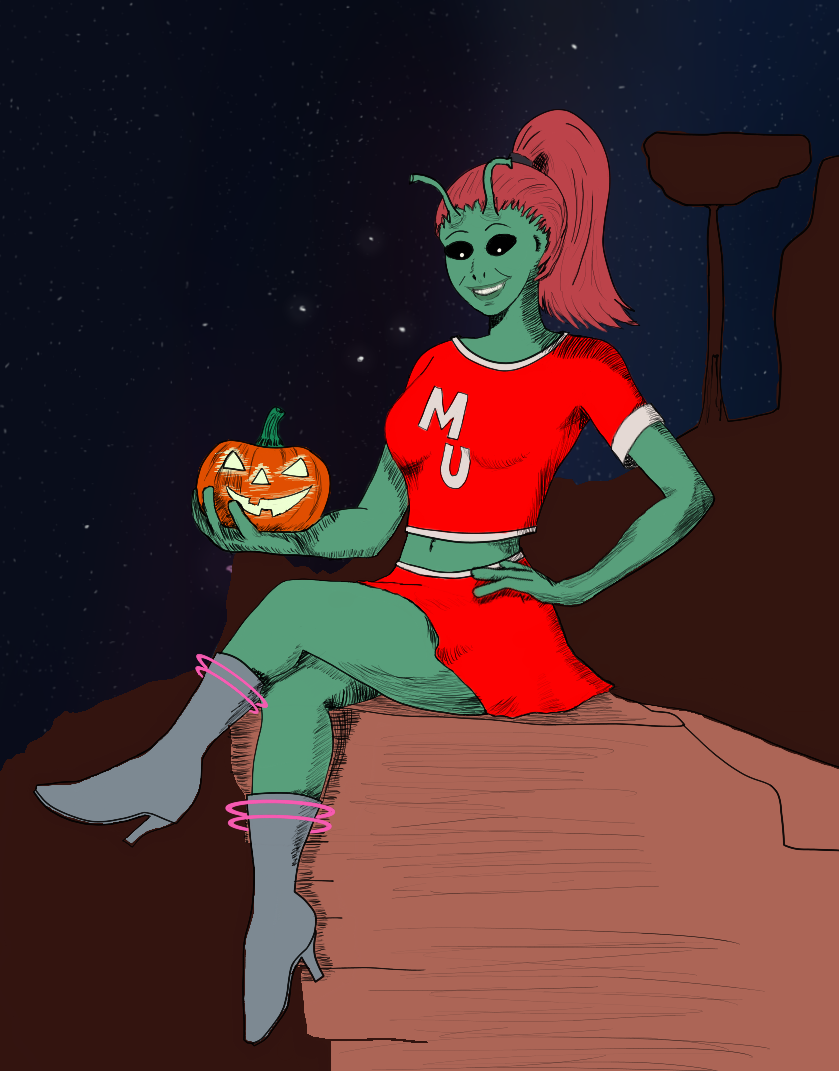
Marla the Martian was created for the first game of Steve Jackson's Toon that I ever played in an RMN forum game run by Dudesoft. My premise for Marla was, "A space alien crash lands in Riverdale and hides out with Sabrina, The Teenage Witch." This is why the first picture I shared shows her in the Archie style.
Zalma Koluchy
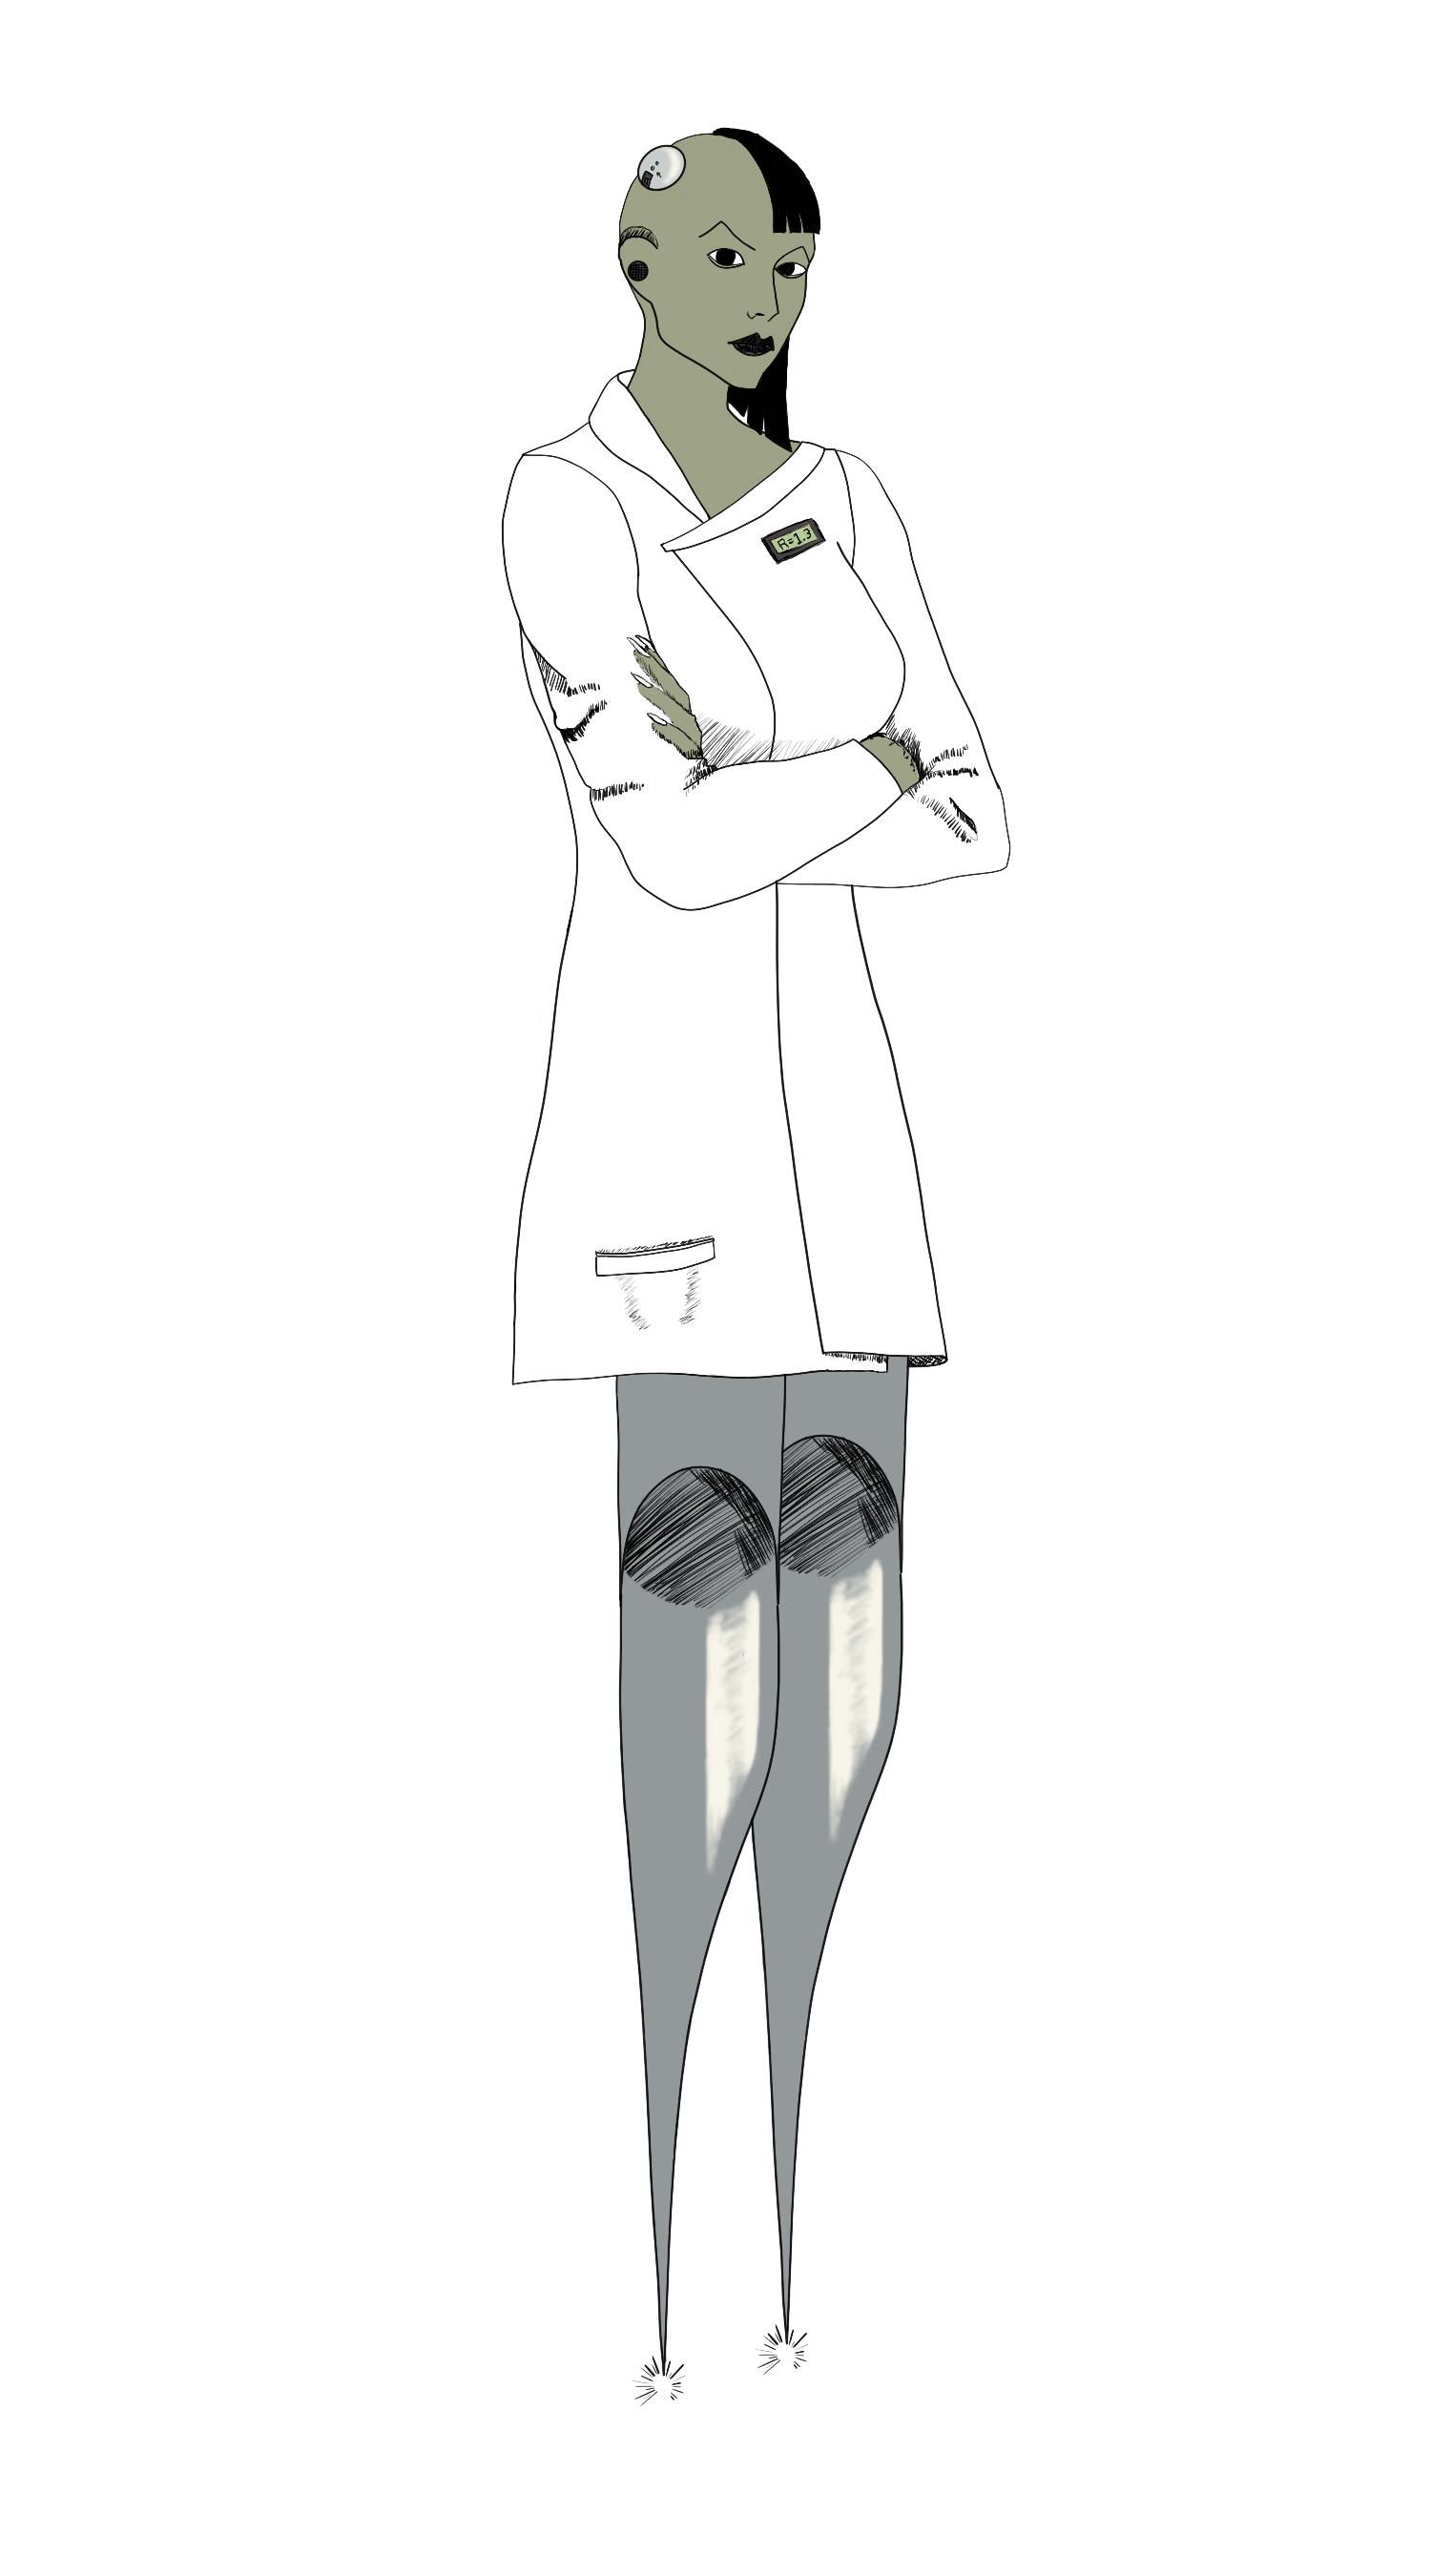
Inspired by another of Dudesoft's forum games, Zalma was created for the Galaxy Police. Obsessed with immortality, she's basically converted herself into a machine. How does this cybernetic mad scientist choose to apply her skills? By working as a forensic's expert! Mad != evil! She's just a little (a lot) kooky!
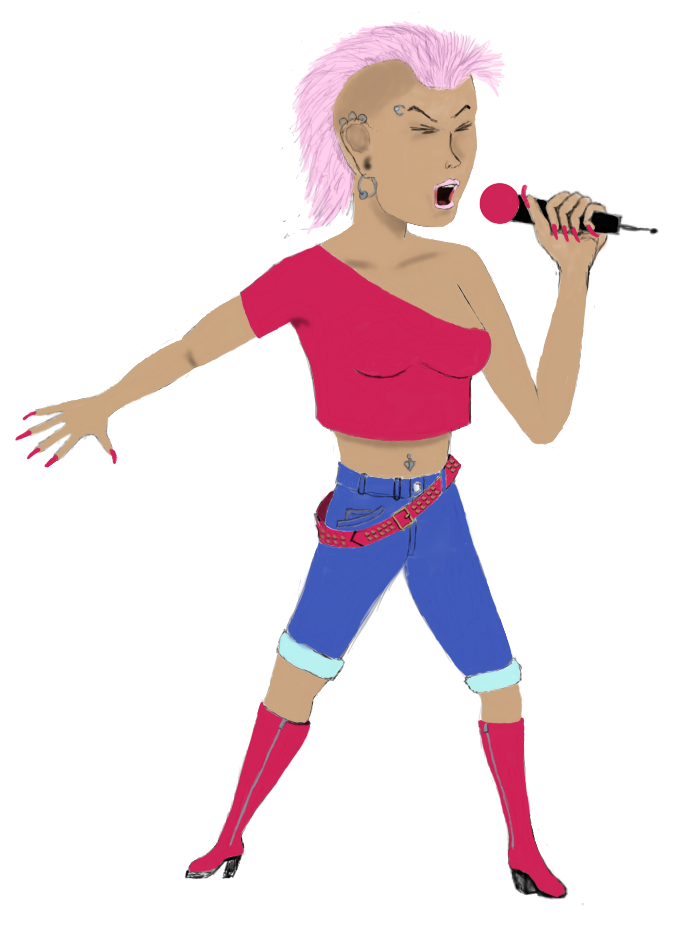
Midori

Did you think I was done with Martians? Nope! Midori was made for a game of Troika! run by Hexatona! She's basically a more serious version of Marla, except she's a pop star, and her backstory is ripped off from Interstella 555. I did not realize at the time I created her that Troika!'s ultra-nihilist style was even zanier than Toon. I simply thought it was a game of light-hearted characters in a grimdark setting. Which...I guess it kind of is. But it's grimdark with Looney Tunes logic. Also, Midori is not the only pop star I've made and given a Japanese name that was just the word for a specific color. Obviously, midori means green, an obvious play on P!nk. Speaking of P!nk...
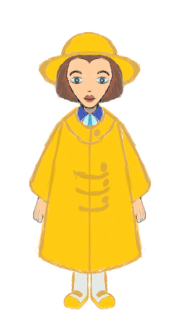
Momoiro
I made Momoiro, whose name means "Pink", for RMN's first Gay Mak Jam.
The protagonists for that game were...
Sunny
and...
Jade
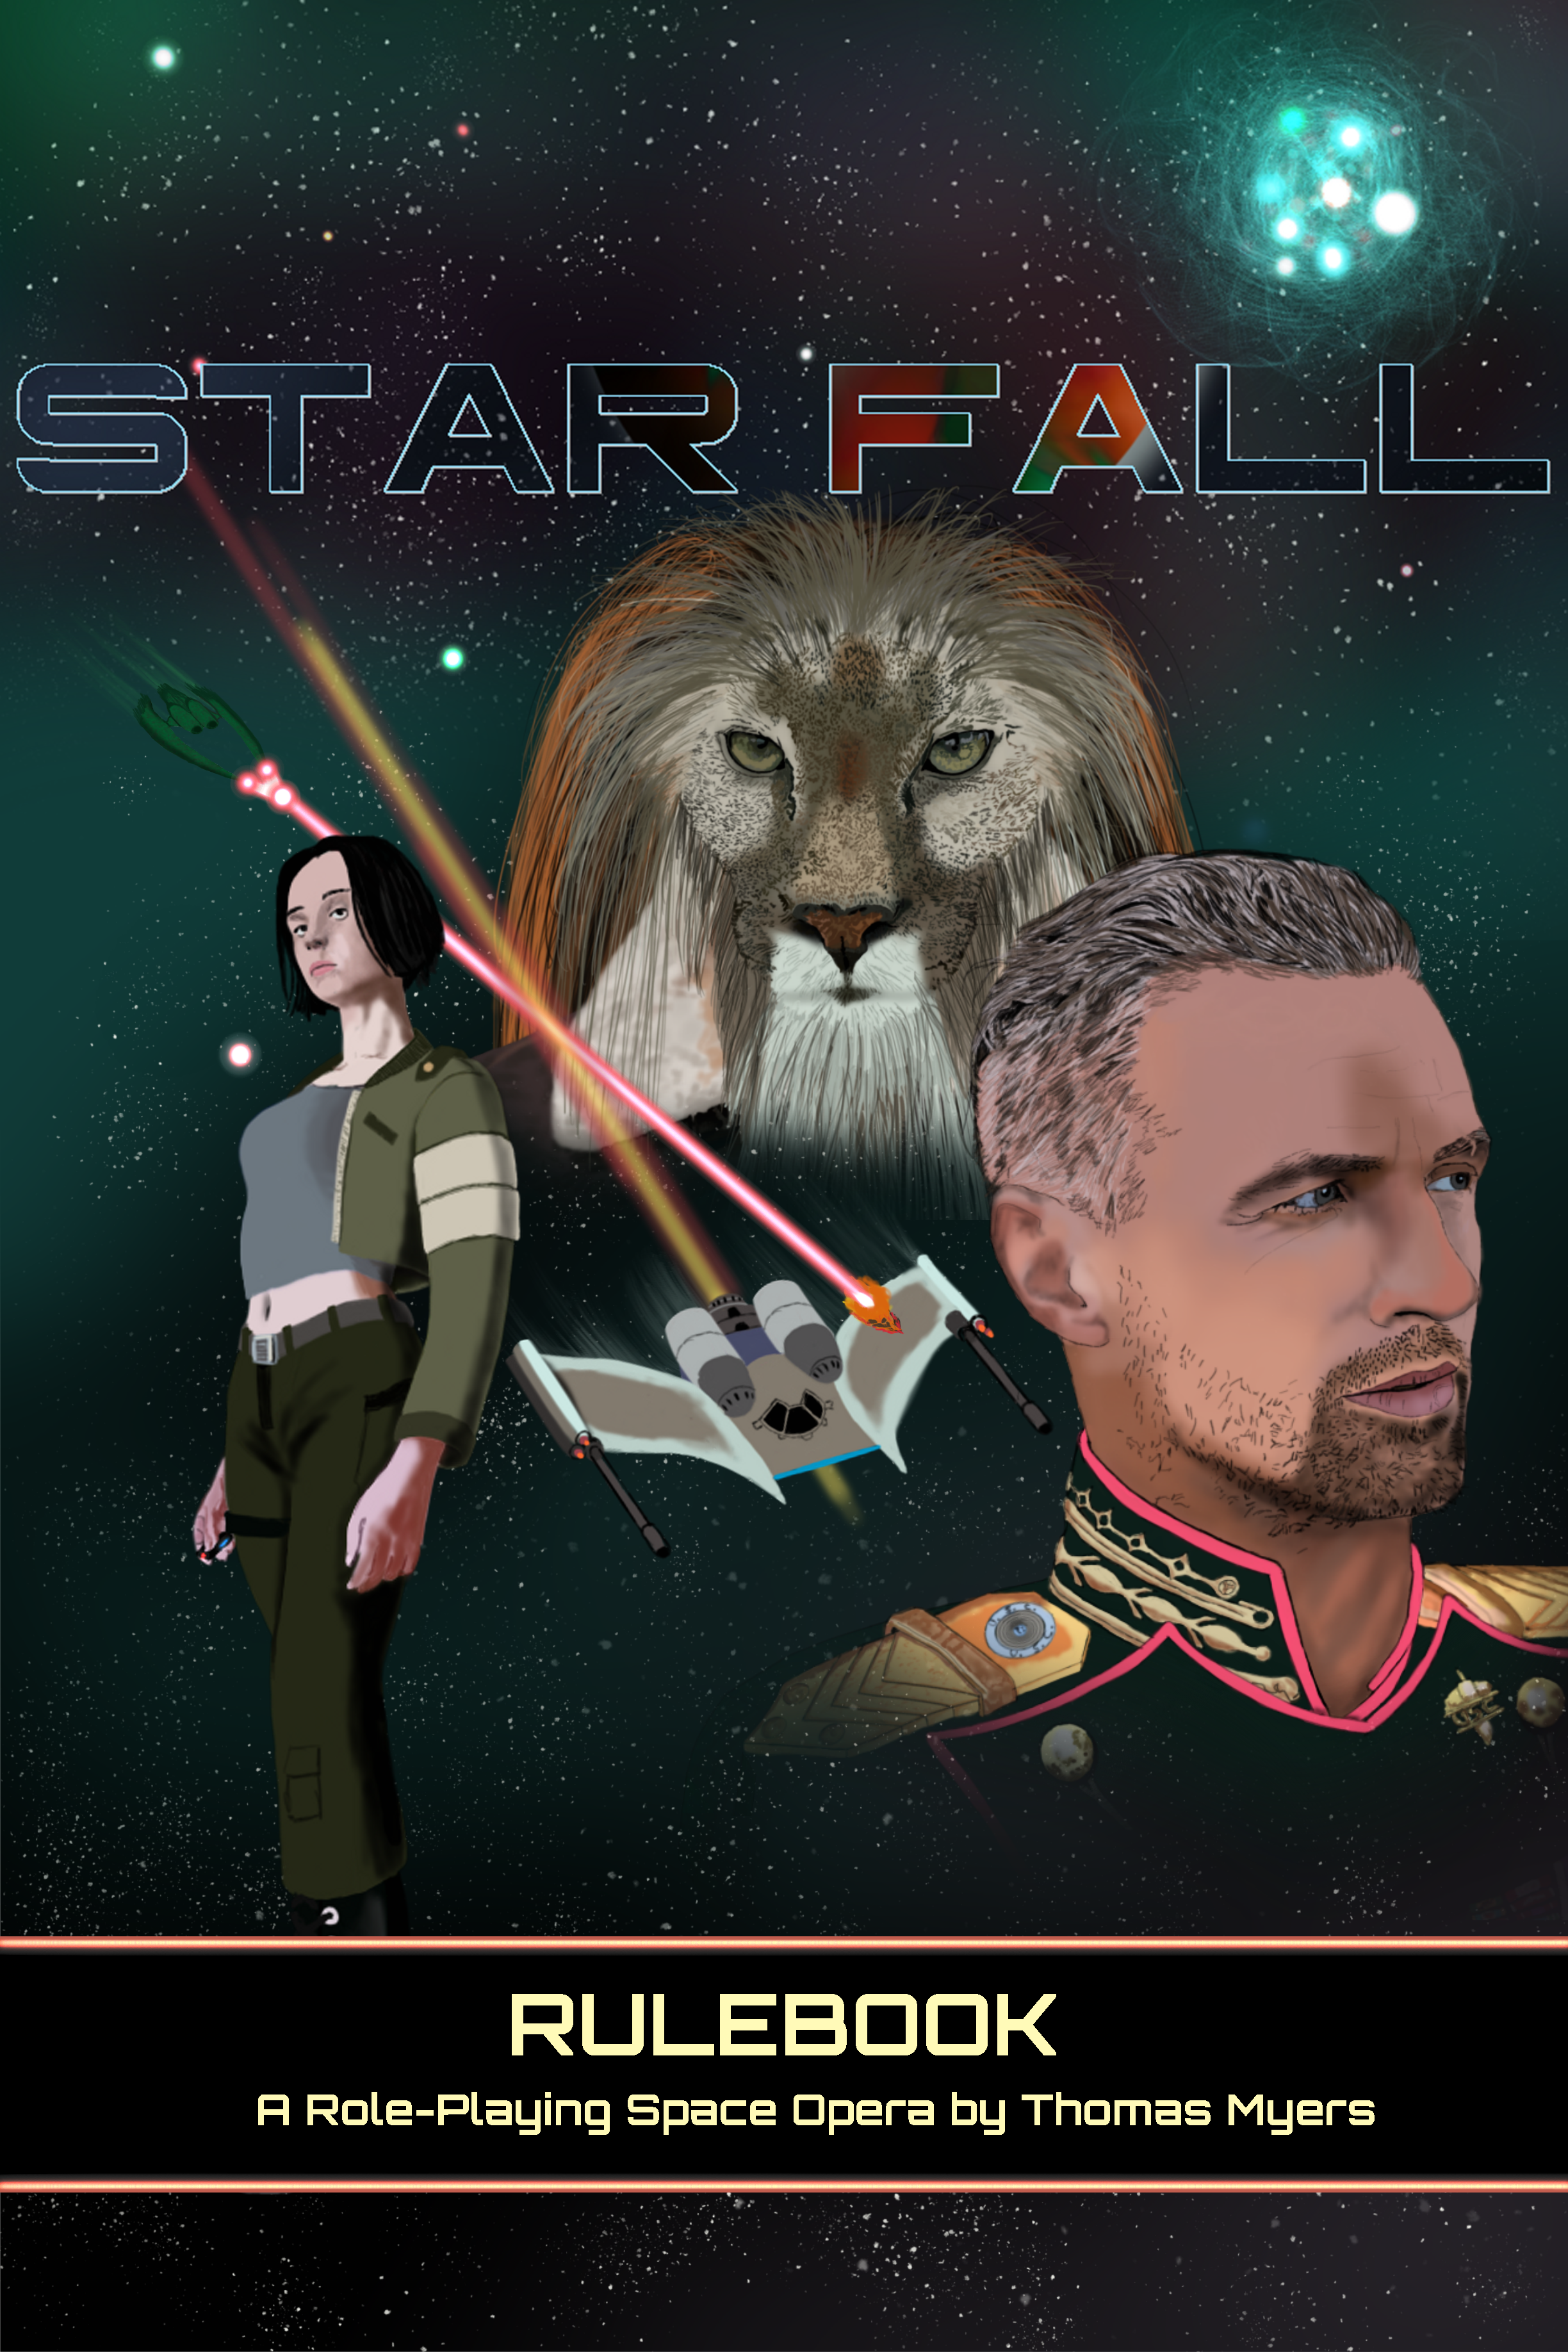
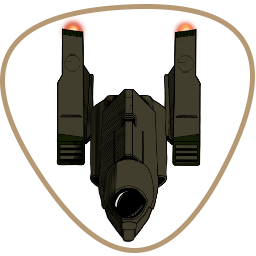
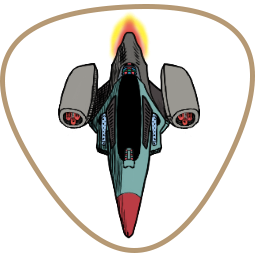
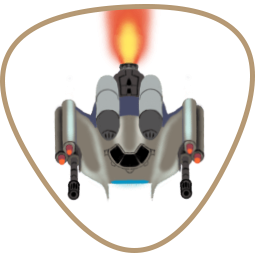
Star Fall
Star Fall is a table top RPG I am developing inspired by games like Wing Commander, Privateer, and Space Rogue.
Cover
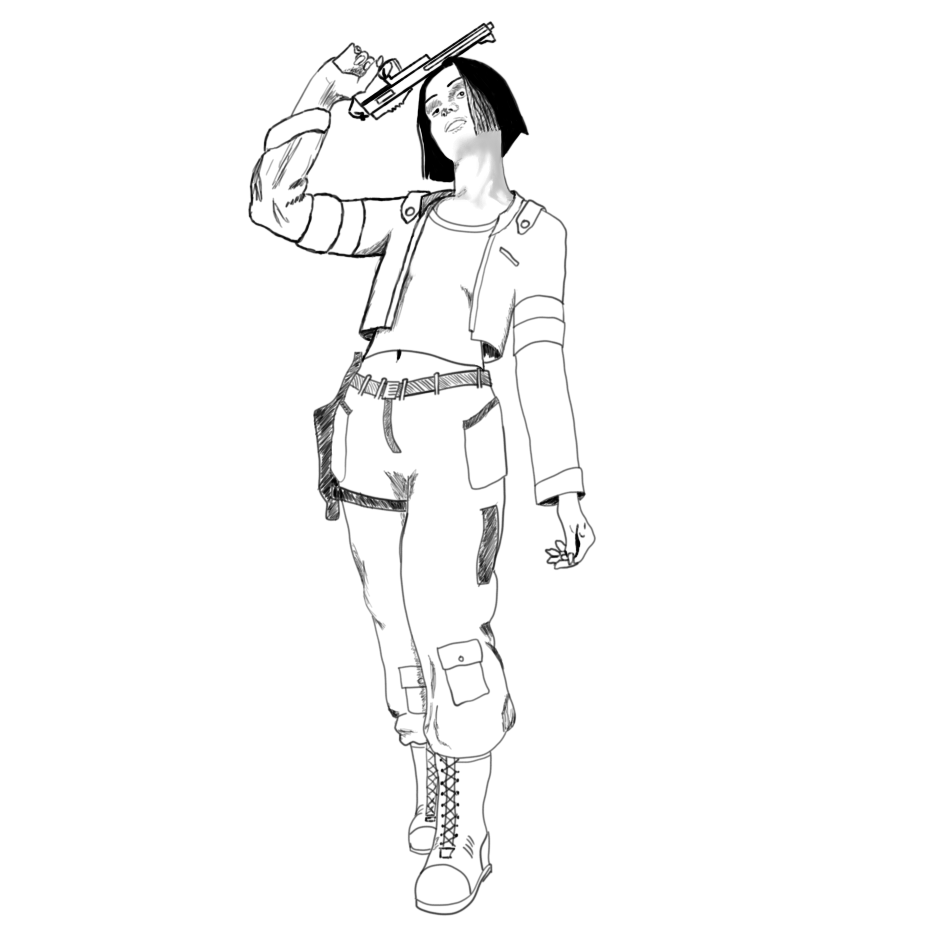
Human
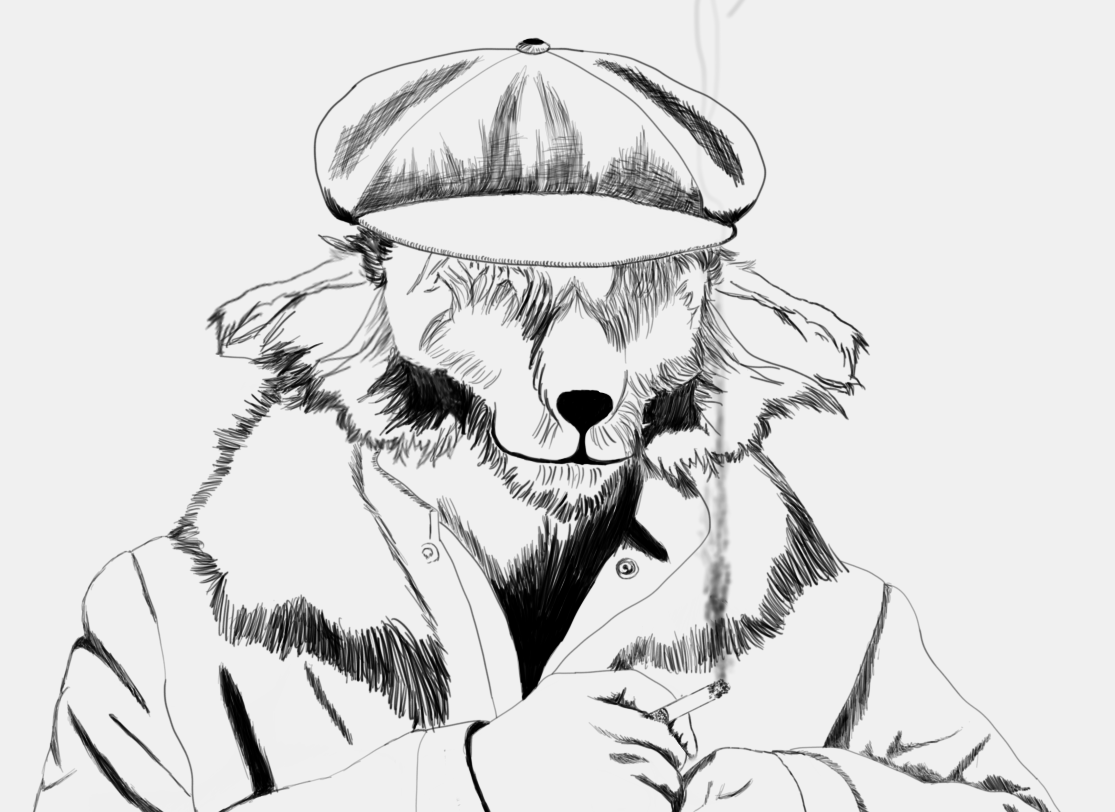
Glimmock
Ships
Gauntlet
Javelin
Interceptor
OSR
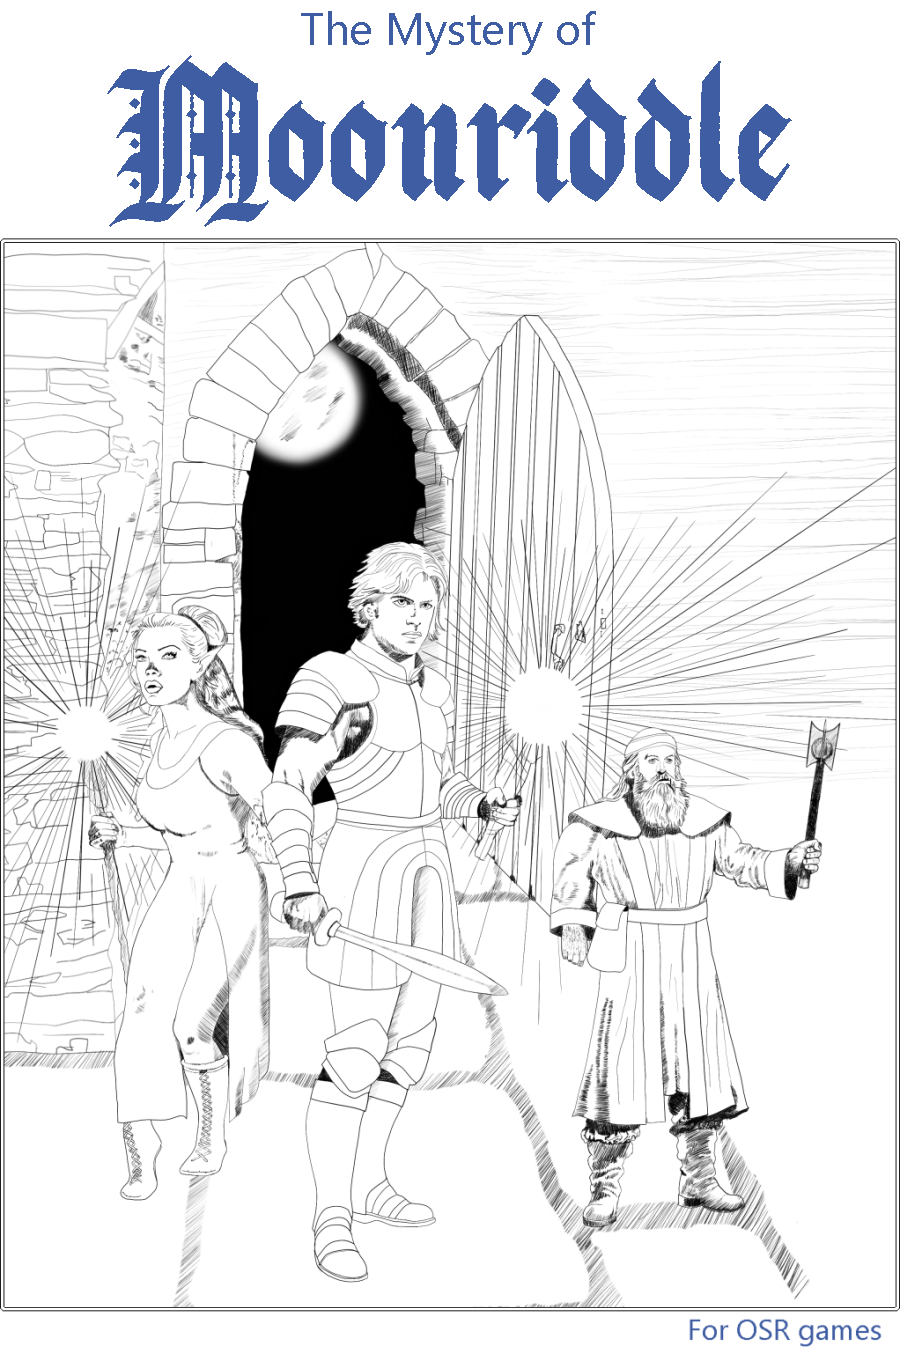
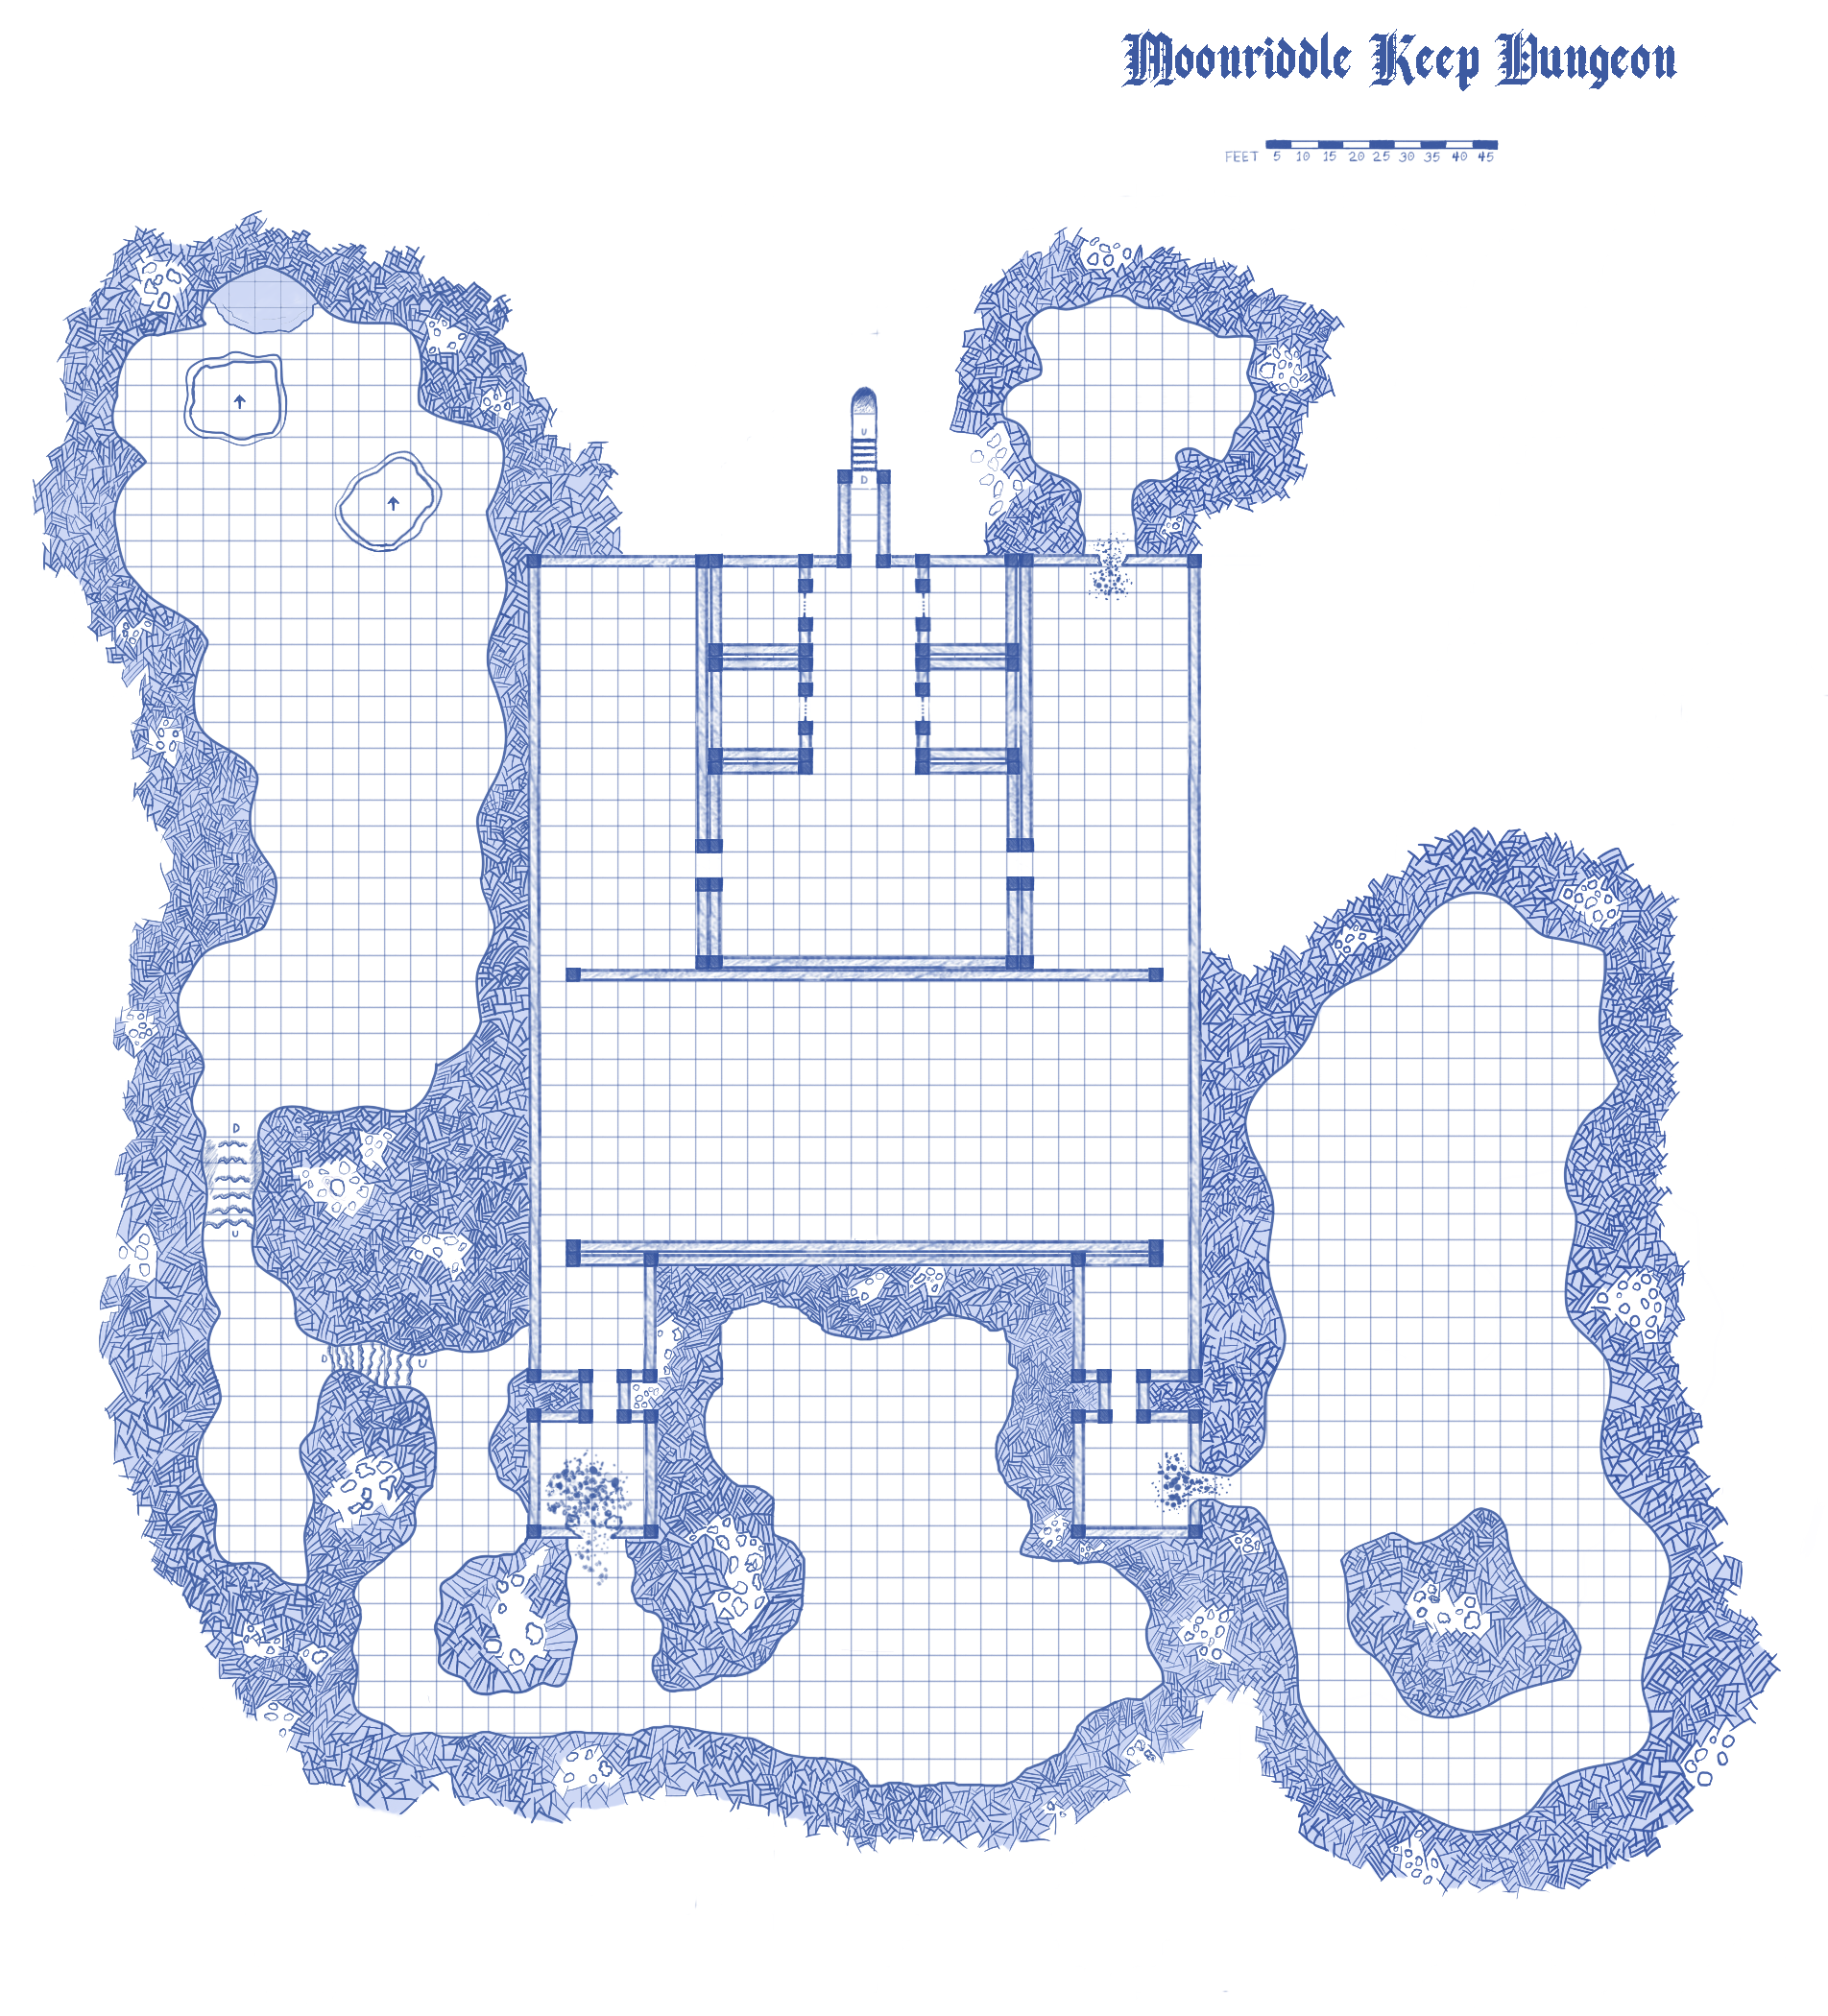
The Mystery of Moonriddle is my first and currently only OSR module and it's available on Drivethru RPG at The Mystery of Moonriddle.
Portraits
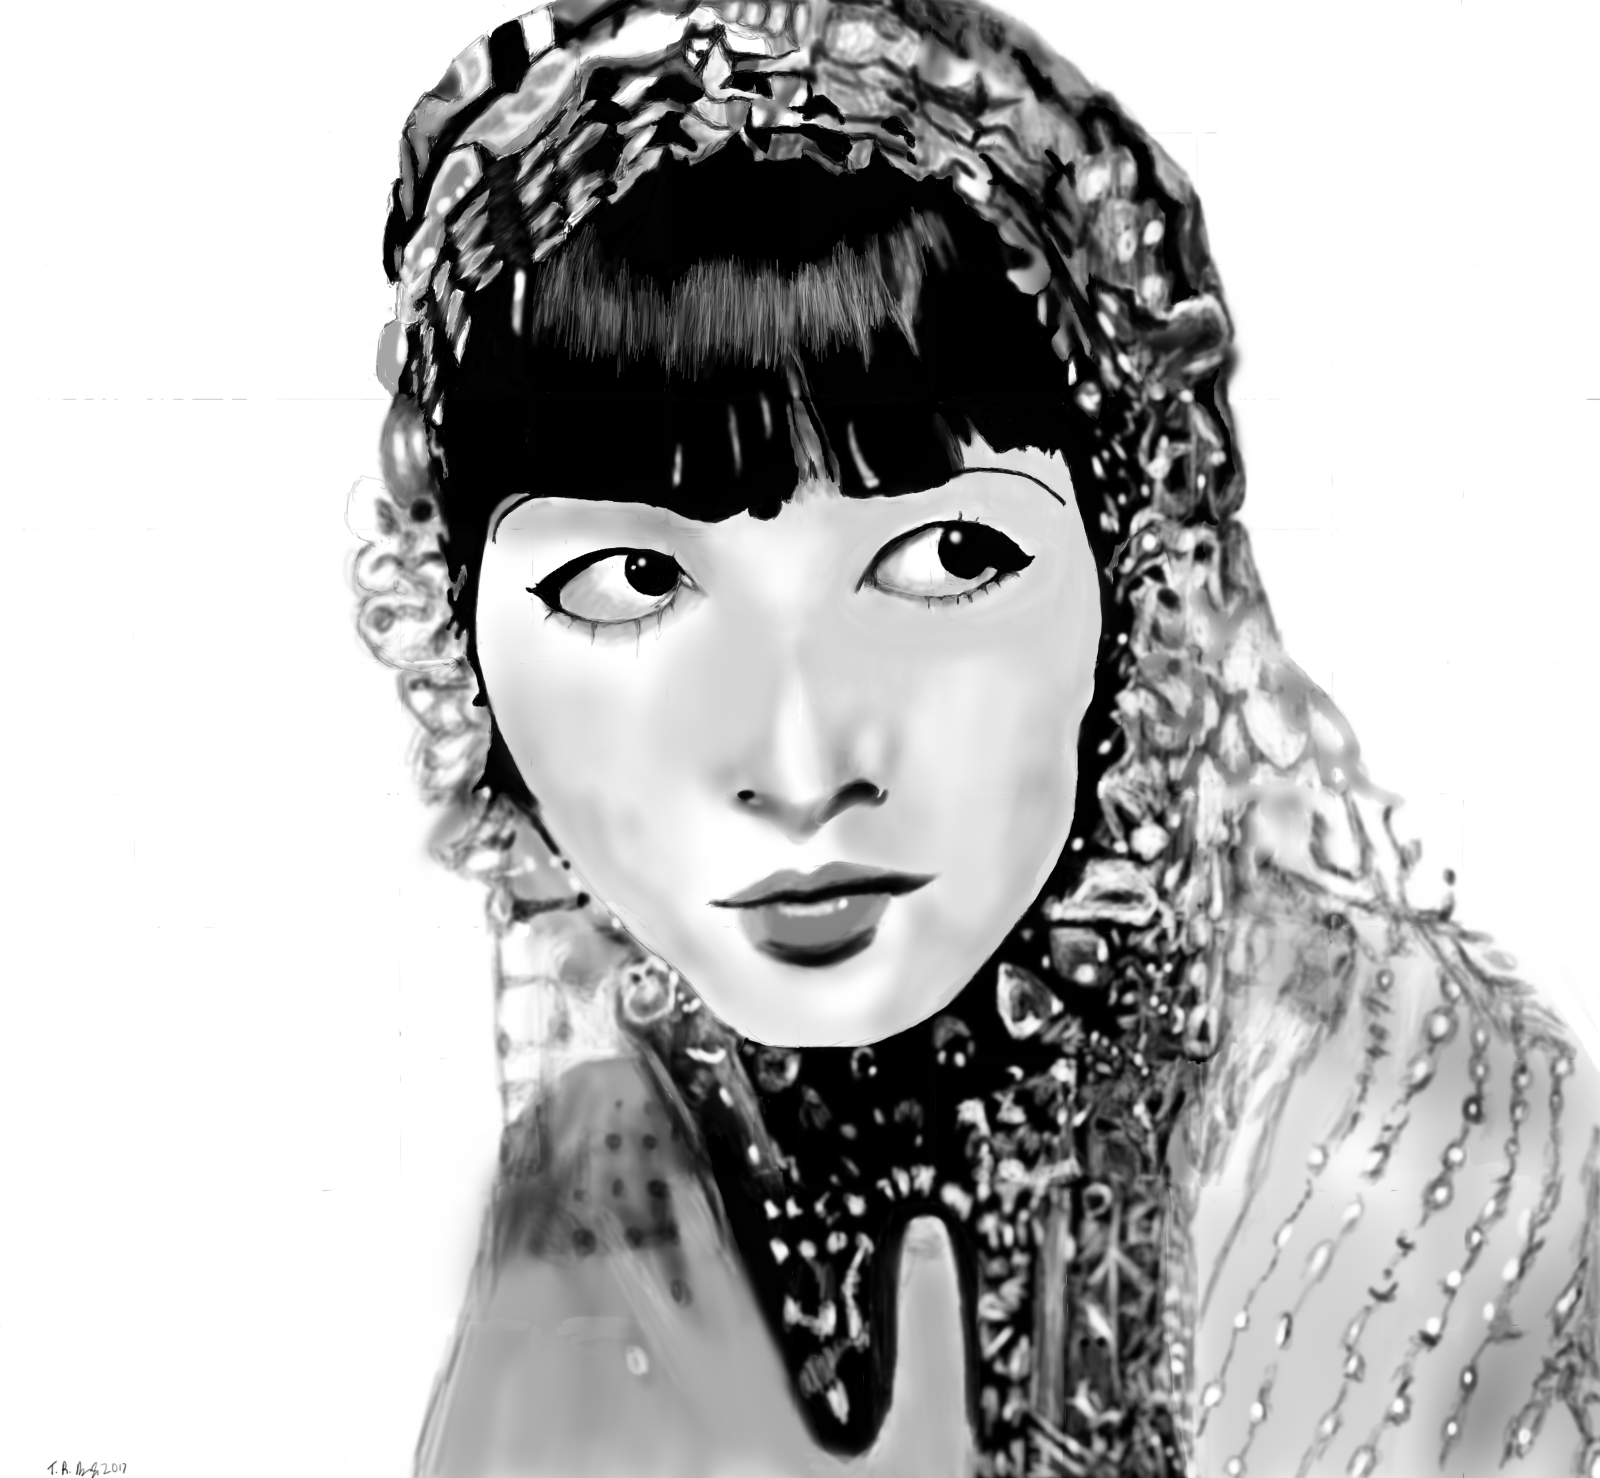
A couple of actress sketches I've done.
Anna May Wong

Audrey Hepburn

Fan Art
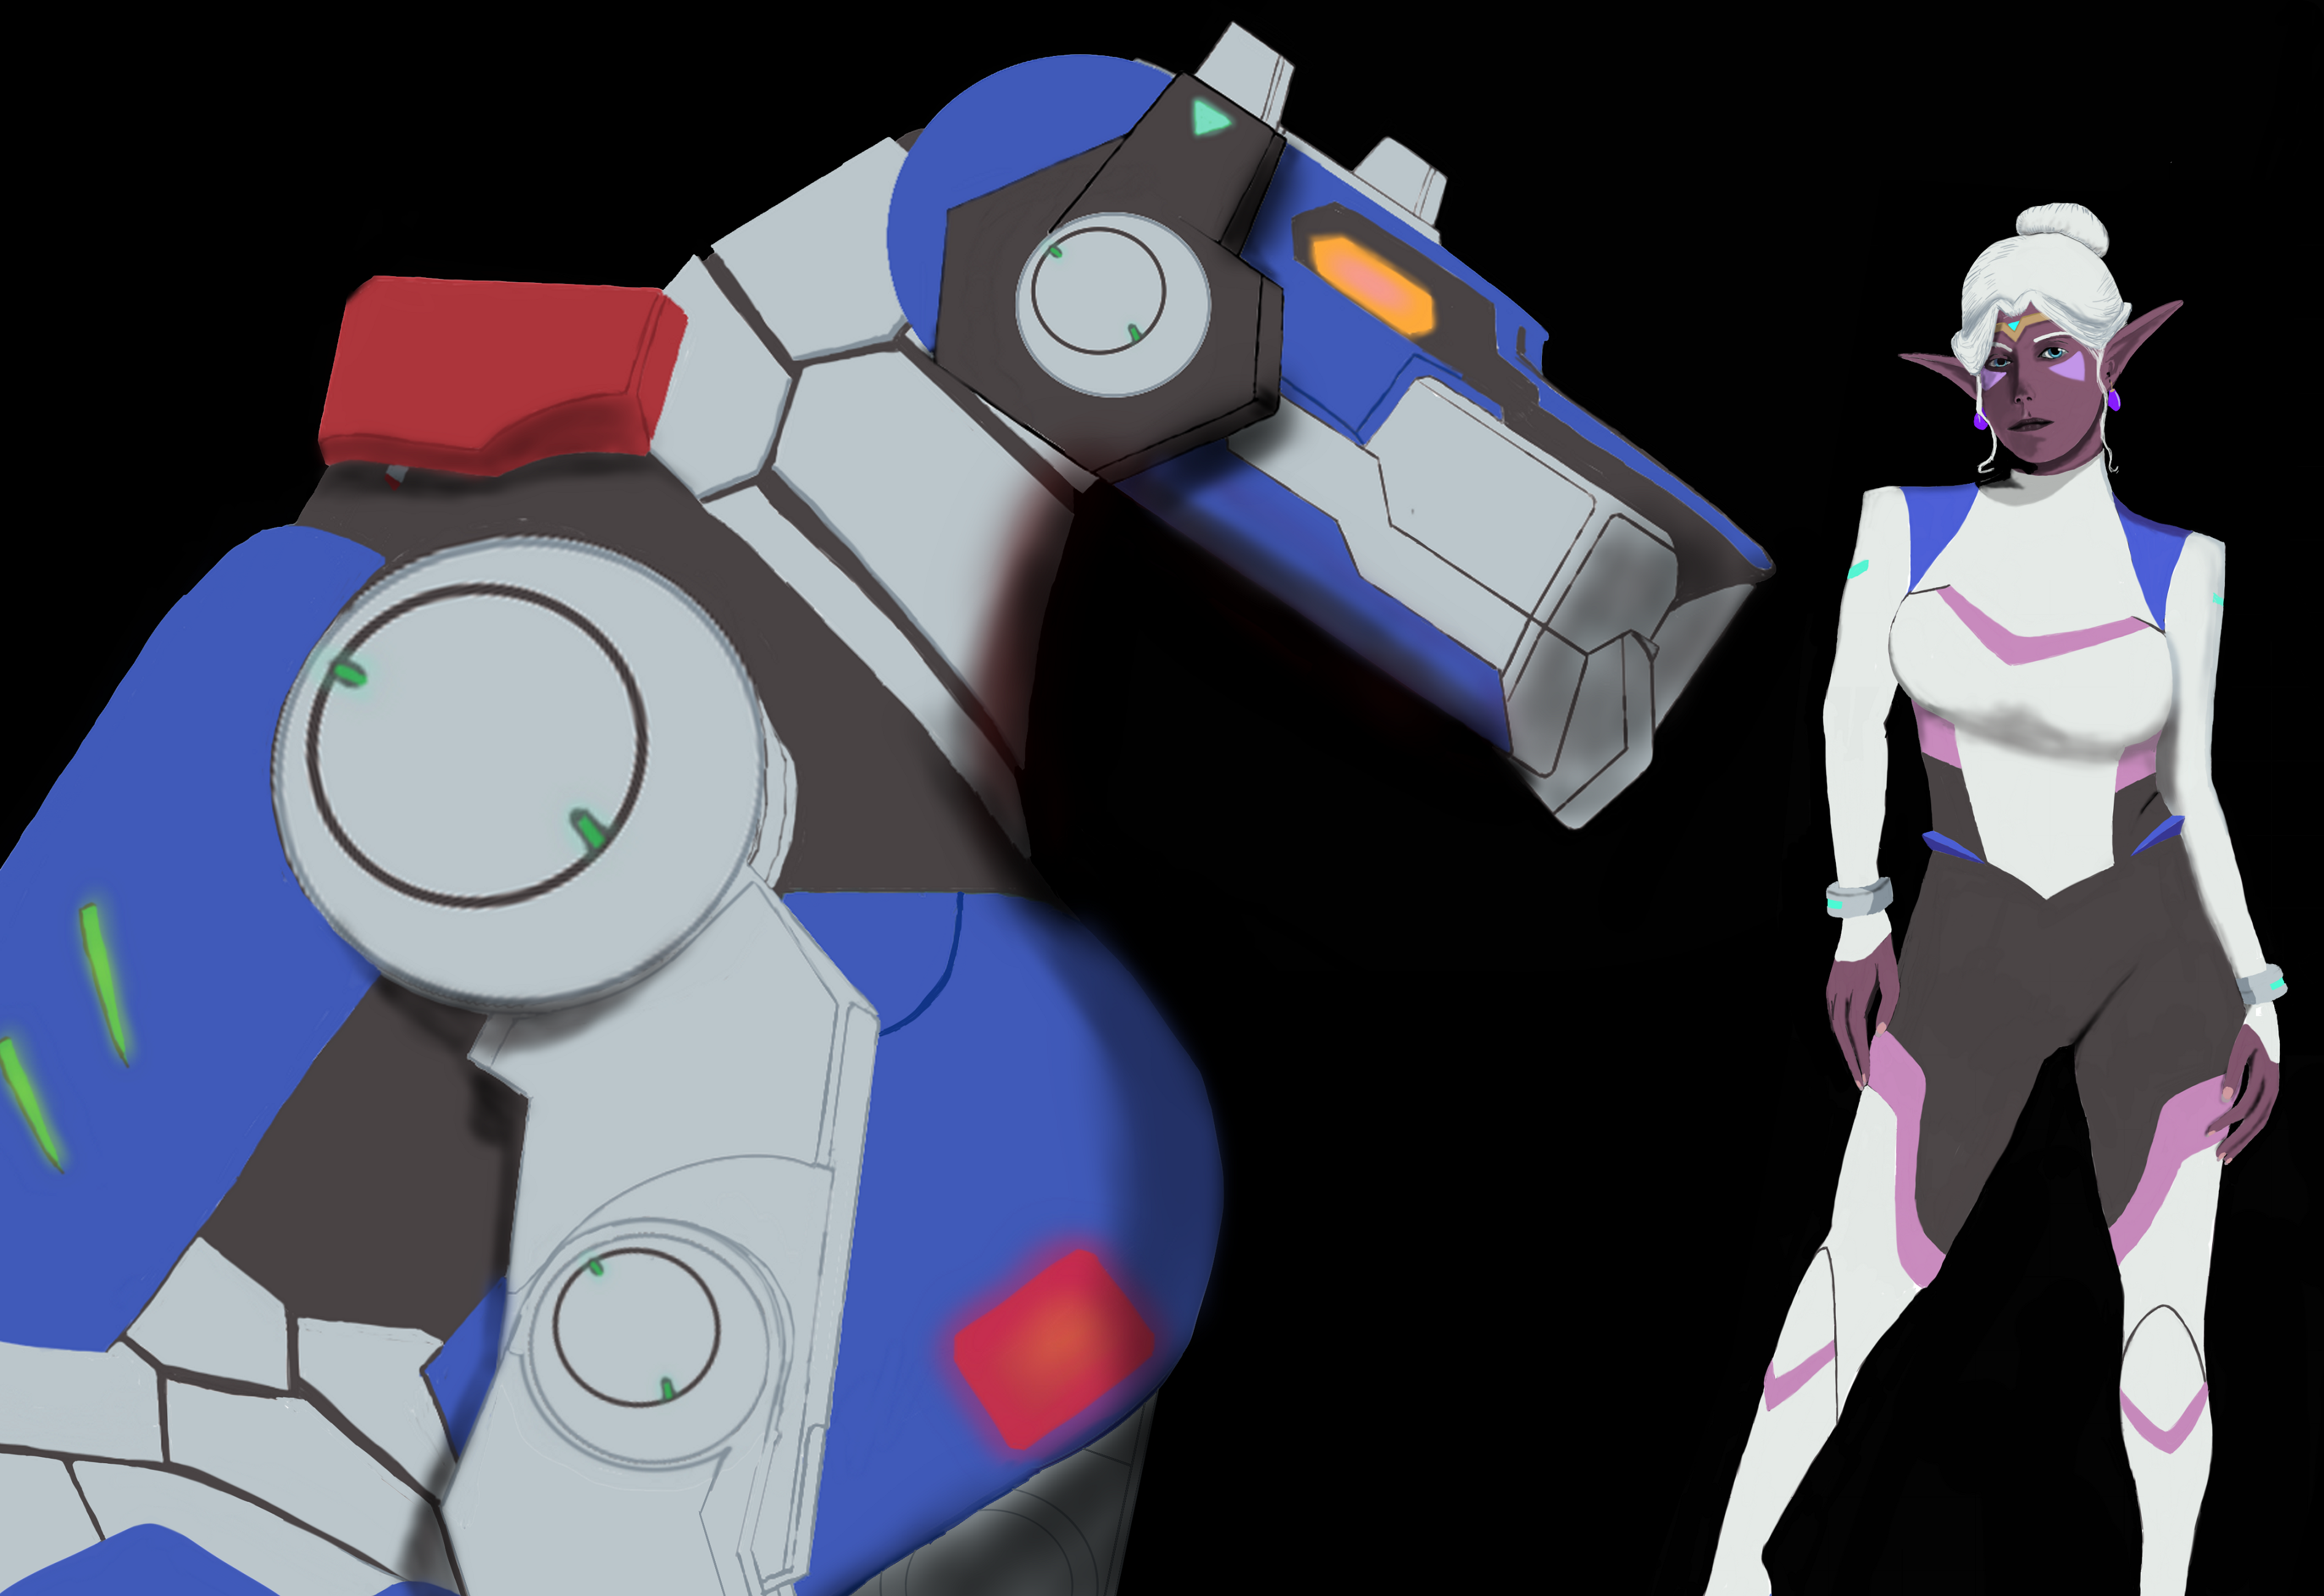
Princess Allura and the Blue Lion
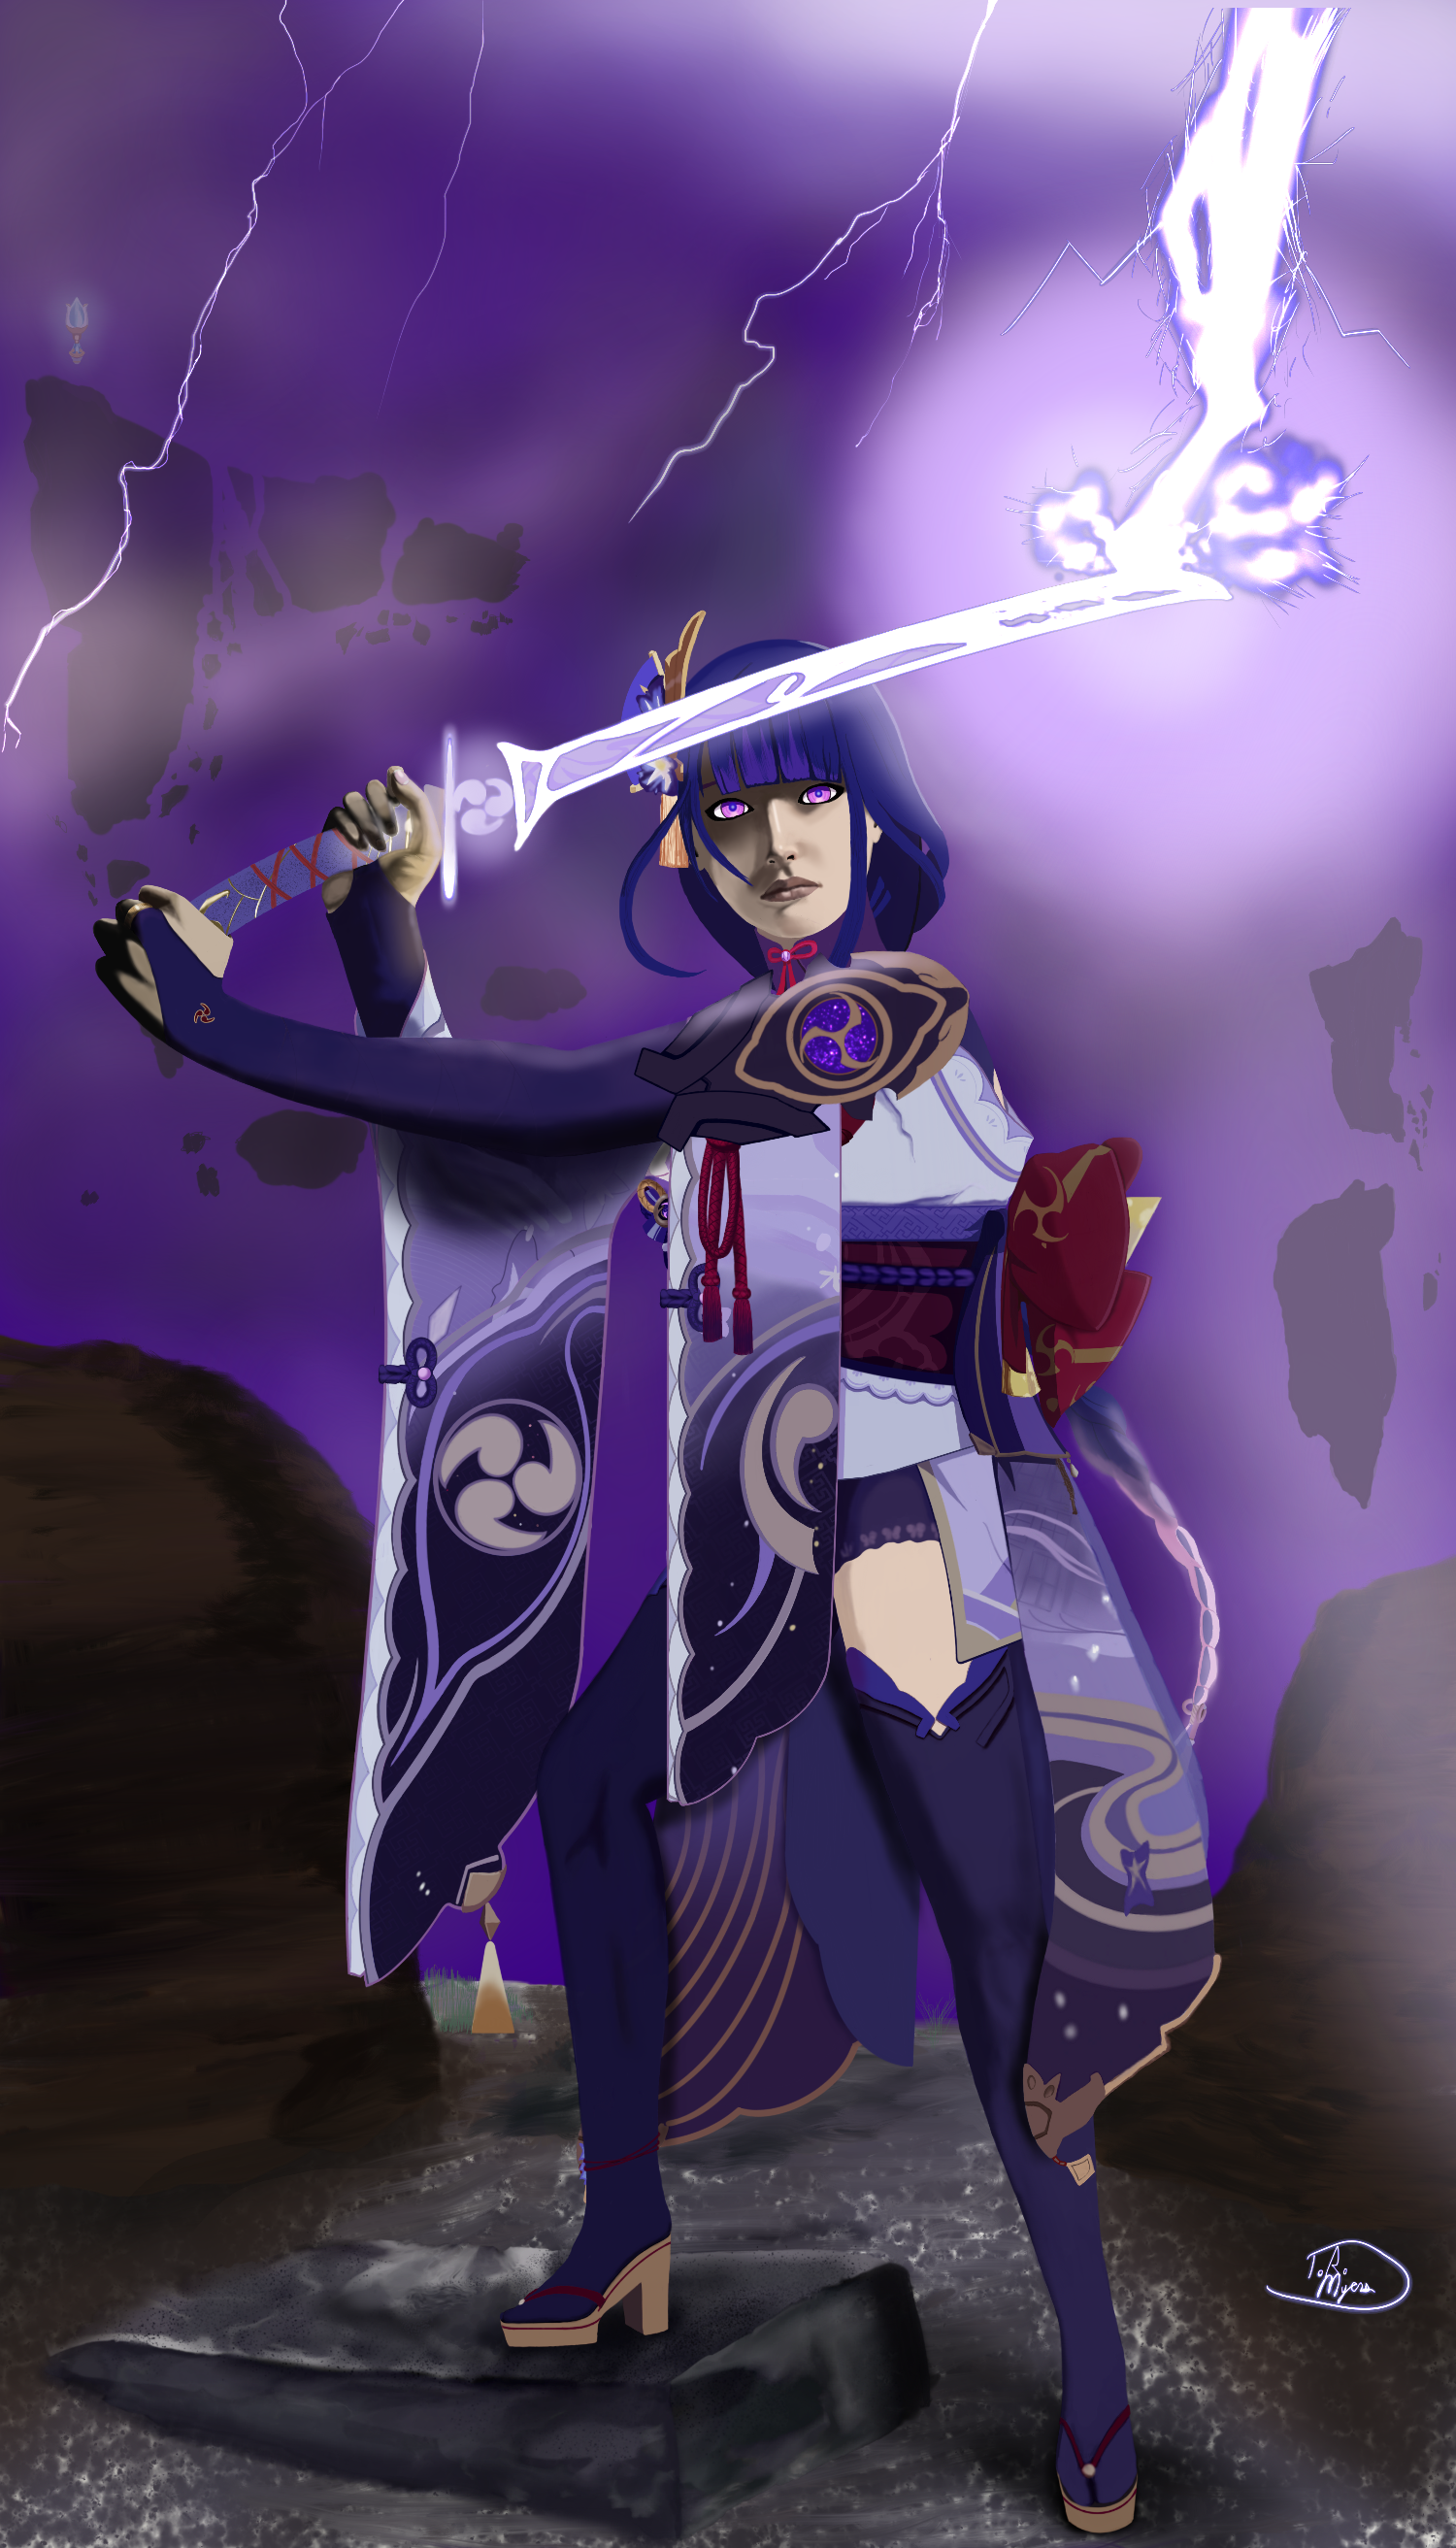
Raiden Shogun
-
Lions of Zaria (2024)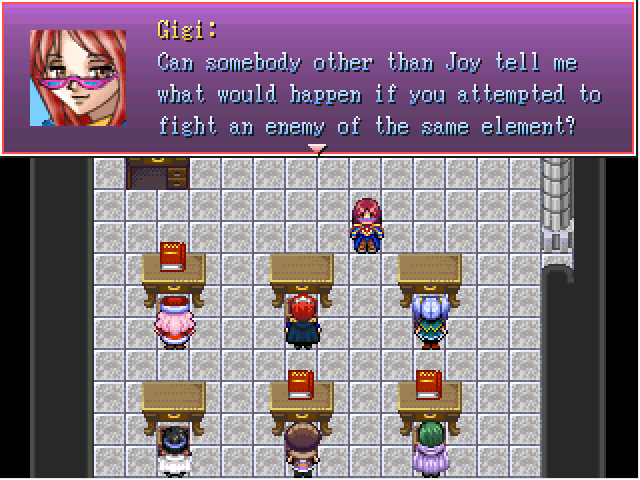
RPG Maker 2003
Gigi teaches magic in Academy City on the continent of Zaria, and her students are in their final year! Time to take them to the Lions of Zaria, who will give them missions in the real world to gain experience and graduate the academy! You will guide four students across Zaria completing various tasks. Be mindful of the time limits!
- Uses First Seed Materials
- White Screw Store
- Milano Cat
- Original music by yours truly
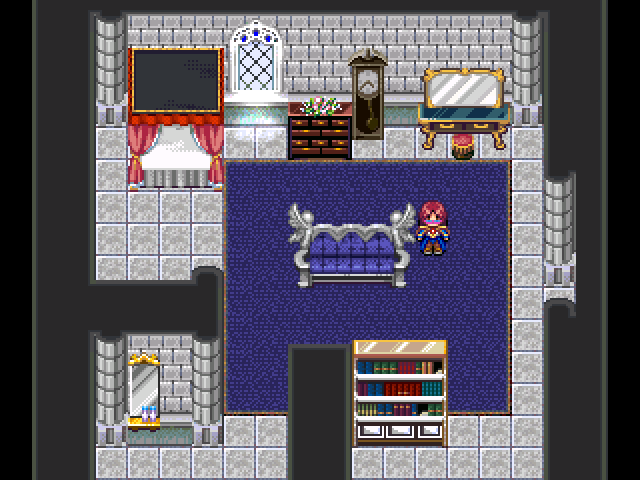
I have imposed inventory limits but I've given you plenty of places in Gigi's room to store your loot so you can collect more! More!!! MORE!!! MOAR!!!!!!!!!11!1!!!1!11!!1111!1
You know, I should actually write a tutorial about this room...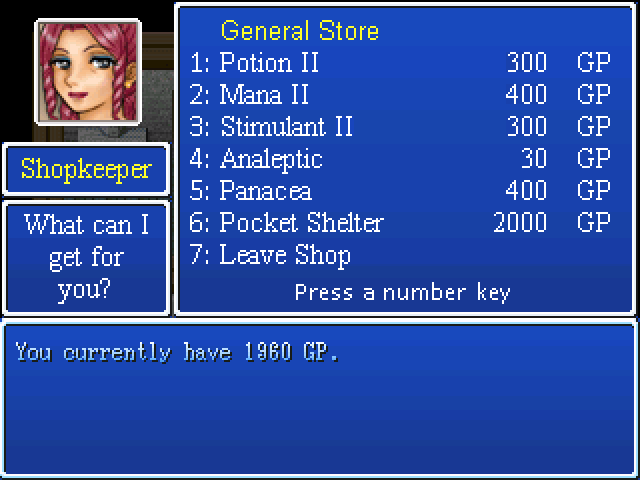
I had to make a custom shop because I imposed inventory limits and couldn't figure out how to restrict the regular shop.

-
Grimm Investigation (2017) -
RADAR TutorialMaking a mini-map with your player represented is one of the earliest things we learned how to do with RPG Maker, but how would you make a mini-display that detects the location of NPCs on the map?
Difficulty: High
Requires: Maniacs Patch
Required knowledge: Variables, a strong understanding of Basic ArithmeticYou will need the following:
Display:

Red Dot:

Red Dot 2:

Reticle:

Set the reticle as your main party member.
To start, make a 40x40 map. Why? Because that's what I'm using and that's what all of my numbers are adjusted to. Once you've learned how to do this, THEN start fiddling with numbers and map sizes.
Common Event 1: Player Tracker
In order to track an NPC, the system needs to know where the Player Character is.
- Name Common Event 0001: “Player Tracker”
- Set it to Parallel Process.
- Do not assign a Condition Switch.
In RPG Maker 2003, a Parallel Common Event without a Condition Switch runs continuously and cannot be turned off.
- In the body of Player Tracker, create Control Variable 0001: PX.
- In Operation, tick “Set”.
- In Page 1 Operand, tick “Event”.
- In the first drop down menu, select “Player”.
- In the second drop down menu, select “X Coordinate”.

[center]This sets the system to constantly track your player based on its X-axis position on the map.[/center]- Next, create Control Variable 0002: PY.
- Repeat steps 5-7.
- In the second drop down menu, select “Y Coordinate”.
This sets the system to track your player based on the Y-axis position. And this completes the Player Tracker event. Since a step counter is not required for a functional RADAR system, it is not included here, but if you were to make a step counter, you would include it in this common event.

Next, you will need an onscreen event: NPC 1
Since a RADAR tracks the NPCs, you will reasonably need something tracking your NPC. In the NPC's active page, set it to Parallel Process, and in the main body, repeat the process you went through creating the Player Tracker.
- Create Control Variable 0003: NX
- Create Control Variable 0004: NY
- Repeat steps 4-11 from the Player Tracker.
- Assign the Event Operand to either “This Event” or the specific NPC.

Time to Create the NPC 1 RADAR common event:
Start by naming Common Event 0002: “NPC 1 RADAR”, and once more setting to parallel process. Since you want to be able to turn your RADAR on and off, assign Condition Switch 0001: RADAR to this common event. Begin by setting RADAR display. You need not follow my example. You can set it to any position you like. I merely set this 31x31 image to the position 16x16 because it's easy to remember. Then set a second image at 2, your first red dot also set at 16x16.
Now, that the system is tracking both the Player and the NPC, we need to note the difference in location. So create Control Variable 0005: DiffX.
- In Operation, tick “Set”. Ignore the second drop-down menu; it should say "Or".
- In Operand, page 3, set drop-down to “Sub”.
- Set both Arg to “Variable” in their drop-down menus.
- Set Arg1 to “3”, “0003: NX”.
- Set Arg2 to “1”, “0001: PX”.

The reason you're setting NPCX to the first argument and PX to the second is because NX is what you're tracking. You're not trying to find out how far you are from it, but rather how far it is from you.
At this point, your first thought is to simply make DiffY now and try to track positioning with a nested Conditional Branch that is tracking both DiffX and DiffY, but this won't work. The reason is that no matter what you do, it will never track both at the same time. It will first check whichever Condition it meets first, and then check the second condition, in order, so it will only ever display the second condition. If the first condition is DiffX, and the second condition is DiffY, then your RADAR will only ever display the Y position and never the X position, and vice versa.
Control Variable 0006: DiffY is, indeed, your next step, but what you're using it for will be a bit more complicated. Create it the same way.
- For 0006: DiffY, follow DiffX steps 1-3.
- Set Arg1 to “4”, “0004: NY”.
- Set Arg2 to “2”, “0002: PY”.
At this point, your NPC 1 RADAR common event should look like this:

Now, it's time to actually start tracking this on the screen. We're going to go through the entire process before showing anymore pictures.
- Create Control Variable 0007:R-Dot_OffsetX.
- In Operation, tick “Set”.
- In Operand, page 1, tick “Variable” and select 0005: DiffX.
Next command:
- Set your DiffX positioning: Make another Control Variable using 0005: DiffX.
- In Operation, tick “Mul”.
- In Operand, tick “Constant” and input 6.
- Make another Control Variable using 0006: DiffY, and in Operation, tick “Div”.
- In operand, tick “Constant” and input 15.
- Create a third one of these, and set it to "Sub", 1.
This is setting the range of the Dot based on a scale to the size of the screen. Larger numbers are better since they're more precise. *11/33is better than *1/3, etc. The -1 is being used to compensate for a strange offset in which, if the display is on the left of the map, the dot will want to go slightly off of the left side. And if it's on the right of the map, it'll want to go off the right side. The same issue exists with the Y-axis. If the RADAR display were in the center of the Screen, this wouldn't be an issue.
- Repeat all of this 0008:R-Dot_OffsetY, setting all variables to 0008:R-Dot_OffsetY and DiffY.
Now, it's time to start actually positioning the dot. There are four control variables using the final two variables in our system.
- Create Control Variable 0009:R-Dot_ScreenX.
- In Operation, page 1, tick “Set”.
- In Operand, tick “Constant”.
- Set constant to 17.
- Repeat Control Variable 0009:R-Dot_ScreenX.
- Operation, page 1, “Add”.
- Operand, Variable 0005: DiffX
- Finally, two more Control Variables; Control Variable 0010:R-Dot_ScreenY.
- Repeat steps 12-17, switching all variables for the Y variable.
This sets the position of the graphic. Since the RADAR display is 31x31, and we are using a 30x30 range, and since these are set at 16 pixels, which assumes 32x32, from the borders, I initially thought that the center should be 16 for each variable. However, in practice, it's off by one, so 17 centers the dot on the screen. No matter where you start on the screen, the dot will always follow the NPC so it will only be in the middle if you are in the same space as the NPC.
- Move Picture command, Picture two:
- Display position, in the drop-down menu, Variable.
- In the second drop-down menu, Center.
- In the first Variable option, 0009:R-Dot_ScreenX.
- In the second option, 0010:R-Dot_ScreenY.
- Set wait time to zero.
- And finally put a wait command 0.0 at the end to take care of any errors.
Finally, we can show an image of what's going on.

Now, in practice, you're going to notice something. On a 40x40 map, if the NPC is in the middle, and you go out to the edge, her dot's going to stay within the middle to secondary area of that RADAR screen. This is because her position is scaled against yours and you can only get half of the full distance from her. Once she's at the edge of the map, only then will you see her go all the way to edge. Because of this, not only does the RADAR give you her direction, but her general vicinity on the map. But let's say that you'd like to target her and you want to know when you're on the money! Well, that's where the little plus sign dot comes in. Open the NPC's event, and let's get to work. There's only thing left to do, and you can use a nested conditional branch for this one.
- Beneath your NPC tracking variables, create a conditional branch: If variable 0001: PX equals variable 0003: NX.
- Inside of that branch, create a second branch: If variable 0002: PY equals variable 0004:NY.
- Now, simply show picture 3, Red Dot 2.
- In both else handlers, place the command, Erase Picture: 3.

I did make a video, but you can barely see the RADAR.
I have attached the project file.
vvvvvvvvvvvvvvvvv
RADAR Tutorial.zip
^^^^^^^^^^^^^^^^^^Note: An RMN user suggested that in a larger process, NPCs should be tracked via parallel process in common events, and I would agree, except in the game I was making this for was using the RADAR for space ship combat.
Essentially, you would use the same parallel process logic, but in a common event tracking all the NPCs, which would simplify processing by streamlining it in a single event, and leave you free to event the NPCs however you like. I mention this because that is absolutely a better approach and I would have loved to use it. But for what I made, it wasn't a viable approach.
There was a glitch I encountered where trying to track them via a separate parallel process that DID work, but I couldn't, no matter how hard I tried, get the weapons interactions to work properly. No matter what I did, it kept glitching badly. Here was what I said in reply:
This RADAR took a week and a half, maybe more of experimentation, and forcing things to work. It was made for a spaceship combat game. In that, I don't need to interact with the NPC. I need it to react when I touch it so I know I'm locked on, and then I need it to blow up with a key reaction. That all works best with parallel processes, so there's nothing to interact with. In that situation, having the NPCs control the parallel processes themselves makes them easier to keep track of.
In short, for a system like that, I still wouldn't follow this suggestion, largely because I tried it, and the logic became too complicated to handle in a short game jam. When you need key activations to work, with this process, it becomes too difficult to differentiate the NPCs, and what I found was that no matter what I did, one of three things would happen:
- Targeted NPC would blow up properly, but the other NPCs would unspawn.
- Targeted NPC would blow up properly, but the other NPCs would no longer be interactable (but still actively firing on you! Unwinnable combat.)
- All NPCs would freeze the moment I used the key command. (This was least common)
However, there are scenarios in which you would want to target the NPC and then interact with them. For that, your method would be fine, because that's not a key command. If you've got an external parallel process tracking the NPC and you just want to go up and talk to them, that shouldn't interfere with anything. (And I tested that! When I ran the external parallel process, and I just had the space ships run text that says "I'm supposed to blow up, now!", that worked just fine. But when I wanted to make them do actually do it, I couldn't make it work right.)
-
Explaining me.I am pianotm. I have been been working with RPG Maker since I discovered the Don Miguel bootleg in 2013. It was a year later that I finally bought VX Ace. Wasn't too thrilled by it, but eventually became proficient with it. While I have made a bunch of games in VX Ace, and will probably make a bunch more, most of what I make is in 2003. I bought XP from one of the Steam sales where it was, like, 4 dollars. Never really gave it a proper try. I bought MV, have made a few games in it. I hated it, but I recently made a shmup in it that has kind of changed my mind. You're not completely useless after all, MV. I have only ever tried the trial version of MZ. I like it much better than MV, but simply cannot afford it.
So, why do I only write 2K/3 tutorials?
Everything I know about working in VX Ace, I've found in tutorials that other people have already written, and what I can't find in tutorials, I can find in plug-ins. No point writing what is already written and easily found in a brief search of RMN. It would be rejected anyway because admin feels the same way.
On the other hand, the bootleg editions of RPG Maker 2000 and 2003 have even more tutorials (and there's still plenty to write about). The legal Steam versions are different. While you can usually pretty easily move a bootleg project into the legal engine, compatibility is not one-to-one, and there are problems to be solved before your project will work right. This warranted the legal versions to be treated as their own, separate engines on the RMN forum, and they had no tutorials. So, whenever I write a tutorial, it's for the legal version of RM2k/3.
My first tutorial was for the bootleg 2k3, and it was just a simple explanation of how to make exclusive clubs in your games, something you can probably figure out on your own, but I'll eventually post it anyway.
-
Dynamic Lists and Indexes (2K/3)Dynamic Index/List in 2000/2003
Prerequisites: Understanding of the use of Switches.
Difficulty: Very Easy
Examples of Use: A bestiary that updates with new encounters. A list of important NPCs that updates as you meet new people. A quest journal that updates as you acquire and complete missions.
Dynamic - /dīˈnamik/ (of a process or system) characterized by constant change, activity, or progress.
I will be showing you how to make a dynamic list that the player can access at any point during the game. I will be teaching this system by explaining how I made a bestiary in my most recent game.
What you will need:
- A sufficient number of switches to match the number of objects you want to list. I set aside two pages of switches for this and up to this point, have only used half of a page. If I continue development on this game, I expect to use most of the rest, and could go over.
- An equivalent number of extra slots in the Actor menu to list the names of the objects.
- One variable for the Key Input function.
- Two common events.
Procedure:
Start by creating your main common event, the actual list you want the player to access. Set it to parallel process. You can decide whether or not to tie it to a switch. I didn't care when the player was able to access, so I didn't use a switch.
Set Key Input Processing and create a variable for it. You can set it to any key you want, but I recommend a key that the player doesn't use in normal gameplay. I chose the NUM1 key. In Key Input Processing, the numbers are assigned values of 10-19, with 10 being the NUM0 key, and 19 being the NUM9 key. So, NUM1 would be 11 in Key Input Processing. This is called by your variable.

Your common event should looks something like this.

I'm assuming that you have created all of the objects you want to list. In the case of the bestiary example being used here, that would be creatures in the enemies list of your database. In your Actor Menu, simply list all of these objects.
As follows:

Back in your main common event, create a conditional branch. Set that conventional branch to trigger on your Key Input variable. I set it to look for NUM1, so I set it to 11. Inside this conditional branch, you can handle the details however you like, however, here are the important details:
The player has to have a way to select specific entries. The easiest way is the “Show Choices” function, which is what I used. I made this manageable by assigning creatures to specific regions, so that there would be only three or four creatures to a region. This let me put the regions in their own “Show Choices” menu. In the show choices menu for the actual objects, don't list the object names directly. Instead list their Actor tags. So for choice one, based on my pictures, it would be \n[[]6[]], then for choice two, \n[[]7[]] and so on. This way, if the name changes in the database, it will also change in your list.
In each choice selection for the object, place a conditional branch set to trigger if your object switches are on. So if you've done a bestiary in the manner I've suggested, you'd have something like this.
Show Choices
Region 1
>Show Choices
>>\n[6]
>>>Condtional Branch
>>\n[7]
>>>Condtional Branch
>>\n[8]
>>>Condtional Branch
>>\n[9]
>>>Condtional Branch
Region 2
>Show Choices
>>\n[10]
>>>Condtional Branch
>>\n[11]
>>>Condtional Branch
>>\n[12]
>>>Condtional Branch
>>\n[13]
>>>Condtional Branch
Etc. etc.
To be clear: These are your list entries. Show Choice option>actor tag>conditional branch. Every time. Consistency and repetition is key, here. This is a list, after all.
Individual Entries:
With each object you add to the list, assign a switch to that specific object and include it in each of your conditional branches for the list entries.
Meets a new NPC – Trigger a switch specific to that NPC in the initial dialogue event.
Encounters a new enemy – In Troop Events, have an event set to turn 1 and trigger a switch specific to that enemy.Each unique object must have its own switch, and you must turn that switch on during the initial encounter. In addition, whenever you turn on a switch, immediately after, use the Call Event command to call the second common event that we'll be creating below.
For each entry in your show choices list, create a conditional branch and provide details in that branch. Here's an example of an entry from my bestiary.
@> Conditional Branch: S[0041:Soma] == ON
  @> Show Picture: 100, SomaFile, (160, 120), 100, 0%, M6, B0, RGBS(100,100,100,100)
  @> Key Input Processing: V[0014:Get Key], (W) { Shift, }
  @> Conditional Branch: V[0014:Get Key] == 7
    @> Erase Picture: 100
    @> Show Picture: 100, SomaFile2, (160, 120), 100, 0%, M6, B0, RGBS(100,100,100,100)
    @> Key Input Processing: V[0014:Get Key], (W) { Shift, }
    @> Conditional Branch: V[0014:Get Key] == 7
      @> Erase Picture: 100
      @>
     : Branch End
    @>
   : Branch End
  @>
 : Else
  @> Text: You have not yet encountered this creature.
  @>
 : Branch End
In this example, I checked to see if I had encountered an enemy, the Soma. If the switch is on, I show a picture (the creature's description), use the Key Input function to wait for the SHIFT key, display a second picture (the creature's stats), and wait for the shift key to completely end the process and let the player continue on their way. If the switch is not on, you get a message telling you the object is unknown.
Here is a screencap of mine where you can see one whole entry and most of a second.

Just rinse and repeat. For each show choice option, make sure it's name is an Actor tag, and just keep repeating these conditional branches.
This, on its own, is enough to create your list. You can simply add choices and entries to this common event as you need to. You're done with it. However, so far, there's no way to hide the names of your objects. This is why we did this with the Actor tab. Events contain a function to change actor names.
Create a second Common Event that updates your list. Name this whatever you want. I named mine “Animal Handling”. Whatever it is, just name this something that reminds you that you're using it to update your list. Set it to “none”. This is an event that gets called. In every instance where you turn on a switch for your list, immediately after, call this event.
- Talk to new NPC>Switch on>Call Update Event
- Encounter new enemy>Switch on>Call Update Event
- Etc.
- Etc.
In the Update Event, every entry, once again, gets its own conditional branch. Once again, it's waiting to see if you've turned that object switch on.
In that conditional branch, if the switch is on, change the name of the associated Actor to its correct name. Else, change the name of the associated Actor to “???”.
@> Conditional Branch: S[0041:Soma] == ON
  @> Change Actor Name: [0006:Soma], Soma
  @>
 : Else
  @> Change Actor Name: [0006:Soma], ???
  @>
 : Branch End
That's it. Every entry should look like that. Your update event is just a list of conditional branches that are checking to see if every switch is on and is changing the names. If you're using actor tags, this will be reflected in the list the player sees.
Except for names, your Update Event should look exactly like this.

And that is it. We're done. In action, it will look like this.


-
Grimm Investigation (2017)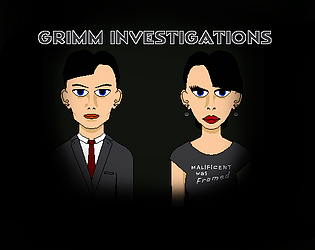
For RMN 10th B'Day. The Bros. Grimm (and sister) provide PI services in fairy tale land.
RPG Maker VX AceGrimm Investigation on itch.io
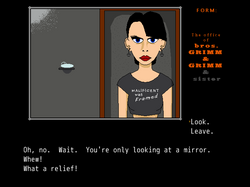
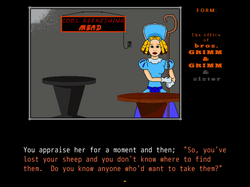
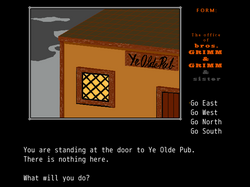
Little Bo Peep has lost her sheep and she doesn't know where to find them. It's your job to find them. You're a private eye. Play as Cecilia Grimm, the sister, or Wilhelm Grimm, one of the brothers. Gather clues in this text based adventure to liberate the looted lambs. Your prime suspect is the Big Bad Wolf, but remember; in a case like this, nothing is what it seems. This is the case that can finally earn you the respect of Jacob Grimm, your brother and founder of Grimm Investigations, so don't mess up.
- A text based adventure with images.
- Two different story arcs, depending on which Grimm you choose.
- Two joke endings, two lame duck endings, and eight mystery solutions; twelve endings in all.
- Autosave. Don't even worry about it. Just turn off the game and pick up where you left off.
- Original art.
- Female Protagonist.
Grimm Investigation on itch.io
-
THERMOCLINE: SURVIVAL HORROR RPG -
Custom Random Encounter System (2000/2003)@DecentTreatment Yeah, I have three or four more tutorials. I'll add those, probably tomorrow and the next day. I've got a lot of stuff to do, and they take awhile to undo the RMN formatting and adjust the picture links.
-
Custom Random Encounter System (2000/2003) -
Custom Random Encounter System (2000/2003)Alternate Random Encounter System
System agnostic: useless in XP and after.There are any number of reasons a developer may not want to use the default Random Encounter system in RPG Maker 2000, but I think the main reason most people will want a custom Random Encounter system is so that they can use custom death handlers, wherein you don't want dying to lead to an automatic game over screen. It's pretty clear to anyone that if you call battles with events, you can tick the box open a conditional branch instead of the game over screen, but the default Random Encounters have no such option, nor is there any way to bypass the automatic game over in battle events.
You will need a fair understanding of variables and switches.
We are going to create:
- A player tracker.
- A step counter.
- A series of encounter rollers.
- An encounter tracker.
We will start with the player tracker.
PLAYER TRACKER
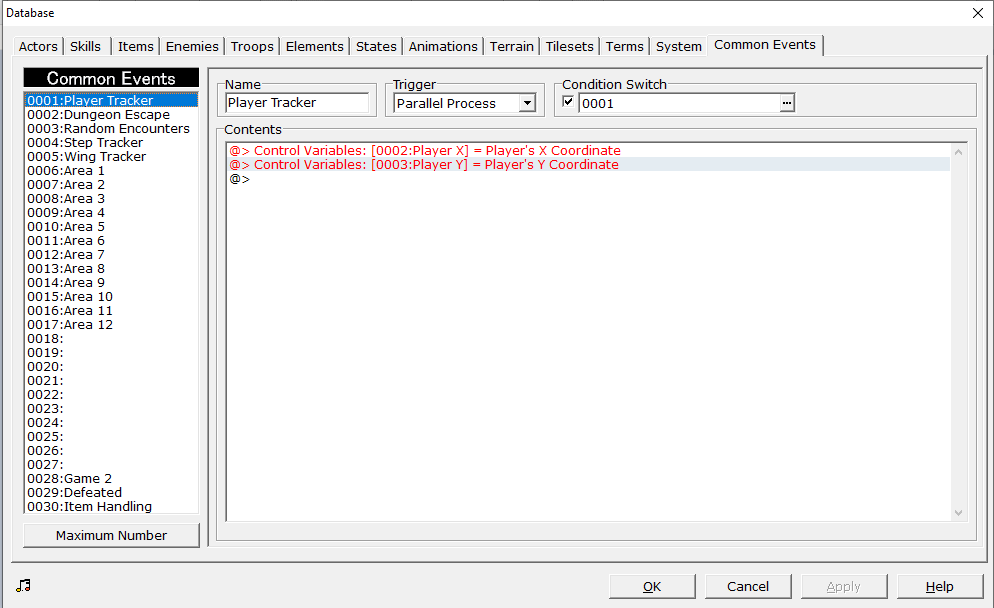
We assume this is a blank project. Open your database and go to common events. Name your first common event “Player Tracker”. Set the Trigger to Parallel Process. Tick the Condition Switch box, create the Switch to 0001: Player Tracker and set the common event to switch 0001. In the player tracker, create the following variables.
@> Control Variables: [0002:Player X] = Player's X Coordinate
@> Control Variables: [0003:Player Y] = Player's Y Coordinate
This is it. That is the entire common event.
STEP COUNTER
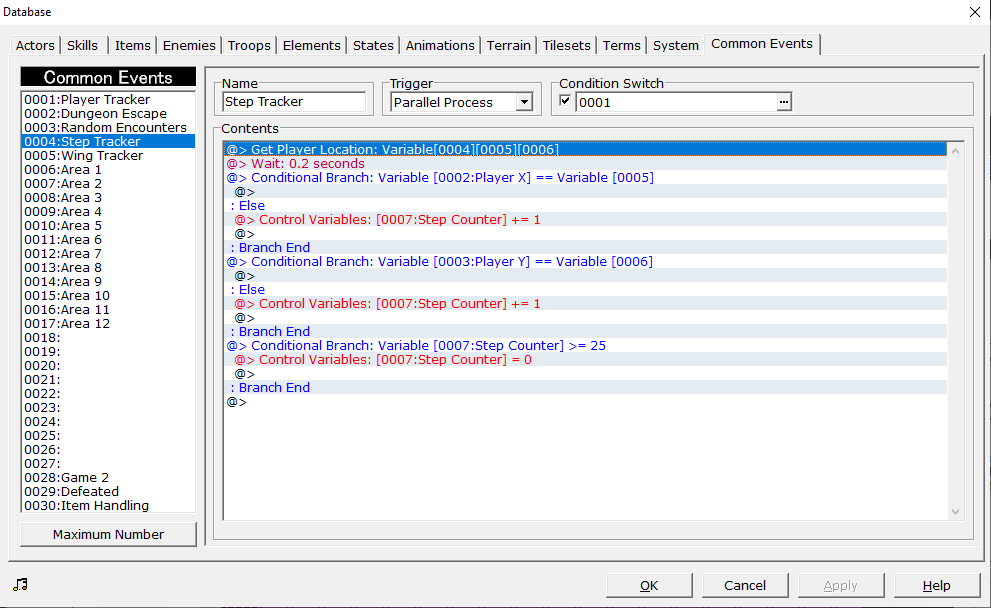
Go to common event 2. Name it Step Counter. Set to the same triggers as your player tracker. Trigger is Parallel Process; switch is 0001: Player Tracker. In the step counter, on the first line, Get Player Location. In Get Player Location, create and set the variables to 0004: Map ID, 0005: Step X, and 0006: Step Y in Map ID:, X Coordinate:, and Y Coordinate respectively.
In line 2, use the Wait command, and set it to a very small increment: 0.1 or 0.2 will each work fine. In line 3, place a conditional branch tracking Player X and in the else branch, create Variable 0007: Step Counter and set to add 1. As follows:
@>Conditional Branch: Variable[0002:Player X] == Variable [0005]
  @>
: Else
  @> Control Variables: [0007:Step Counter] += 1
  @>
: Branch End
Create a second Conditional Branch tracking Player Y.
@>Conditional Branch: Variable[0003:Player Y] == Variable [0006]
  @>
: Else
  @> Control Variables: [0007:Step Counter] += 1
  @>
: Branch End
Now, if we were JUST creating a step counter, I'd end this here, but we're not. We're creating a Random Encounter system, and we need a fail safe in case the process fails. Create a third conditional branch that resets your Step Counter to zero if so many steps have been taken.
@>Conditional Branch: Variable[0007:Step Counter] >= 25
  @> Control Variables: [0007:Step Counter] = 0
  @>
: Branch End
With this third branch, we've created the first part of our Random Encounter range; the maximum step counter, but this does not mean that the most you'll be able to take is 25 steps before an encounter. No. The particular RE system I designed here needs a bit of care in designating step limits. You see, it can miss, and if that happens, you need a way to go back, which is what this does. Technically, the counter should never reach 25. But it can and since that will be out of our encounter range, we want to make sure it can reset.
RANDOM ENCOUNTER EVENTS: PART 1
At this point, you should have two full common events; the Player Tracker and the Step Counter. Now, it is time for the third common event: The Random Encounter event. So go ahead and create a new common event called Random Encounters. Set it to parallel process, and set it to switch 3. Name this switch “Random Encounters”. You are going to need a series of conditional branches in this, and this could get rather long depending on how long your game is and how many different encounter areas you plan on having. Now, you'll note that I've left variable one blank. That's because I like to set my random variables in as close to the beginning of the list as possible. You can put it anywhere, but for this tutorial, variable 1 will be our random dice roller. So, our very first conditional branch will set our minimum steps for random encounters. In this tutorial, we are setting that to 15, which means, our conditional branch will be looking for the step counter variable to hit 15. In this branch, we'll create our dice roller. Name control variable 1 “Random” and set it as Random 1 through 4.
@>Conditional Branch: Variable[0007:Step Counter] == 15
  @> Control Variables: [0001:Random] +1= Random [1...4]
  @>
: Branch End
What we are setting this to is a one in four chance of hitting a random encounter. If you roll 1, you hit an encounter. If you don't, the counter keeps going. How high it should go before cycling back will be in our next branch, so create your second branch below this one.
@>Conditional Branch: Variable[0007:Step Counter] == 20
  @> Control Variables: [0001:Random] +1= Random [1...4]
  @>
: Branch End
And “Wait!” You say! This doesn't cycle anything! This is just another point that could potentially hit an encounter! And that's right. This is simply the intended topmost number that an encounter is rolled, but we need to determine what happens if you roll an encounter or if you miss an encounter. If you miss, we need to reset the step counter, and we don't want to go all the way back to zero because that can actually cause an issue where you could go several hundred steps before hitting an encounter. We are creating a loop where the counter reaches 15, and then creates a loop between 16 and 20 where it is constantly rolling an encounter chance. So let's make that random dice roller actually do something, now. You're going to create a series of conditional branches that determine whether you hit a random encounter, or your steps keep counting.
@>Conditional Branch: Variable[0001:Random] == 1
  @> Comment: This one hits. We need to call a common event that doesn't exist yet, so use this
  @>                 : comment as a place holder. All others will not hit, so they are easy to deal with. :
  @>
: Branch End
@>Conditional Branch: Variable[0001:Random] == 2
  @> Control Variables: [0007:Step Counter] = 16
  @> Control Variables: [0001:Random] = 0
  @>
: Branch End
@>Conditional Branch: Variable[0001:Random] == 3
  @> Control Variables: [0007:Step Counter] = 16
  @> Control Variables: [0001:Random] = 0
  @>
: Branch End
@>Conditional Branch: Variable[0001:Random] == 4
  @> Control Variables: [0007:Step Counter] = 16
  @> Control Variables: [0001:Random] = 0
  @>
: Branch End
There is your Random Encounters event, and clearly, we're not done with it, but we need to leave it for now. What we've created is a random encounter step system that reaches 15, rolls for an encounter, and then if it misses, rolls a random encounter every four steps to see if you hit an encounter. Each roll has a one in four chance of either hitting an encounter and going back to zero, or a three in four chance of missing and rerolling four steps later. Now, this looks like it can't go past 20, but it can. You're forgetting that the step counter isn't perfect, and needs a wait command to make sure it doesn't just start counting up whether you move or not. Because of this, it can absolutely shoot past 20 and just keep going (it won't happen often, but it does happen, and it will absolutely break your Random Encounter system), and you can see here that if that happens, there is no handler to bring the counter back to 0 or 16. Hence why the step counter has a handler that brings everything back to 0 if the counter is more than 25. I suppose I could have set the above handler to Equal to or Greater than 20, but I didn't want to add that to miss chance. Why do I like this? You're probably going to hit a random encounter between 15 to 30 or so steps, but occasionally, you can go 50, 60, 70 or more steps without an encounter. The dice really decide instead of an upper limit.
Your entire code for this event should look like this.
@>Conditional Branch: Variable[0007:Step Counter] == 15
  @> Control Variables: [0001:Random] +1= Random [1...4]
  @>
: Branch End
@>Conditional Branch: Variable[0007:Step Counter] == 20
  @> Control Variables: [0001:Random] +1= Random [1...4]
  @>
: Branch End
@>Conditional Branch: Variable[0001:Random] == 1
  @> Comment: This one hits. We need to call a common event that doesn't exist yet, so use this
  @>                 : comment as a place holder. All others will not hit, so they are easy to deal with. :
  @>
: Branch End
@>Conditional Branch: Variable[0001:Random] == 2
  @> Control Variables: [0007:Step Counter] = 16
  @> Control Variables: [0001:Random] = 0
  @>
: Branch End
@>Conditional Branch: Variable[0001:Random] == 3
  @> Control Variables: [0007:Step Counter] = 16
  @> Control Variables: [0001:Random] = 0
  @>
: Branch End
@>Conditional Branch: Variable[0001:Random] == 4
  @> Control Variables: [0007:Step Counter] = 16
  @> Control Variables: [0001:Random] = 0
  @>
: Branch End
ENCOUNTER TRACKING
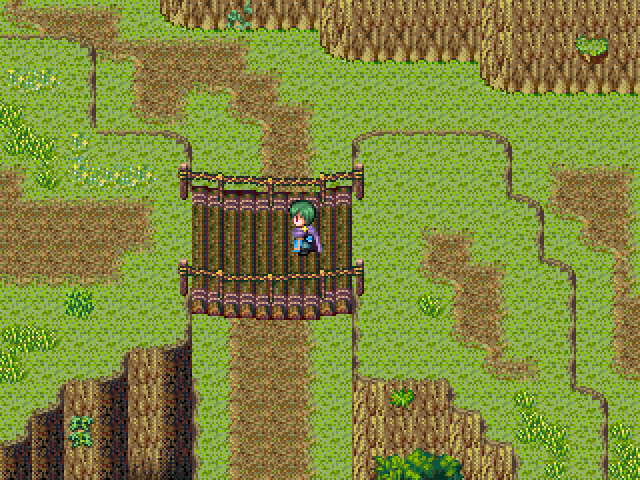
Let's save all of this and get out of the database for the time being. We need a way to determine the encounter area, and which encounters your player will hit, which is very simple to do. This part won't take long, and is necessary to continuing with our Random Encounter events. Create an event that is called every time your character enters a new area. The transfer can easily serve this purpose, but if you're on a world map where entering a new area doesn't use a transfer, you'll have to set up paths where the character has to pass through and will trigger an event. Set this event to “Below Player” and to “Player Touch”. In the contents window, create a variable. We'll make this Control Variables: [0009: Encounter Area] = 1. Or 2, or 3, or 4 if those are the areas you're moving into. If it's a transfer, pop it anywhere in the content screen there.
That's all. Simply number your areas and make sure your player triggers that area every time they enter it. If it's not being done with a transfer, you'll probably want to do it with two events per area: the first one you step on is the area you're currently in, and the second one following it triggers the new area.

[img]/media/content/users/40682/locker/Encounter_Tracker_2.png[/img]
Note where on the map each event is highlighted.RANDOM ENCOUNTER EVENTS: PART 2
Now, let's give you're encounter roller something to call. You will want to allocate a series of common events for this. Each common event will be your encounter region. In each common event, you will designate which monsters get encountered for each area. So let's assemble the first area event.
Create a new common event called “Area 1”. Please keep these numbers consistent since we'll be using them to correspond with your Encounter Area variable. This event will be set to “none”. It will be called in your Random Encounters event. Remember where we set that comment? Don't worry about that yet. There's a little bit we have to do there.
Time to roll the dice. The encounter has been called! But which monster? Which monster? We'll assume you have you three monsters encounters in your first area. At the top of the content box, place a random variable set to 1 through 3.
@> Control Variables: [0001:Random] +1= Random [1...3]Yes, you can use the same random variable. It's simply a dice roller, after all. So, for three monster encounters, you need three conditional branches! If Variable 1 equals 1, 2, or 3! In each branch, set each monster encounter with the Battle Processing command. Allow escape, and tick the circle to “interrupt event” if player chose to escape. Tick the circle to “Conditional Branch” under the “If Defeated” setting (even if you want a regular game over, you should do this.). Under the Win condition of the Battle Processing branch, set your Step Counter, Variable 0007 to 0 and your Random variable, Variable 0001 to 0. In the “If defeated” handler, do whatever you want! Call a custom game over! Call a regular game over (there are really plenty of other reasons to want to make a custom encounter system that has nothing to do with skipping the game over!)! Transport your character to a new location!
@>Conditional Branch: Variable[0001:Random] == 1
  @> Battle Processing: Troop 1
   : If Won
    @> Control Variables: [0001:Random] = 0
    @> Control Variables: [0007:Step Counter] = 16
    @> End Event Processing
   : If Defeated
    @> Comment: I will leave up to you what happens here.
    @>
: Branch End
@>Conditional Branch: Variable[0001:Random] == 2
  @> Battle Processing: Troop 2
   : If Won
    @> Control Variables: [0001:Random] = 0
    @> Control Variables: [0007:Step Counter] = 16
    @> End Event Processing
   : If Defeated
    @> Comment: I will leave up to you what happens here.
    @>
: Branch End
@>Conditional Branch: Variable[0001:Random] == 3
  @> Battle Processing: Troop 3
   : If Won
    @> Control Variables: [0001:Random] = 0
    @> Control Variables: [0007:Step Counter] = 16
    @> End Event Processing
   : If Defeated
    @> Comment: I will leave up to you what happens here.
    @>
: Branch End
As a redundancy, copy the two control variables and the End Event Processing command in your win condition, and paste them at the end of the Area 1 Common Event after all conditional branches. This is just so your character doesn't get jammed up if for some reason, something doesn't fire correctly.
Return to your Random Encounters Common Event. Recall the random roll that hit but we put a comment in? Here it is:
@>Conditional Branch: Variable[0001:Random] == 1
  @> Comment: This one hits. We need to call a common event that doesn't exist yet, so use this
  @>                 : comment as a place holder. All others will not hit, so they are easy to deal with. :
  @>
: Branch End
In place of that comment, place another conditional branch. If Variable Encounter Area is equal to 1, set variables 7 and 1 to 0, and call common event: Area 1. You'll have something that looks like this:
@>Conditional Branch: Variable[0001:Random] == 1
  @>Conditional Branch: Variable[0009:Encounter Area] == 1
  @> Control Variables: [0007:Step Counter] = 0
  @> Control Variables: [0001:Random] = 0
  @> Call Event: Area 1
  @>
: Branch End
Want more? Create a second common event called Area 2! Repeat the instructions for Area 1, except replace your creatures with harder enemies. If you want more enemy troops, increase the random number, and increase the number of conditional branches to match. Once you've done that, update your map with the new Encounter Area variable events, and return to Random Encounters and update your code.
@>Conditional Branch: Variable[0001:Random] == 1
  @>Conditional Branch: Variable[0009:Encounter Area] == 1
    @> Control Variables: [0007:Step Counter] = 0
    @> Control Variables: [0001:Random] = 0
    @> Call Event: Area 1
  : Branch End
  @>Conditional Branch: Variable[0009:Encounter Area] == 2
    @> Control Variables: [0007:Step Counter] = 0
    @> Control Variables: [0001:Random] = 0
    @> Call Event: Area 2
   : Branch End
  @>
: Branch End
@>
Now, Your Random Encounters event should look like this.
@>Conditional Branch: Variable[0007:Step Counter] == 15
  @> Control Variables: [0001:Random] +1= Random [1...4]
  @>
: Branch End
@>Conditional Branch: Variable[0007:Step Counter] == 20
  @> Control Variables: [0001:Random] +1= Random [1...4]
  @>
: Branch End
@>Conditional Branch: Variable[0001:Random] == 1
  @>Conditional Branch: Variable[0009:Encounter Area] == 1
    @> Control Variables: [0007:Step Counter] = 0
    @> Control Variables: [0001:Random] = 0
    @> Call Event: Area 1
  : Branch End
  @>Conditional Branch: Variable[0009:Encounter Area] == 2
    @> Control Variables: [0007:Step Counter] = 0
    @> Control Variables: [0001:Random] = 0
    @> Call Event: Area 2
   : Branch End
  @>
: Branch End
@>
@>Conditional Branch: Variable[0001:Random] == 2
  @> Control Variables: [0007:Step Counter] = 16
  @> Control Variables: [0001:Random] = 0
  @>
: Branch End
@>Conditional Branch: Variable[0001:Random] == 3
  @> Control Variables: [0007:Step Counter] = 16
  @> Control Variables: [0001:Random] = 0
  @>
: Branch End
@>Conditional Branch: Variable[0001:Random] == 4
  @> Control Variables: [0007:Step Counter] = 16
  @> Control Variables: [0001:Random] = 0
  @>
: Branch End
FINISHING TOUCHES
There's more to do! This is a very involved process! You need to tell your game when your character is facing enemies, and when they aren't. This is very simple. In areas that don't have enemy encounters, simply turn Switch 0003:Random Encounters OFF. In areas where you DO face random encounters, turn it ON! Again, this can be done in the transfer, or if there is no transfer, make sure your character must trigger an event to get to and from areas with encounters and toggle the switch there.
Now, let's take a look at all of these, in engine, together!


I hope you find this useful!
-
Traps and Trapfinding in RPG Maker 2003 (system agnostic)Trap Setting
THIS TUTORIAL ASSUMES THAT YOU UNDERSTAND BASIC EVENTING AND IF I TELL YOU SOMETHING LIKE, CREATE A MOVE ACTION, YOU WILL KNOW WHAT I'M TALKING ABOUT.
Should work with all RPG Makers. When making traps in any game setting, there are specific questions that need to be asked.
- Where are the traps?
- Are the traps detectable?
- Can they be disabled?
- Can they be avoided?
- What happens when they're triggered?
For this tutorial, we'll assume that questions 2, 3, and 4 are all answered “yes”. Traps are extremely simple to make. Ideally, they should be placed on a path in such a way that they cannot be bypassed without finding another route. For gameplay purposes, consider making it impossible to progress without encountering the trap. There are plenty of variations on making a trap. I'm going to show you the method I am currently using.
It requires two events: the detection event, which is the point on the map in which your protagonist will either see or fail to see your trap, and the second is the trap itself.

Corridor with trap.In this first image, I show how a standard trap setup. At the top is the transfer event for another map. If you want to get to that map, you're going to have to get by my trap, Mr. or Mrs. Protagonist! It's not as easy as it sounds! For this tutorial, I've limited you to the mercy of the Random Number Gods! Your skills mean nothing! Success or failure is entirely predicated on how the dice land! Mwahahahaha!!!
But you will need two variables and four switches, if you dare! You will also need a fifth switch if you want to use the optional enhancement item, but you'd be a fool to try, mortal!Variables:
- Random Number
- Trap Damage
Switches: - Trap Spotted
- Trap Found
- Trap Not Found
- Trap Disabled
- (Optional) Rogue Kit
The Optional Item
For this method of adding a trap finding/disabling bonus, this has to be a found item, there should be only one example of it, and finding it should be set to activate the Rogue Kit switch. There are likely better ways of doing this, but this was just the really easy way I came up with that most directly works with the laid out trap finding and disabling method.Spotting the Trap
Let's start with the bottom event; the Trap Detection event. This is painfully simple, it's a single switch.- Set the first page to Player Touch in the trigger condition.
- The event priority should default to “below characters”, but just check to make sure it's set to that.
- In contents, create a switch, and call it Trap Detection or whatever you like.
- Turn Trap Detection on.
- Create a second page that is triggered by Trap Detection, and forget about it.
This is exclusively seeing if you detect the trap or not. How that is done is going to be in the trap itself.

And the next page is blank.Before Setting the Trap
In Age of Myth, I currently had seven traps placed before I decided to create an item that grants a bonus to trap finding and disabling. The item cannot be purchased and only exists in a single location, so I simply turned on a switch upon finding the item. This meant altering my trap detection parameters. I will include that in the tutorial so that you don't find yourself having to go back and make sure all of your traps are corrected like I did. Again, there's a few ways to do this, but I decided that my trap system is simple enough that I didn't want to tie this item to another conditional branch. I basically didn't feel like rewriting the events.Setting the Trap
Time to work on our trap event.-
Create a new event and set its trigger to Parallel Process.
-
Set your first page to be activated on Trap Detection. This way, the parallel process doesn't run the second you enter the map.
-
In contents, create a variable called “Random Number”. You will be able to use this for every trap, and anything else that needs a random number generator.
-
In this event, tick Set in Operation, and for Random, choose 1 through 4.
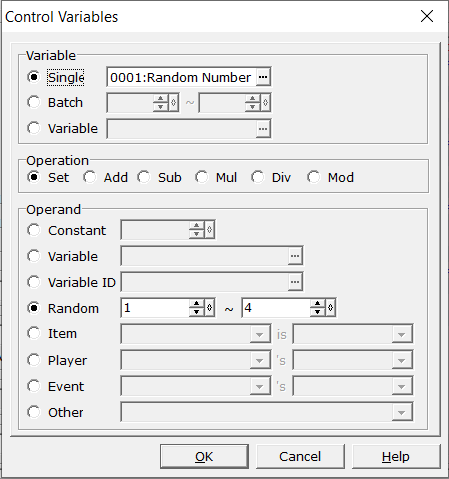
Creating your Random Number Generator. -
After creating the Random Number variable, create a conditional branch.
-
In this conditional branch, tick “variable” and select your Random Number variable. Set it as Equal to 1. Untick the condition handling box at the bottom.

Setting your trap detection method. -
Copy and paste this three times so that you have four conditional branches.
-
Set the other four to 2, 3, and 4 respectively.
-
In the first, create a message that you've found the trap! Then create a switch called “Trap Found” and turn it on.
-
In the next conditional branch create a switch named “Trap Not Found” and turn it on. In the two remaining conditional branches, copy paste your Trap Not Found switch.

Congratulations! Your protagonist has a 25 percent chance of spotting a trap. -
Copy this page, and press the Paste Page function.
-
Add your trap finding item switch to the switch triggers for this page as the second switch. Add a conditional branch that successfully finds the trap.
Congratulations! Your protagonist's chance of spotting a trap has improved.
Now, your protagonist is fully capable of spotting the trap. Now, let's figure out what happens. We will start with what happens if the trap is found. Okay, this is a long procedure. If you feel you've missed a step, refer to the event code that I'll be placing below.
-
Create a new page, give your trap a sprite, set it to its untriggered appearance and make sure the priority is set to same as character.
-
Set the Condition to your “Trap Found” switch and set the Trigger to Action Button.
-
Ask your character if he or she wants to disable or find another way, and give them a choice. Obviously, they'll have to choose to disable the trap before proceeding, so put all handling in that choice, and leave the other choice blank.
-
Remember your Random Number variable? Call it and set it once again to 1 through 4.
-
As before, we'll be creating four conditional branches and setting the first one as our success handler. So let's get into that one.
-
You want something to happen once the disable attempt is made, so in your success handler, simply create a move action that sets the trap to through on and another move action to move the character up and onto the trap. You might also consider awarding them experience.
-
Create a switch called “Trap Disabled” and turn it on.
-
The remaining conditional branches are our failure handlers and they will all have identical commands.
-
Again, move the character up and onto the trap, but this time, create a move action for the trap to change to its triggered sprite, and move the player back off of the trap.
-
Since this is on the same page, paranoia has me always making a new random number variable. Name this one Trap Damage and set it to 0 through 4 (the 0 is because I also give the character a chance to dodge the trap and avoid taking damage. This is entirely up to you.).
-
Create five conditional branches looking for the Random Number variable, equal to 0 through 4.
-
In Conditional Branch 0, simply give a message saying that the character dodged.
-
In Branches 1 through 4, Change HP: Entire Party: -1 through -4.
-
Set the trap to through on and turn on your “Trap Disabled” switch.
-
Copy paste this whole process in the remaining Conditional Branches.

Your Protagonist's health depends on success or failure. -
As previously, you can copy paste this page to create a new handler for special trap finding item.
We'd all like an improved chance at avoiding damage, wouldn't we?
Now that we've figured out what to do if you find the trap, what happens if you don't find the trap? Well, what would you see if you didn't find something? Absolutely nothing so if your random number generator doesn't find the trap, the player should have no indication that the trap is there until they've stepped on it.
-
Create another page and make the Condition your Trap Not Found switch.
-
For this, you can simply copy paste the conditions of one of your failed conditional branches from the previous page.

Of course, just not spotting the trap isn't very good for your Protagonist, either. -
Create one last page, and set its condition to your Trap Disabled switch. Make sure its priority is “Below Characters” and that it is set to action button. Leave this page empty. The trap is set.
Alright. To make sure you've got this straight, I am placing the contents of the events below for reference. Apparently, placing this within a hide tag was not an option. I am terribly sorry about that. But, the two events are divided into quotes so they can be distinguished from each other.
Detection Event:
Page 1: Player Touch, Below Characters.
Conditions: none@> Control Switches: [0001:Trap Spotted] = ONPage 2: Action Button, Below Characters.
Conditions: Trap Spotted is ON.
Contents: EmptyTrap Event:
Page 1: Parallel Process, Below Characters
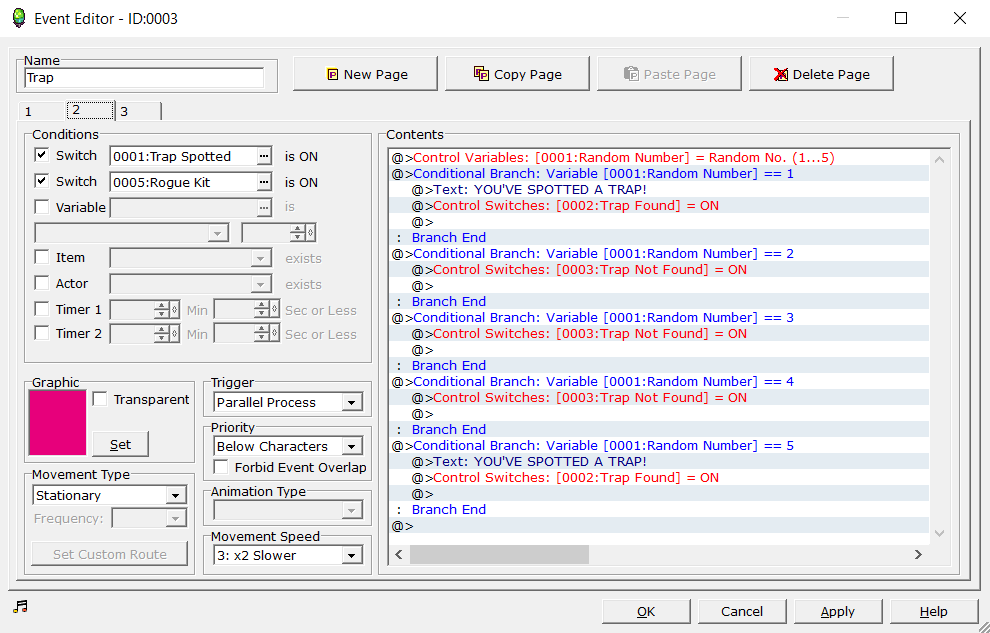
Conditions: Trap Spotted is ON.@> Control Variables: [0001:Random Number] = Random No. (1...4) @> Conditional Branch: Variable [0001:Random Number] == 1 @> Text: YOU'VE SPOTTED A TRAP! @> Control Switches: [0002:Trap Found] = ON @> : Branch End @> Conditional Branch: Variable [0001:Random Number] == 2 @> Control Switches: [0003:Trap Not Found] = ON @> : Branch End @> Conditional Branch: Variable [0001:Random Number] == 3 @> Control Switches: [0003:Trap Not Found] = ON @> : Branch End @> Conditional Branch: Variable [0001:Random Number] == 4 @> Control Switches: [0003:Trap Not Found] = ON @> : Branch EndPage 2 (OPTIONAL): Parallel Process, Below Characters
Conditions: Trap Spotted is ON. Rogue Kit switch is ON.@> Control Variables: [0001:Random Number] = Random No. (1...5) @> Conditional Branch: Variable [0001:Random Number] == 1 @> Text: YOU'VE SPOTTED A TRAP! @> Control Switches: [0002:Trap Found] = ON @> : Branch End @> Conditional Branch: Variable [0001:Random Number] == 2 @> Text: YOU'VE SPOTTED A TRAP! @> Control Switches: [0002:Trap Found] = ON @> : Branch End @> Conditional Branch: Variable [0001:Random Number] == 3 @> Control Switches: [0003:Trap Not Found] = ON @> : Branch End @> Conditional Branch: Variable [0001:Random Number] == 4 @> Control Switches: [0003:Trap Not Found] = ON @> : Branch End @> Conditional Branch: Variable [0001:Random Number] == 5 @> Control Switches: [0003:Trap Not Found] = ON @> : Branch EndPage 3: Action Button, Same as Characters
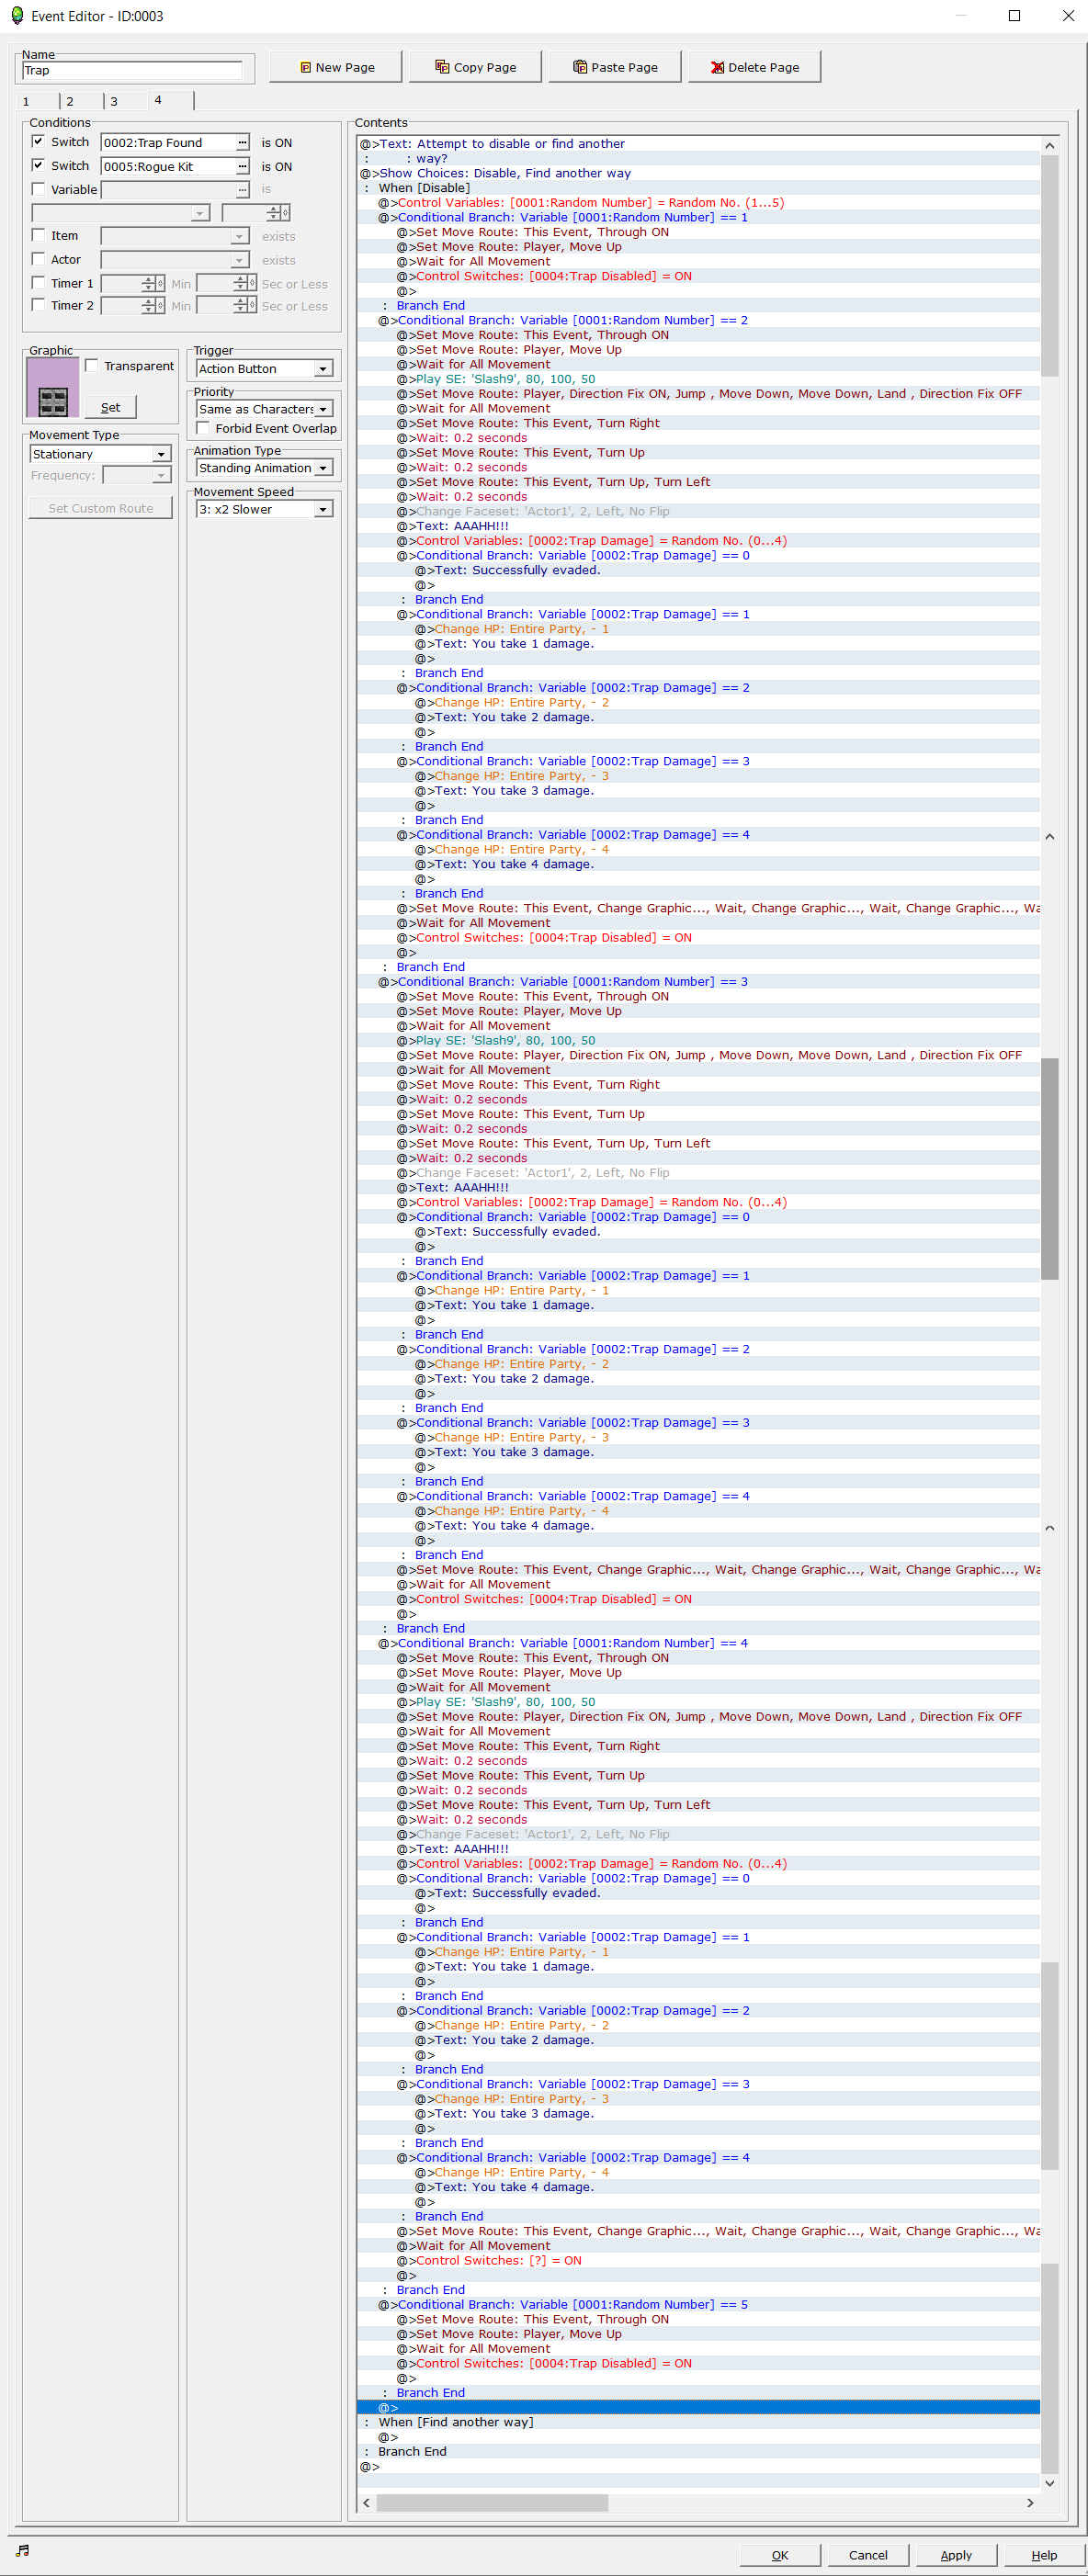
Conditions: Trap Found is ON@> Text: Attempt to disable or find another : : way? @> Show Choices: Disable, Find another way : When [Disable] @> Control Variables: [0001:Random Number] = Random No. (1...4) @> Conditional Branch: Variable [0001:Random Number] == 1 @> Set Move Route: This Event, Through ON @> Set Move Route: Player, Move Up @> Wait for All Movement @> Text: Success! : : Gain 50 XP. @> Control Variables: [0016:Leveling] += 50 @> Control Switches: [0004:Trap Disabled] = ON @> : Branch End @> Conditional Branch: Variable [0001:Random Number] == 2 @> Set Move Route: This Event, Through ON @> Set Move Route: Player, Move Up @> Wait for All Movement @> Play SE: 'Slash9', 80, 100, 50 @> Set Move Route: Player, Direction Fix ON, Jump , Move Down, Move Down, Land , Direction Fix OFF @> Wait for All Movement @> Set Move Route: This Event, Turn Right @> Wait: 0.2 seconds @> Set Move Route: This Event, Turn Up @> Wait: 0.2 seconds @> Set Move Route: This Event, Turn Up, Turn Left @> Wait: 0.2 seconds @> Change Faceset: 'Hero Face 3', 1, Left, No Flip @> Text: AAAHH!!! @> Control Variables: [0002:Trap Damage] = Random No. (0...4) @> Conditional Branch: Variable [0002:Trap Damage] == 0 @> Text: Successfully evaded. @> : Branch End @> Conditional Branch: Variable [0002:Trap Damage] == 1 @> Change HP: Entire Party, - 1 @> Text: You take 1 damage. @> : Branch End @> Conditional Branch: Variable [0002:Trap Damage] == 2 @> Change HP: Entire Party, - 2 @> Text: You take 2 damage. @> : Branch End @> Conditional Branch: Variable [0002:Trap Damage] == 3 @> Change HP: Entire Party, - 3 @> Text: You take 3 damage. @> : Branch End @> Conditional Branch: Variable [0002:Trap Damage] == 4 @> Change HP: Entire Party, - 4 @> Text: You take 4 damage. @> : Branch End @> Set Move Route: This Event, Change Graphic..., Wait, Change Graphic..., Wait, Change Graphic..., Wait, Change Graphic... @> Wait for All Movement @> Control Switches: [0004:Trap Disabled] = ON @> : Branch End @> Conditional Branch: Variable [0001:Random Number] == 3 @> Set Move Route: This Event, Through ON @> Set Move Route: Player, Move Up @> Wait for All Movement @> Play SE: 'Slash9', 80, 100, 50 @> Set Move Route: Player, Direction Fix ON, Jump , Move Down, Move Down, Land , Direction Fix OFF @> Wait for All Movement @> Set Move Route: This Event, Turn Right @> Wait: 0.2 seconds @> Set Move Route: This Event, Turn Up @> Wait: 0.2 seconds @> Set Move Route: This Event, Turn Up, Turn Left @> Wait: 0.2 seconds @> Change Faceset: 'Hero Face 3', 1, Left, No Flip @> Text: AAAHH!!! @> Control Variables: [0002:Trap Damage] = Random No. (0...4) @> Conditional Branch: Variable [0002:Trap Damage] == 0 @> Text: Successfully evaded. @> : Branch End @> Conditional Branch: Variable [0002:Trap Damage] == 1 @> Change HP: Entire Party, - 1 @> Text: You take 1 damage. @> : Branch End @> Conditional Branch: Variable [0002:Trap Damage] == 2 @> Change HP: Entire Party, - 2 @> Text: You take 2 damage. @> : Branch End @> Conditional Branch: Variable [0002:Trap Damage] == 3 @> Change HP: Entire Party, - 3 @> Text: You take 3 damage. @> : Branch End @> Conditional Branch: Variable [0002:Trap Damage] == 4 @> Change HP: Entire Party, - 4 @> Text: You take 4 damage. @> : Branch End @> Set Move Route: This Event, Change Graphic..., Wait, Change Graphic..., Wait, Change Graphic..., Wait, Change Graphic... @> Wait for All Movement @> Control Switches: [0004:Trap Disabled] = ON @> : Branch End @> Conditional Branch: Variable [0001:Random Number] == 4 @> Set Move Route: This Event, Through ON @> Set Move Route: Player, Move Up @> Wait for All Movement @> Play SE: 'Slash9', 80, 100, 50 @> Set Move Route: Player, Direction Fix ON, Jump , Move Down, Move Down, Land , Direction Fix OFF @> Wait for All Movement @> Set Move Route: This Event, Turn Right @> Wait: 0.2 seconds @> Set Move Route: This Event, Turn Up @> Wait: 0.2 seconds @> Set Move Route: This Event, Turn Up, Turn Left @> Wait: 0.2 seconds @> Change Faceset: 'Hero Face 3', 1, Left, No Flip @> Text: AAAHH!!! @> Control Variables: [0002:Trap Damage] = Random No. (0...4) @> Conditional Branch: Variable [0002:Trap Damage] == 0 @> Text: Successfully evaded. @> : Branch End @> Conditional Branch: Variable [0002:Trap Damage] == 1 @> Change HP: Entire Party, - 1 @> Text: You take 1 damage. @> : Branch End @> Conditional Branch: Variable [0002:Trap Damage] == 2 @> Change HP: Entire Party, - 2 @> Text: You take 2 damage. @> : Branch End @> Conditional Branch: Variable [0002:Trap Damage] == 3 @> Change HP: Entire Party, - 3 @> Text: You take 3 damage. @> : Branch End @> Conditional Branch: Variable [0002:Trap Damage] == 4 @> Change HP: Entire Party, - 4 @> Text: You take 4 damage. @> : Branch End @> Set Move Route: This Event, Change Graphic..., Wait, Change Graphic..., Wait, Change Graphic..., Wait, Change Graphic... @> Wait for All Movement @> Control Switches: [0004:Trap Disabled] = ON @> : Branch End @> : When [Find another way] @> : Branch EndPage 4 (Optional): Action Button, Same as Characters
Conditions: Trap Found is ON, Rogue Kit is ON@> Text: Attempt to disable or find another : : way? @> Show Choices: Disable, Find another way : When [Disable] @> Control Variables: [0001:Random Number] = Random No. (1...5) @> Conditional Branch: Variable [0001:Random Number] == 1 @> Set Move Route: This Event, Through ON @> Set Move Route: Player, Move Up @> Wait for All Movement @> Text: Success! : : Gain 50 XP. @> Control Variables: [0016:Leveling] += 50 @> Control Switches: [0004:Trap Disabled] = ON @> : Branch End @> Conditional Branch: Variable [0001:Random Number] == 5 @> Set Move Route: This Event, Through ON @> Set Move Route: Player, Move Up @> Wait for All Movement @> Text: Success! : : Gain 50 XP. @> Control Variables: [0016:Leveling] += 50 @> Control Switches: [0004:Trap Disabled] = ON @> : Branch End @> Conditional Branch: Variable [0001:Random Number] == 2 @> Set Move Route: This Event, Through ON @> Set Move Route: Player, Move Up @> Wait for All Movement @> Play SE: 'Slash9', 80, 100, 50 @> Set Move Route: Player, Direction Fix ON, Jump , Move Down, Move Down, Land , Direction Fix OFF @> Wait for All Movement @> Set Move Route: This Event, Turn Right @> Wait: 0.2 seconds @> Set Move Route: This Event, Turn Up @> Wait: 0.2 seconds @> Set Move Route: This Event, Turn Up, Turn Left @> Wait: 0.2 seconds @> Change Faceset: 'Hero Face 3', 1, Left, No Flip @> Text: AAAHH!!! @> Control Variables: [0002:Trap Damage] = Random No. (0...4) @> Conditional Branch: Variable [0002:Trap Damage] == 0 @> Text: Successfully evaded. @> : Branch End @> Conditional Branch: Variable [0002:Trap Damage] == 1 @> Change HP: Entire Party, - 1 @> Text: You take 1 damage. @> : Branch End @> Conditional Branch: Variable [0002:Trap Damage] == 2 @> Change HP: Entire Party, - 2 @> Text: You take 2 damage. @> : Branch End @> Conditional Branch: Variable [0002:Trap Damage] == 3 @> Change HP: Entire Party, - 3 @> Text: You take 3 damage. @> : Branch End @> Conditional Branch: Variable [0002:Trap Damage] == 4 @> Change HP: Entire Party, - 4 @> Text: You take 4 damage. @> : Branch End @> Set Move Route: This Event, Change Graphic..., Wait, Change Graphic..., Wait, Change Graphic..., Wait, Change Graphic... @> Wait for All Movement @> Control Switches: [0004:Trap Disabled] = ON @> : Branch End @> Conditional Branch: Variable [0001:Random Number] == 3 @> Set Move Route: This Event, Through ON @> Set Move Route: Player, Move Up @> Wait for All Movement @> Play SE: 'Slash9', 80, 100, 50 @> Set Move Route: Player, Direction Fix ON, Jump , Move Down, Move Down, Land , Direction Fix OFF @> Wait for All Movement @> Set Move Route: This Event, Turn Right @> Wait: 0.2 seconds @> Set Move Route: This Event, Turn Up @> Wait: 0.2 seconds @> Set Move Route: This Event, Turn Up, Turn Left @> Wait: 0.2 seconds @> Change Faceset: 'Hero Face 3', 1, Left, No Flip @> Text: AAAHH!!! @> Control Variables: [0002:Trap Damage] = Random No. (0...4) @> Conditional Branch: Variable [0002:Trap Damage] == 0 @> Text: Successfully evaded. @> : Branch End @> Conditional Branch: Variable [0002:Trap Damage] == 1 @> Change HP: Entire Party, - 1 @> Text: You take 1 damage. @> : Branch End @> Conditional Branch: Variable [0002:Trap Damage] == 2 @> Change HP: Entire Party, - 2 @> Text: You take 2 damage. @> : Branch End @> Conditional Branch: Variable [0002:Trap Damage] == 3 @> Change HP: Entire Party, - 3 @> Text: You take 3 damage. @> : Branch End @> Conditional Branch: Variable [0002:Trap Damage] == 4 @> Change HP: Entire Party, - 4 @> Text: You take 4 damage. @> : Branch End @> Set Move Route: This Event, Change Graphic..., Wait, Change Graphic..., Wait, Change Graphic..., Wait, Change Graphic... @> Wait for All Movement @> Control Switches: [0004:Trap Disabled] = ON @> : Branch End @> Conditional Branch: Variable [0001:Random Number] == 4 @> Set Move Route: This Event, Through ON @> Set Move Route: Player, Move Up @> Wait for All Movement @> Play SE: 'Slash9', 80, 100, 50 @> Set Move Route: Player, Direction Fix ON, Jump , Move Down, Move Down, Land , Direction Fix OFF @> Wait for All Movement @> Set Move Route: This Event, Turn Right @> Wait: 0.2 seconds @> Set Move Route: This Event, Turn Up @> Wait: 0.2 seconds @> Set Move Route: This Event, Turn Up, Turn Left @> Wait: 0.2 seconds @> Change Faceset: 'Hero Face 3', 1, Left, No Flip @> Text: AAAHH!!! @> Control Variables: [0002:Trap Damage] = Random No. (0...4) @> Conditional Branch: Variable [0002:Trap Damage] == 0 @> Text: Successfully evaded. @> : Branch End @> Conditional Branch: Variable [0002:Trap Damage] == 1 @> Change HP: Entire Party, - 1 @> Text: You take 1 damage. @> : Branch End @> Conditional Branch: Variable [0002:Trap Damage] == 2 @> Change HP: Entire Party, - 2 @> Text: You take 2 damage. @> : Branch End @> Conditional Branch: Variable [0002:Trap Damage] == 3 @> Change HP: Entire Party, - 3 @> Text: You take 3 damage. @> : Branch End @> Conditional Branch: Variable [0002:Trap Damage] == 4 @> Change HP: Entire Party, - 4 @> Text: You take 4 damage. @> : Branch End @> Set Move Route: This Event, Change Graphic..., Wait, Change Graphic..., Wait, Change Graphic..., Wait, Change Graphic... @> Wait for All Movement @> Control Switches: [0004:Trap Disabled] = ON @> : Branch End @> : When [Find another way] @> : Branch EndPage 5: Player Touch, Below Characters
Conditions: Trap Not Found is ON@> Set Move Route: This Event, Through ON, Turn Down, Change Graphic... @> Wait for All Movement @> Play SE: 'Slash9', 80, 100, 50 @> Set Move Route: Player, Direction Fix ON, Jump , Move Down, Move Down, Land , Direction Fix OFF @> Wait for All Movement @> Set Move Route: This Event, Turn Right @> Wait: 0.2 seconds @> Set Move Route: This Event, Turn Up @> Wait: 0.2 seconds @> Set Move Route: This Event, Turn Up, Turn Left @> Wait: 0.2 seconds @> Change Faceset: 'Hero Face 3', 1, Left, No Flip @> Text: AAAHH!!! @> Control Variables: [0002:Trap Damage] = Random No. (0...4) @> Conditional Branch: Variable [0002:Trap Damage] == 0 @> Text: Successfully evaded. @> : Branch End @> Conditional Branch: Variable [0002:Trap Damage] == 1 @> Change HP: Entire Party, - 1 @> Text: You take 1 damage. @> : Branch End @> Conditional Branch: Variable [0002:Trap Damage] == 2 @> Change HP: Entire Party, - 2 @> Text: You take 2 damage. @> : Branch End @> Conditional Branch: Variable [0002:Trap Damage] == 3 @> Change HP: Entire Party, - 3 @> Text: You take 3 damage. @> : Branch End @> Conditional Branch: Variable [0002:Trap Damage] == 4 @> Change HP: Entire Party, - 4 @> Text: You take 4 damage. @> : Branch End @> Set Move Route: This Event, Change Graphic..., Wait, Change Graphic..., Wait, Change Graphic..., Wait, Change Graphic... @> Wait for All Movement @> Control Switches: [0004:Trap Disabled] = ONPage 6: Action Button, Below Characters.
Conditions: Trap Disabled is ON.
Contents: Empty
