Sawyer's Guide To Speedy Game Updates
-
Heya everyone! If you've published a game before, you probably know that you need to update a game from time to time to improve content or fix errors! This can be a pretty long process if you go about it through normal channels.
In this guide I’mma teach you how to use Shell Commands to turn the process of updating your games to Steam and Itch from a 30 minute ordeal to a single double click! You can spend a little time up front to save you hours in the future!
Steam
Let’s start with Steam. This is gonna assume you have already gotten your game set up on Steamworks and the build is already playable on your account.
First, you’re going to need to get a copy of Steamworks SDK.
Place the download somewhere safe and unzip it. I personally place it in the Documents folder. Its location is important, as we will be referencing it later.
While you’re at it, pick up a copy of Butler for Itch.io. We can use Shells to combine the commands from all of our little friends together into a single smooth process.
First off, let’s go ahead and get SteamworksSDK taken care of.
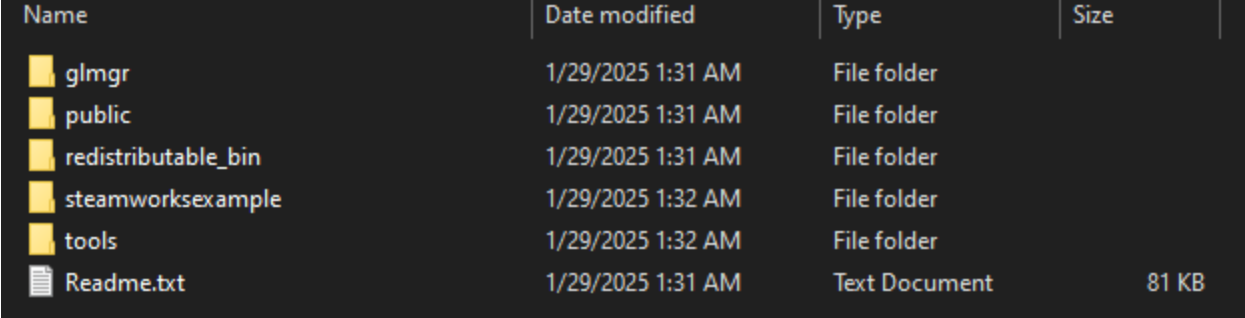
Inside the SDK is a bunch of nonsense. We’re gonna open up the Tools folder.Follow the folders through ContentBuilder>scripts, and you’ll find a few .vdf files in here. These are scripts you can open in a text editor to create some arguments to upload with.
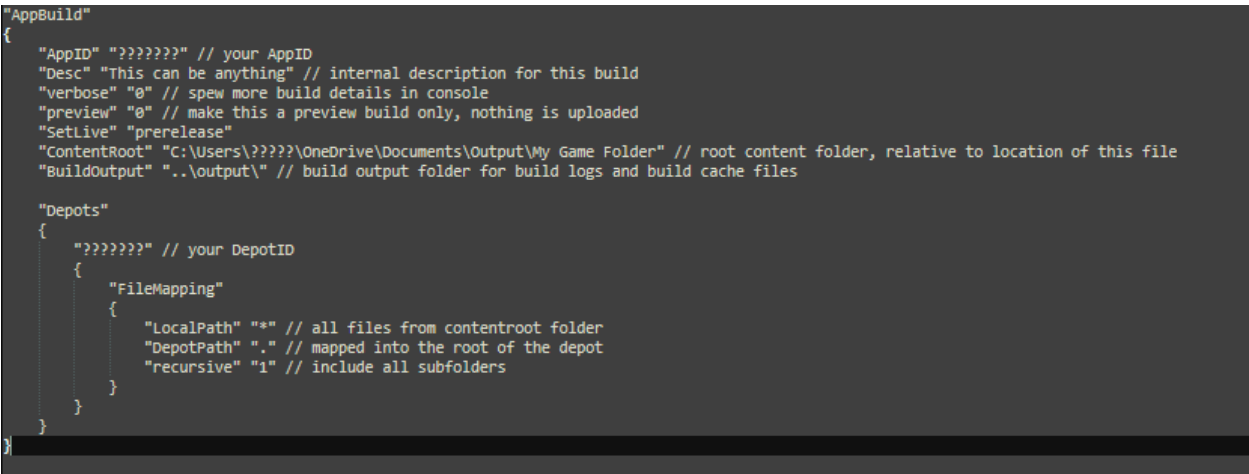
Opening up one of these in a text editor, you’ll see a good number of parameters. I censored out my own sensitive info just to be safe, but the question marks would be replaced by your AppId and DepotId (You can find those both in the Steamworks website).
Below is a template for a script that will upload to a depot and instantly update it:
"AppBuild"
{
	"AppID" "???????" // your AppID
	"Desc" "This can be anything" // internal description for this build
	"verbose" "0" // spew more build details in console
	"preview" "0" // make this a preview build only, nothing is uploaded
	"SetLive" "???????" // Which build path to set live to
	"ContentRoot" ?????????" // root content folder, relative to location of this file
	"BuildOutput" "..\output\" // build output folder for build logs and build cache files

	"Depots"
	{
		"???????" // your DepotID
		{
			"FileMapping"
			{
				"LocalPath" "*" // all files from contentroot folder
				"DepotPath" "." // mapped into the root of the depot
				"recursive" "1" // include all subfolders
			}
		}
	}
}
With the above, replace the question marks with the parameters that the comments ask for, such as the root folder location you want to pull from and your AppIds. Everything else should stay the same. You can also read the documentation to better understand what you’re setting up.
Using this, you can pull from your deployed project folder without needing to zip it: Steam will upload it all straight from the source.Once you’ve prepared the script to your needs, save it with a unique name. Remember this file path (in fact, copy and paste the file path into a notepad so you don’t forget it), we will be needing it later.
Now, let’s try running a script! Below is a sample line that you can plug into your command prompt of choice that will instantly run the script we just made. This time, replace anything in [] with the relevant info, removing the brackets.
[filepath for your steamcmd.exe] +login [your username] “[your password]” +run_app_build ../scripts/[the name of your script] +quitIf done correctly, once you hit enter, the above should instantly upload your game to Steam and set it live for the build you defined. Now, let’s put this somewhere easy to execute so we don’t have to open Command Prompt.
Open your text editor of choice (I like Notepad++) and paste this command into it. You can use a # to write comments as well, e.g.

IMPORTANT: If you copy and paste from the file path in File Explorer on Windows 10, it’ll write the slashes using a backlash. If you want this to run as a shell command, you must replace those with a forward slash (/).
Now, save this as a .sh file somewhere easy for you to access. You can even save it to your desktop!
Now, once it’s saved, try double clicking that .sh file, and it should open up Steam and upload your game a second time!Congratulations! You can now make multiple scripts and call them as desired to update your Steam builds in whatever configuration you need.
Itch.io
Okay, next up is Butler, for Itch.io. Inside is a Butler.exe, go ahead and run it.
This will automatically set up Butler and it should now be able to run commands for you.Here is an example of a command that will instantly upload a build onto Itch.io. Unfortunately, this will be made public instantly, unless the game is private, since Itch doesn’t support private depots.
butler push "C:\Users\????\Documents\Output\Silver Daze" sawyer-friend/silverdazetest:win-fullgameIn the above command, you simply have to write “butler push” followed by the folder path that you’re pushing, the url of the Itch page you are pushing to, and finally that colon is the “channel”, the thing that people can download. For example, this channel is called “win-fullgame”, so the uploaded zip will be titled “fullgame” and labelled as a windows game.
You can read the full documentation on Butler here.The first time you upload to Itch using Butler, it’ll have you login to Itch with your username and password. The first upload takes a much longer time as it’s uploading the entire thing, but it will become much faster after this use because Butler automatically skips unchanged files, only updating changes to your game rather than the entire game each time.
In our shell file, if we want to push to Itch and Steam at the same time, just copy the Butler command you made and paste it above or below Steam (doesn’t matter which, this only changes what order they get uploaded in)

Here’s an example of how that would look.
If you want to do any of these features independently, simply place them in their own separate shell scripts.
Demo Merge
Next up, I’ll show you how to merge your Demo from the full game, updating it instantly while excluding any files that aren’t in there.
WARNING: If you don’t have any infrastructure in place to differentiate the demo from the full game, the demo is just going to treat itself as the full game but missing files, so it’s gonna crash. You’ll need to either manually edit the demo after the push to ensure it’s safe, or strategically consider which files to exclude to retain compatibility.We will use a feature called Robocopy, which is automatically included in your copy of windows. Here is the documentation on Robocopy if you need to edit anything.
The following is an example of a Robocopy command that will merge Silver Daze into the Silver Daze Demo:
robocopy "C:\Users\???\Documents\Games\Silver Daze" "C:\Users\???\Documents\Games\Silver Daze Demo" /s /xlAs you can see, this one is really easy. The first part is the folder you are copying from, and the second is the folder you are copying to. “/s” means that you are copying subfolders (this means every folder in this path gets copied in), and “/xl” means “exclude lonely”, and will not copy any files that don’t exist in the target location, e.g. any files not present in your demo.
Now, this will run fine in Command Prompt, but to make it Shell compatible we have to add one last thing, which is to convert all of our options (such as /s) to have two slashes instead (e.g. //s). That’s just a quirk of shell files.
So, the above script will copy EVERYTHING that exists in the demo, but of course you may want to exclude a path or specific file. For that, we can use “/xf [filename]” to leave out a file, or
“/xd [foldername]” to leave out a folder, ignoring the brackets.Instant Deploy
Lastly, we can use Robocopy to deploy the game faster, without ever needing to open up RPGMaker. As you likely know, in the exported deployed game, the WWW folder contains all of the workable files for your game project. So, all we have to do is copy our project folder into the deployed WWW folder.
I assume your game already has a deployed copy, but if not deploy it through RPGMaker once first to ensure the folder exists.
Then, we’re gonna use Robocopy again:robocopy.exe "C:\Users\???\Documents\Games\Silver Daze" "C:\Users\???\Documents\Output\Silver Daze\www" //s //xf "Game.rpgproject" //xd "save"The above will copy the entire project folder and place it into the Output folder. xf ignores the Game.rpgproject file, and xd will ignore the save folder. The result should be identical to deploying an update.
So, finally, we can put all of this into a single shell file, or multiple, and with that it takes only a double click to instantly merge, deploy, and update our games!
I hope this guide helps speed up the process for you guys! I've been using these methods for years and I think it'll help a lot if everyone can improve their workflows!